Posts

Showing posts with the label crafts

Cherry Pits - DIY Holiday Projects On The Horizon - 2020

Image
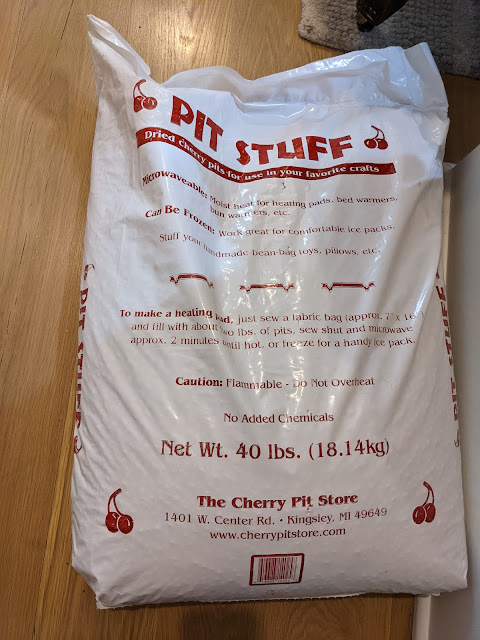
 Nobody:  what are you going to do with all your quarantine time when the weather gets cold? Me:  Have I shown you our forty pound bag of dried cherry pits? Back a few years when it seemed like I had more time, I would often try to DIY some of our holiday gifts.  Seems like we might have more of that, ummm, time this year.  And cherry pits are a key part of our strategy.  More to come when we get things set up and ready.

Unpainted Faux Chocolate Bunnies - 2017

Image
Back in March, I posted a photo of this year's bunny mold .  Fast forward a few weeks and we've birthed four of these guys.  And while I've been trying to get the girls to help out with these over the years, this was the first year that they actually helped!  Like...they mixed up the water putty, filled the cavity and helped me free them from the mold when they were set.  These are decidedly much smaller than any of the other ones we've made over the years. Now they'll go off to get painted and dressed up before Easter.

This Year's Bunny Mold - 2017

Image
This cute little bunny mold arrived in the mail recently.  She's wearing a dress and carrying a basket - as Easter Bunnies are wont to do.   The bunny from 2014 also carried a basket, but he was a bit more formal. This one is a bit smaller than we've done in the past, but I think with the girls helping me, the size is going to work to our advantage. Turns out, we didn't make one of the last year.  Instead, we went to Sea Island instead of having Easter around town.  Ahhh...Sea Island. Back to reality with these molds.  I'll work with the girls to stuff the cavitiy with water putty, then once dry, we'll paint them up, then add a topcoat for shine.  Aiming for four of them to spread the Easter joy around a bit. Here's the mold we used in 2015 . Here's the mold we used in 2014 . Here's the mold we used in 2013 . Here's the mold we used in 2012 . Here's the mold we used in 2011 .

This Year's Water Putty Easter Bunny - 2015 Edition

Image
This is the fifth edition of the 'faux chocolate' water putty Easter bunny produced in our house.  He has a basket on his back and is pretty tall.  Took almost a half can of Water Putty for each one. I can't seem to find the photo of last year's version (but I did, indeed, produce one).   Guessing it had something to my lack of posting in March and April of 2014.  I did, however post the mold from last year that you can see here .  We made the typical batch of four of these guys and with the help of the girls, we gave them away a week ago on Easter Sunday. Here's the original how-to post from back in 2011 . There have been five, but with 2014 missing, here's the rest: Here's the 2013 edition . Here's the 2012 edition . Here's the 2011 edition .

This Year's Bunny Mold - 2015

Image
Easter may have come and gone, but I find time to get around to posting about this year's bunny mold.  The Babe and I produced a few of these just like we've done in year's past. This year's mold was pretty big and used A LOT of water putty.   This marks the 5th year of doing the bunnies and they're all different.  I'll post some photos of the in-progress bunnies and the fully-finished ones that are all glossy with polycrylic. Here's the mold we used in 2014 . Here's the mold we used in 2013 . Here's the mold we used in 2012 . Here's the mold we used in 2011 .

This Year's Easter Bunny Mold - 2014

Image
We're going to get started this weekend with the water putty.  This guy is 'vintage-y' looking, so he'll fit right in with some of the past year's editions. Here's the mold we used in 2013 . Here's the mold we used in 2012 . Here's the mold we used in 2011 .

Makeit & Bakit "Stained Glass" Suncatchers

Image
We were in the Hobby Shop up in Watervliet over the New Year's holiday and The Babe spotted these vintage "New Old Stock" (as the guy called them) craft projects.  They were buy-one-get-one-free, so we picked up both of these. The Babe did the flower one all by herself.  I used a tweezer to clean up a lot of the little beads that were in the 'wrong' section, but this one was 99.5% her. These type of sun-catchers were all over Nat's Grandmother's kitchen.

Treehopper Toys Yo-Yo's and More from Chicago

Image
The Babe gave me this classic wooden yo-yo from Treehopper Toys for Christmas and she couldn't have been more proud of herself for picking it out.   This was the first year where the Babe nosed around the Christmas Renegade Fair with her momma and they came home with this yo-yo, a bear HopperJalopy for the Bird and also a set of transportation MatchStacks which she's taken to playing with at the dinner table most days. Both of the products are wood and really well made.  I'll quibble a little bit with the finger loop on the yo-yo as my pudgy digits have a hard time wiggling through there.  (Those hipsters in their skinny jeans at Renegade all have tiny fingers, I guess?!?)  I haven't picked up a yo-yo since probably junior high but I've had a lot of fun playing around with it the past few weeks. The site says that Treehopper is located 'outside Chicago' but they don't quite say where.  If you're in the market for a clever, US-made kid toy yo

Craft: Pinecone Elves with the Babe

Image
The Babe and I rounded up a few pinecones from the tree in our alley a few houses down and with a little bit of felt, a wood bead and some pipe cleaners we had ourseves an elf.  The Babe even drew the face herself.  She couldn't have been more proud of herself after this we made these.

Dollhouse Progress - 4 Days To Go

Image
With Christmas just a few days away, the Elves at the Parrillo House have been getting busy trying to finish up some projects.  I've been at this Dollhouse for the Babe for a few weeks and things are finally getting close to completion.  Today, I made the shingles, painted them and tacked them on the roof tonight.  I still have to make a few more for the other side and then fit in the floors.  The walls are built, but waiting for my partner in crime to paper them up with wall paper. I don't have the stairs figured out, but by Saturday night, we'll have them built, painted and installed.

DIY Candle Lamps - Installed

Image
I finished the eight candle lamps over the weekend and put them up on the steps to the house.  They didn't stay in this position for very long and have moved up to be by the front door for the time being. I put flicker bulbs in them and at night they provide a nice orange-ish contrast to the little white traditional lights that we have up on other parts of our house.

DIY Outdoor Candle Lamps

Image
Last night, I finished up the first - of eight - diy outdoor candle lamps.  The inspiration and design came from Mrs. Martha Stewart , of course. That's a two-footer there in the photo and I have four of those along with four three-footers. I used 2" PVC pipe along with a 1.5" galvanized flange (the foot) and a 6" 1.5" (diameter) nipple to give it some stability.  The light is a simple IKEA Hemma fixture. I primed the pvc with plastic primer than sprayed the pipe green.  Due to the low temperatures and the fact that our detached garage isn't super warm right now, it took quite a while to cure.  I brought them inside and within a few hours the paint had set up. Once that happened, I whipped out the hot glue gun and drizzled big globs of glue down the sides to replicate some faux candle wax which I painted white.  I topped it with a flickering bulb and it turned out great! I have the other seven to hot glue/paint white then to make a platform for t

Pumpkin Cemetery Set Up - 2012

Image
Yesterday, we spent a few hours in the morning getting some of our Halloween decorations up in the yard and around the house.  Still plenty more hours left until we get our stuff set up. For the "Pumpkin Cemetery", I grabbed a few pieces of tongue-and-groove boards from the remnant rack at Menards and printed out the letters in a funky font.  Then I traced them on with pencil and painted the letters in black.  I threw on a few coats of polyurethane to seal it in and provide a little bit of weather-proofing. I picked up a little bit of edging fencing from Menards, too.  And stuck that in the ground. For the pumpkins, we debated between real and fake.  We ended up going with real.  Not sure if that is going to end up being wise in the long run, but only time will tell.  I painted on the eyes and mouths and then painted (with a pastry brush) a slurry of red pepper flakes and water all over them.  Before that water dried, I also sprinkled on a bunch of chili powder. You

First Coat of Paint on Witch - 2012

Image
Put down the first coat of a few colors on one of the witches.   I'm certainly not very artistic, so this is a tricky experience for me.  I'm trying to use some color but trying to keep it away from being too much like the cartoon Jesus that was re-painted recently .  

Even More Shrinkage - Shrunken Apple Head

Image
The carved apple head continues to shrivel up.  Just two days later , we're getting the eyes to skrunch up a bit.

Shrunken Apple Head - One Week In

Image
Just six days after I peeled and carved a little apple into a head shape , we're starting to see a little bit of 'shrunkeness'.  The rice teeth turned out pretty great, but the eyeballs aren't skrunch-ing up enough for my tastes.

Witch Mold Halloween Project - 2012

Image
Back in the Spring, when I was ordering this year's new bunny mold , I also picked up this witch.  I cut down the white plastic molding on the sides last night to get room for the binder clips to grab hold.  I picked up the water putty last weekend, so now it is just a matter of finding time to make the witch(es). Have to get going on it early so they'll dry out in time to get painted and (maybe?) antiqued.

2 Chocolate Bunnies Down, 10 To Go

Image
After a lot of worrying, swearing, and a big mess, look what popped out of my little mold:  my first chocolate bunny.  I need to take a paring knife and clean up the seams, but I have to say that I'm quite (pleasantly) surprised by how this one turned out. I was very worried about the tempering of the chocolate, but I since Nat bought *nice* chocolate bars to use, there was more room for error?  I didn't use chips nor those Wilton discs. That's the great news.   The bad news?  Each one takes forever.  My goal was 12.  I've gotten just two of them done. The process is such that you temper the chocolate then pour it into the bottom of the mold.  Tap it around and then pour it back out.  Then wait.  And wait.  Until it sets.  All the while keeping the chocolate warm.  Then, you pour in the chocolate again to build up a second layer.  Then pour it out.  And...wait.  Then..repeat a 3rd time.  Soon, you have a bunny that has a cavity in the middle that you can fill wi

Faux Chocolate Bunnies - 2012 Edition

Image
This is the second year I've made Faux Chocolate Bunnies out of Water Putty and reproductions of vintage chocolate molds.  The picture above was shot last night after applying the first coat of chocolate-colored brown paint.  A few more coats plus one or two coats of a clear acrylic spray to give 'em a little bit of shine and they'll be ready to go. These are decidedly more vintage that last year's version and I think because of that I like them a little bit better.  The mold was a lot more complex with little nooks/crannies that I couldn't always get the bubbles out from, so there are a few tiny voids, but for the most part you wouldn't notice them unless I pointed them out. I also made a decision to leave a good bit of the 'seam' in the middle of the bunny on purpose.  I took out my Dremel and ground it down to a very slight ridge, but since these things are supposed to replicate chocolate bunnies (which have the seam), I wasn't that worried

Easter Projects Underway - 2012

Image
Work on the second in a series of collectible Faux Chocolate Easter Bunnies is underway in the Parrillo household.    This year, instead of hugging/holding a big egg, he/she's carrying it on their back .  I made a mold last night and I'm NOT thrilled with the alignment of the two pieces.  As you can see in the photo above, the noses don't quite line up.  That leads to a bunch of seam problems.  I can either choose to align the noses and mis-align a significant portion of the body or align the body and have a 2-faced bunny.  Decisions, decisions. There's also the question of volume.  Exactly how many bunnies is enough to make?