River Rock Added to Pizza Oven Sub-Surface for Drainage - March 2024
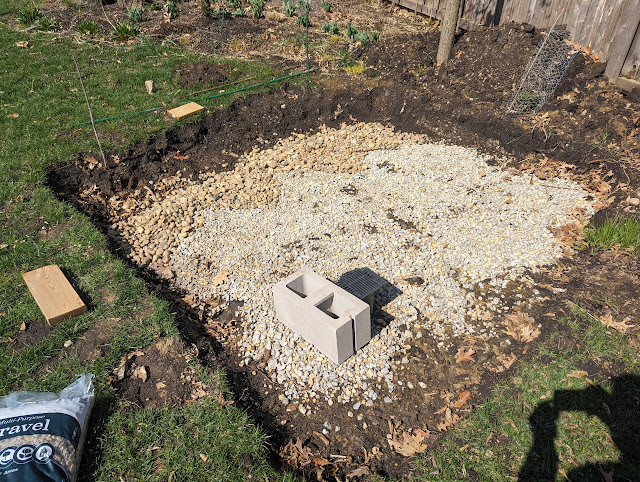
I last added ten (10) bags of gravel to the excavated wood-fired pizza oven construction site to begin to level the area. As a reminder, this is being built on-top of our drywell, so this gravel layer is an extra insurance policy for drainage below the slab in hopes of avoiding heaving. When I added the ten bags, I noted that I thought I'd need another round of gravel to finish the project. Before heading to the store, I eye-balled the site and decided that I needed a bit more material on the western edge of the site. Thanks to a sale, I decided to add six (6) bags of River Rock to that side. Thinking that the larger size of the rocks would fill in the deeper portion of the dig - that part is going to *mostly* be outside the footprint of the foundation. Here's the site after six bags of river rock added to the left side (note the different color): Below is the Menards item # for the River Rock - 180-2006. Normally priced $3.49 per bag, it was on sale for $2.24. I'