Posts

Showing posts with the label new old house

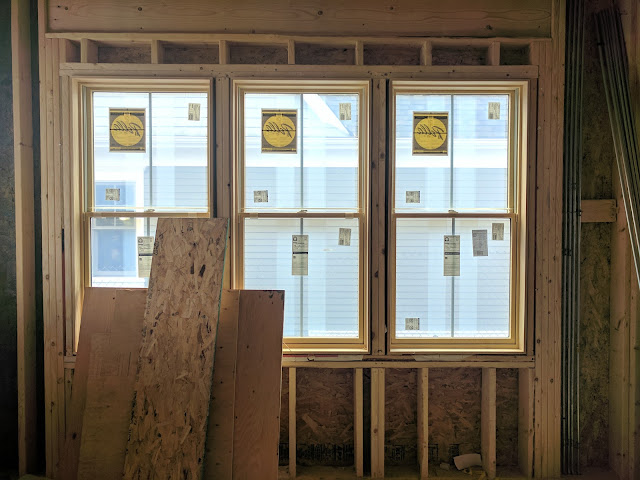
One Year Ago Today: We Just Got Windows Installed

Image
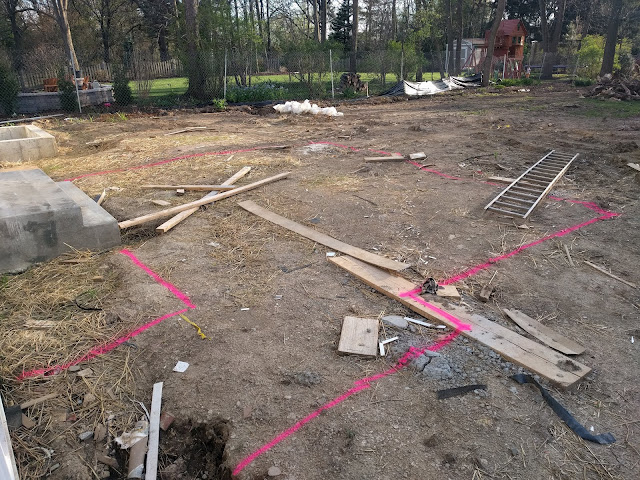
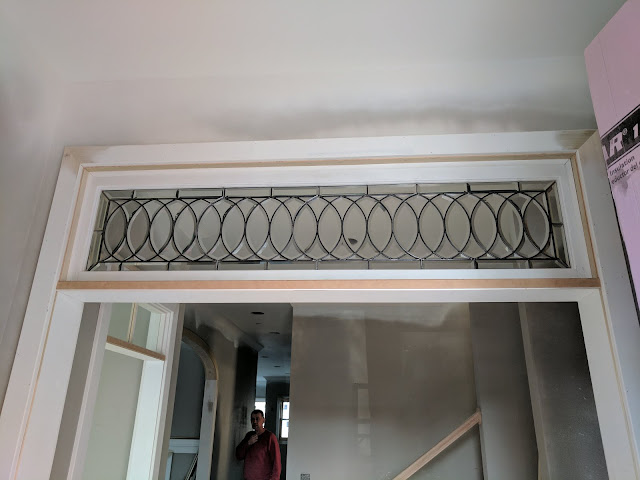
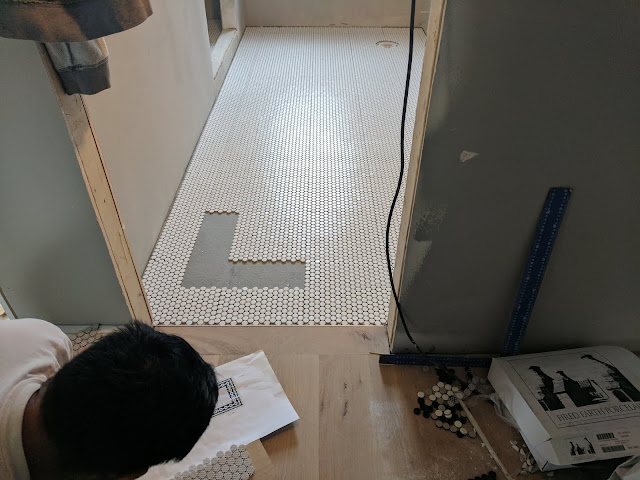
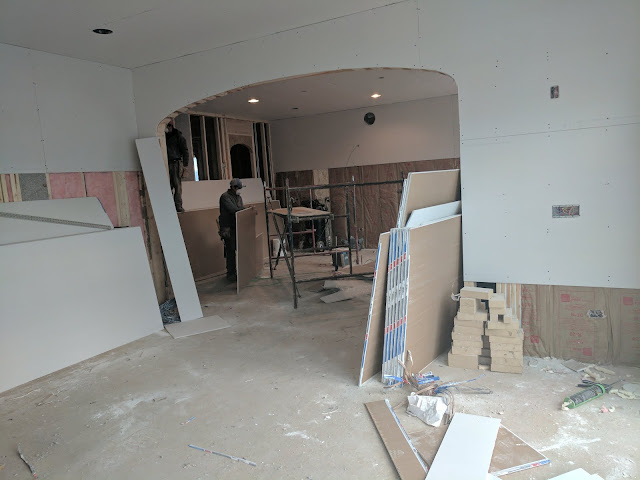
One year ago today, I posted that photo above here on the blog to mark the milestone in building our #NewOldFarmhouse when we had our windows installed into the framed house.  Hard to believe that was a year ago as it feels like yesterday that we were making the regular visits to Downers Grove to check on the status of the construction job.  Welp...Nat was there EVERYDAY because she was a trooper who took our one of our kids all the way to Downers Grove for school everyday from Elmhurst.  Then made the return trip back to pick her up.  We're one year removed from the installation of the windows, but still in the thick of things in terms of getting the house situated.  I've posted quite a bit about the needs in the yard/garden, but there's also so much still to get set-up inside.  Like window treatments, furniture, wall-hangings and what-have-yous.  Nat has done a really great job of introducing elements a little at a time and we're this/close to our installation d

Corkscrew Willow Tree - Far Backyard Location

Image
More tree posts!  Yeah...just what you were hoping for, right?  Another post about the tree situation at our new place in Downers, but this one is a bit special.  It's because the kids and I went out and picked out this tree just for Natalie.  She wanted a Willow, so we went hunting at Menards and came up with this interesting one:  a Corkscrew Willow.  Salix matsudano 'Tortuosa'. As a refresher, there's been a bunch of new trees that we're adding/added to the backyard. We picked up a Dawn Redwood .  And planted it.   I posted about the north side of our backyard and how we're going to fill it in.   I am trying my hand at the art of espalier.   With two Linden trees .   And, after being inspired by the Cherry Blossoms in Tokyo, I picked up a flowering Cherry tree . And now add this Willow to the mix.  We picked it up at Menards and it was priced to sell. Listen...I know the reputation of willows.  Dirty, filthy trees.  That don't last long.

We're Adding A Flowering Cherry Tree To The Arboretum

Image
Earlier this Spring, I spent time in Tokyo where in addition to heading to Tokyo Disneyland and checking out the fish market, we were also there during the peak Cherry Blossom season.  I wrote about the trees here on the blog back in April .  I've been enamored with the trees ever since.  And trees have been on my mind lately as we continue to think about our yard.  I'm trying to get an early start on trees, because unlike sod or even flowers or bushes, trees take much longer to mature to the point to where they've grown into their size.  I've already posted about how we picked up a Dawn Redwood tree and planted it.   I also posted about the space we're going to fill in with either flowering pear trees or perhaps European Hornbeams along our northside.  And, of course, there's the Linden trees that I'm going to try to espalier .   (At what point, can we start calling it an arboretum??) For Mother's Day, I also picked up Nat a Japanese flowering

Our Driveway Going In - New Old Farmhouse

Image
Last check-in on our house was showing the footprint of the patio out back , but things continue to move along both inside and outside.  One of the latest things is the installation of our new driveway.  Above, you see the apron or approach between the driveway and the street being installed by the crew.  We were able to get there while the concrete was setting up and Nat etched out name in the driveway. At our old place, we didn't have much of a driveway.  Our garage was out back off the alley and we had a kind of 'pad' for one car out front.  Thus, shoveling wasn't a big issue.  I'd break out the shovel and spend more time on the sidewalk than on the driveway.  But, just look at this thing!?!   We decided to set the house back an additional 20 feet behind where it had to be (by code) because we wanted to try to save a tree that we would have had to cut down.  But, that created 20 additional feet of driveway that I'm going to have to tend to this winter.  

1 of 2 Troublesome "Privacy" Spots In Our New Backyard

Image
Above is a photo of the northern side of our new lot in our backyard that is almost immediately outside our backdoor.  That fence, it turns out, belongs to our neighbor to the north, but is installed incorrectly (with the 'good side' facing his side and a bit too tall), so things are changing, I believe.  We've heard from our builder that the fence might be coming down and getting readjusted.  But, we hope it isn't going away.  That's because it is shielding their driveway - which is currently occupied by a few project cars and some other larger items. We are investigating a fence for ourselves (btw, this would be our second fence. Here's a post from way back in 2011 when I was staining our newly installed fence at our old place .) , but because of the way the lot is graded, this part of the property is a lot lower than the middle part, where our house is located.  That means that it is really easy to basically see 'over' the current fence.  And if

Patio Planning @ Our New Old Farmhouse

Image
With the weather turning, and the inside of the house moving along at it's scheduled pace ( like with the installation of this leaded window ), it is time for our builder to turn some of their attention to the outside of the house.  In this case, it means a look at what our patio is going to look like out back.   The world is, indeed, a small place, and on this project it meant that I was able to reconnect with a friend from my college days who it turned out was the subcontractor chosen to help us with our landscaping by our builder.  As part of the project, Chris, our landscape team lead went out and spray painted the outline of our proposed patio.  You can see that in pink above. Nat did what she does best:  picked some great materials, and soon enough, the team will be leveling and grading the site, cleaning up all the various debris and then installing the patio in pavers.  We have a good-sized yard, so we were trying to strike a balance between installing a 'large eno

Leaded Transom Installed In Entry Vestibule

Image
All the way back in early January, I posted for the first time about the salvaged windows we were intending to use in our new old farmhouse.   You can see them in their original state here .  There is a pair of square-ish windows for use in one of the rooms and this large, horizontal-oriented transom that was destined to go in our front hall vestibule. In early March, I shared a photo of some of the window sashes that were removed .  We dropped them off at Drebohl Art Glass in Chicago to be fixed and preserved.  As part of that process, we had our builder strip the sashes off all three, sand them down to be smooth and then prime them with a white primer before bringing them back to the guys at Drebohl Art Glass for the final assembly. As the house progress continues, one of the trades that is moving along is the trim carpenter.  We didn't want these windows just laying around the jobsite because of their delicate state, so as part of his work, he moved ahead with installing th

Tile Install - New Old Farmhouse Bathroom

Image
The last update on our #NewOldFarmhouse showed off the drywall being hung and finished back a week or so ago .  Today, I'm sharing a few photos of the tile work being done in an upstairs bathroom that I think is coming together really nicely.  Nat has been the champion behind all of the design selections and she's done a really great job on all of it - including the tile. This bathroom has a retro-vibe to it and she's using 'penny tiles' that from this distance look a bit like hexagon tiles, but are all circles.  We had a hexagon tile bathroom floor in our last house, so I'm inclined to love the look, but in this one, she went in a little different direction by introducing a custom border around the room.  In the photo at the top, you can see the section that the tile guy is working on.  In that spot will be the pattern he's been building below.  If you look closely at the photo above, you can see a printout of the tile pattern right above the tile guy

Drywall Getting Hung - New Old Farmhouse

Image
The last construction update that I shared on our New Old Farmhouse was way back in early March when I showed the audio/visual 'chases' that were put in the walls to carry all the various cable-ing back to the basement.   Well, a lot has happened since then.  But let's start with what came after the chases.  The crew put in insulation.  We had a pretty cool mix of foam, batts and blown-in.  Different product for different applications.  As soon as the insulation went in, the street noise went to almost zero.  It was nuts.  After that?  What you see in this photo.  The drywall was hung. For the first time, the rooms took shape and we could get a sense for the light values in each room.  Exciting stuff.  If you're following along with Nat on the insta (as the kids say these days, right?), then you know where we are today and what's been done since I snapped this photo above.  Exciting times! Also, for those following along at home, I've covered other drywa

A Mechanical Doorbell: Crazy? Or Crazy Cool?

Image
We're at the point in the building of our new old farmhouse that we're starting to think about some finishes.  That means Nat is trying to wrangle all the choices with counters and tile and colors and trim and such.  But it also means things like railing hangers and garage floor epoxy and doorbells. Yeah...doorbells.   And Nat and I have been looking around online to find a doorbell that we both like and while there are some neat ones that seem right , I just haven't found anything that I'm in love with. I know...it is just a doorbell.  But, I loved our last one.  And I want to love this one. That's lead me to this crazy idea:  what about a mechanical doorbell?   See the photo above?  That's the 'outside' part of the mechanical doorbell.  You have to 'turn' the dial to ring the bell.  Below is a photo of the 'bell' part that would sit inside the house.   Remember, we're trying to build a #NewOldFarmhouse.  We&

A/V Chases Installed

Image
Last week, I posted about the masonry work that was taking place for the fireplace outside at our New Old Farmhouse and I also gave a little update about the salvaged leaded glass windows we are having repaired for reuse in our place by the craftsman at Drebohl Art Glass in Chicago .  (Drebohl, btw, is the ' oldest stained glass studio in Chicago ', so they're the real deal.) This week, the attention on the house construction turns inside as the tradesmen undertake their rough installations.  And that includes some low-voltage wiring work.  You'd think that in today's world, there wouldn't be the need for a ton of wires running all around the place with ethernet jacks and ports and what-have-you's installed in the walls in every room.  But you'd - like me - would be wrong. As part of our house build, we're getting a bunch of different wires put in - for use now, but also a bit of 'future proofing' things of sorts.  That means, Cat 5/6

Update on Leaded Glass Windows

Image
Back in early January, I posted about the three windows we bought salvage that included a big transom and a pair of more square-ish windows .  The transom is destined for our entryway/vestibule and the pair will go in the library/living room.   We wanted to do the windows right, so we found the folks at Drehobl Art Glass in Chicago and after talking with them, decided to undertake the restoration process on all three.   That meant taking the glass out of the sashes and work on the leading in between each one.  That also gave us an opportunity to work with our painter to have him restore the sash/frame.  Here's what one of them looked like in the back of Nat's van.  You can see that they're in pretty rough shape.  Peeling paint, weather damage.  They'll get stripped, sanded and then glued to make them just about new. And here's a look at the pair of leaded glass windows out of their sashes.  They will undergo a bit more work to get straightened out

Masonry Work and Fireplace: Done

Image
A few weeks back, I posted an update about our new place showing the installation of the windows in most* spots (The asterisk is because not all the windows are in...as we're still waiting on a few of the more 'fancy' ones...) and how that felt like real progress.  And there's been even more progress lately including the installation (do you call it that?) of the fireplace and chimney.  This one you see above is in what I think is going to be my favorite spot in the house: our screened porch. You'll note the the cables come out of the center of the masonry work above the fireplace, so one of the first jobs is going to be finding a tv that will work out there and getting it hung.   The room isn't huge, but I'm thinking Nat will do a great job finding the right seating mix where we can hang as a family out there and also where we can entertain folks.  And, frankly, something that I can take a Saturday afternoon nap on while watching some sports... The

Windows!

Image
In a major development on the construction site, we now have windows installed!  Windows!  Yeah, I know.  You're questioning the exclamation points.  But, listen....we've been at this a loooooooooong time.  And this is a real mark of progress towards having a home completed, so it is worth celebrating for our family. They're not all in - nor are the doors - so the house isn't quite 'buttoned up', but it is close.  And that marks an exciting time.  If you look closely on the right side of this photo you'll see some metal conduit that the electrician has put in.  That means that some of the mechanical work has been started, so once that's done and the insulation is installed, I think we get the drywall hung.  Then we'll *really* get a sense for how the place is turning out and what the true space is for each room. But for now, we're celebrating windows.

Electric Service Going In - New Old Farmhouse

Image
It was ten-plus days ago that I posted a photo of the framers building out our new place with walls and ceilings and such .  Welp, they've wrapped up their portion of the project and moved on to other jobs leaving behind something that *actually* looks like a house.  Like...a real, live house.  You can still basically 'see' right through it as there's nothing in any of the walls and there's no windows or doors, but the basic shapes of the place we've been thinking about, dreaming about, hoping about for the past two years is there to take in, in it's full glory.  Or...some portion of it's glory. We've been able to head over there on the weekends and peek in on the progress.  Nat gets there more often than I do, because she has the hard job of getting our kids around all day, everyday, so she finds herself in the neighborhood more than I do. When I was there recently, I peered out back and saw this machine in the backyard and noticed the trenc

Framing Of Our #NewOldFarmhouse

Image
Progress, progress, progress at our new place.  Just ten days ago, I posted about the incredible installation of our water main (under a huge tree!) and now we're already moving on to framing of the house.  And by the time you all read this post, there will be even more done! The crew is busy putting up the deck, walls and ceilings and now the place is starting to really FEEL like a house.  It was an abstract idea for a long time, but now that you can walk into each of the rooms and actually BE there?  It's totally real and it is totally crazy.   Almost hard to convince myself that this project involves us and our family.  We're not just watching something happen.  We're watching OUR something happen! And...crazy?  Yeah, crazy like the weight of two years of wandering around as a family is coming off of our shoulders.  Sure, there's a TON more time to go, but suddenly, we have a place.  We have a shared goal.  We have a home.  It is just made out of lumber,

Salvaged Transom Window For Our New Place

Image
Right at the turn of 2017, I posted a photo of a couple of salvaged windows we're going to use in our new old house and mentioned that we also bought a transom window that came from the same place. Here, above, is a look at the transom window right next to one of the square windows that are destined for our library room.  The transom is 74" wide by 18" tall (that's the glass part) and the frame adds a few inches each way.  We really love it and it was in our budget to buy this one.  There was another one that just was priced a bit too high, but was pretty awesome. We're going to use this transom in the 'interior' side of the vestibule that we're building right by our front door and I'm hoping we can work to incorporate the design in other places - maybe another transom?  We can't get too nuts, though...right?

Even More Vestibule Tile Inspiration Courtesy of PizzaRizzo

Image
All the way back in November, I shared a photo that showed off square tiles, set in a pattern that was from the queue of a ride that I thought might serve as good inspiration for the tile in our vestibule .  Just a week or so ago, I came across another tile pattern that stopped me in my tracks.  That's it above.   This is the ordering section of the new PizzaRizzo restaurant and as you can see above, is a mix of a main pattern and a few borders.  This uses both hexagons and squares.  Check out the close-up below to see how the hex's and the squares work together.   I'm out of the tile-selecting business (that's Nat's territory), but knowing she's a reader, here's hoping that this will influence her a bit in one of these directions.  She's already ruled out my first choice:  which was to put our last name in tile.  Then I wanted the house number.   Kinda like this .  Or even this with it smaller in one corner of the vestibule .   But I th

Progress: Water Main Installation

Image
There's been some progress on our new old house over at Hilltop including the installation of the sewer line and the water main.  The photo above shows the trench with the water main laying in the bottom of it and most of the photo is unremarkable, but at the top, there's something that happens that I was surprised by:  they bore *under* this massive tree on the property and ran the water line right UNDER the tree. Here's a close-up: We really wanted to save this tree and this seemed like the best way to both preserve the tree and to solve the location of the water main.  Pretty neat to see them go right under the root system. My Dad has said that building a custom home is a full-on problem-solving project as there are dozens of little decisions that need to be made everyday like this one.

New Year, New Windows

Image
About a week ago, we went to a salvage and antique shop with Nat's parents and her sister on the northside to pick out some windows for our new place.  We ended up buying this matching pair of beveled glass windows that will go on the southside exterior wall in the library up front of the house.  We also bought a really sweet transom that I'll post a photo of at some point. With the new year here, our attention turns to the construction of our new house.  And despite it being a long, long, long process, I think both Nat and I are excited to see it come to life... like...really come to life in terms of being built!  These windows are the first thing we've *bought* for the new place, so this brought an extra level of reality to the situation. We put in some vintage windows in our first place on Indiana Street and I always liked how they transformed the house a bit with an 'new old house' feel.  It was one of the best decisions we made.  I'm hoping we'll