Posts

Disneyland Rose - June 2018 Update

Image
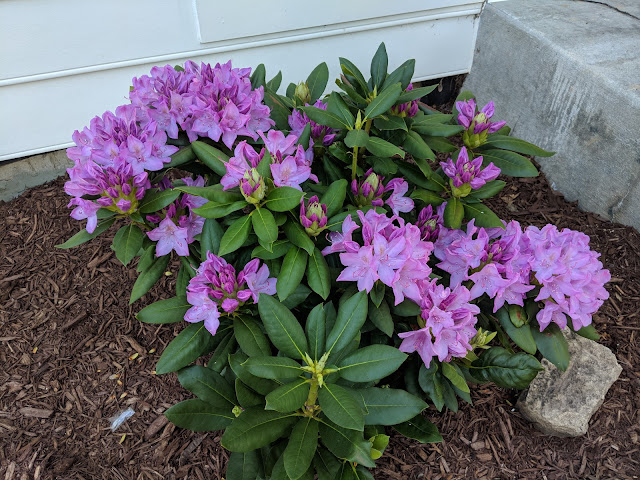
Late last Summer/early last Fall, Nat's Mom gifted us three plants: an Everlasting Revolution Hydrangea , a Tuff Stuff Red Hydrangea  and a Disneyland Rose .  I planted the two Hydrangeas along the south fence line where the plan called for them, but I stuck the rose in the rear foundation beds outside of our kitchen windows .  It is located right in between where I planted the teardown Hostas  last Fall and the Karl Foerster Grasses that I planted this Spring . What you see in the photo above is the Disneyland Rose - that has not only survived the winter, but is about to burst with it's first flowers.  What good news to see this thing flourishing in our first Summer here.  Those pointy buds are really quite cool, aren't they? Those of you who aren't familiar with the Disneyland Rose, check out this post I wrote when we acquired the plant .  Nat has expressed an interest in more roses, but our plan is really light on them, so we'll have to figure out how to

Installing the Gartenkraft 100 Foot Retractable Garden Hose Reel

Image
Inside of our garage, we had a hose bib installed during construction that I intended to use to water inside the garage, on the driveway and out front of the house.  But, when we actually started to use the hose in this area, it quickly became apparent that we had to be thoughtful in terms of where/how we stored the hose.  At first, I considered something like the (highly regarded) Eley hose reel with a traditional hose.  I came across it from Laura on Garden Answer in this video .  But, in thinking about how much the kids are involved in the hose (watering the flowers, playing with the water, etc), it seemed like if I wanted the hose to end up wound up each and everytime, I was going to have to find a self-retracting hose reel.  GeekbeatTV ran a review of a retractable hose reel from Flowmaster that seemed right for us.    Our Home Depot sells the same Flowmaster reel but under the Gartenkraft name .  And after it came home with us, it sat in the garage for a month.  Then I figu

Tear Down Ferns - Spring 2018 Update

Image
Back in May, I posted a photo update on what I have been calling our 'teardown hostas' that came out of a yard down the block .  They've subsequently grown quite a bit and have leaf'd out to be nice sized hostas that are really in their first year of growth in our yard.  I mean... I put them in the ground in October , so there was really very little opportunity for them to grow/put down roots before they died off for the Winter. In that same post back in October of 2017, I mentioned that I grabbed a fern or two as well from the tear down lot.  I planted them right amongst the hostas and guess what?  They, too, came back.  I took the photo above at the beginning of the month - and that's one of my favorite stages for these Ostrich Ferns - when they begin to unfurl.  But, because I'm just getting around to posting about these ferns, I went back and took another photo to show the progress/growth.  Look at how tall and proud it is standing now.  (and speaking

Two Fingerling Potato Varieties Planted - 2018

Image
This year, I planted two different varieties of fingerling potatoes in containers - the Magic Molly I (above) and Pinto Gold I (below).  These are very similar to the two that I planted back in 2016 .  Last year, with the move and all, I didn't plant any spuds.  I chose to put these into a series of containers because we don't have a garden set up yet.    I took the seed potatoes, cut them up into segments with at least one eye each, then after waiting for the cuts to heal/dry, I planted them in some larger containers that our shrubs/trees had come in.  Fast forward to today and look at the growth coming out of the top of the soil.  I planted these low and kept the soil level down because I wanted to 'hill up' new soil on top of this growth .  These are the purple Magic Molly's based on their purplish foliage.  On top of this new growth, I added a few inches of top soil.  Then, when they grow more, I'll add a little more until I reach the top of th

Update on Sarah Bernhardt Peonies - Shoots Emerging June 2018

Image
Back in May, I posted about the first peony plant that we put in our backyard - a variety called Sarah Bernhardt .  Despite the fact that peonies are Nat's absolute favorite flower, we had gone almost a year without planting one.  (We did, however, have a foster peony at Nat's Mom's house .) I put this particular peony near the north fence line and after burying the tuber, I covered the area with mulch and marked it with a stick and then a stone ring.  We were putting together Fairy Gardens with the kids recently and I noticed that the peony shoots and broken through the mulch and we had some actual growth.  These are way, way behind what most normal, established peony plants look like by June.  This is normally the time we're cutting the blooms and bringing them indoors.  Since this was planted as a tuber this year, I was just hoping that we'd get these to emerge this year and that they'll have enough time to establish their root system before the dry/

Rhododendrons Added To Backyard - 2018

Image
Back in April, I shared a small look at the landscape plan that was specified for either side of our rear stoop .  These are the stairs that come out of our family room and lead to our patio.  That plan called for a pair of rhododendrons that flank each side of the stoop.  Earlier this Spring, I picked up the plants and got them in the ground before the mulch arrived.  After a bit of acclimating, they seem to have stabilized and have begun to throw off a series of beautiful, almost out-of-this-world blooms.  The photo above is one of them.  And you can see both of them in the image below. (pay no attention to the hose or shoes or sidewalk chalk in the photo!  We live in a perfect backyard, folks!) One other thing to note in that photo:  the pot on the stoop contains the dahlias that I planted inside earlier this Spring .  Look how big and happy they are!?!?

Replacement Chanticleer Flowering Pear - By Garage - June 2018

Image
Right at the end of May, I posted about the 3" caliper Chanticleer Flowering Pear tree that we had installed right outside of our garage didn't make it through the Winter and was slated to be replaced.  Welp...as you can see in the photo above, the new tree arrived and was planted recently.  The initial tree was planted in June of 2018 before we moved in and I did a check-in post on the tree in February of this year when I speculated that the tree didn't make it based on the very few buds being set on the tree in the fall.   Here's a side-by-side comparison of the new tree and the one that they ripped out. I've made no secret about my love/hate relationship with these flowering pears.  They do a really great job of growing fast, providing screening and even a little show in the Spring.  But, I know that they're a cheap/low-cost solution that isn't all that long-lived.  That hasn't stopped me from planting three of these including t