Posts

Showing posts with the label 2020 to-do list

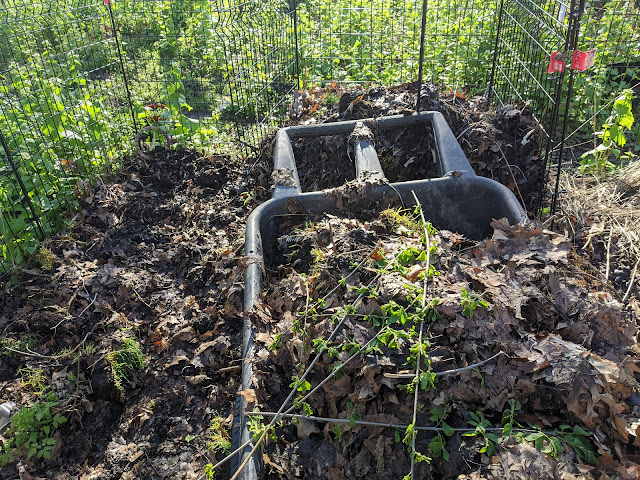
First Milorganite Application - Memorial Day 2020

Image
This post is now two weeks in the coming.  It is being published in the first week of June, but the photo above is from Memorial Day weekend when I put down two bags of Milorganite on the front yard.  I applied to the main yard, the south side yard, the parkway and the strip of grass on north side of the driveway.  My 2020 scheduled called for Milorganite application to the yard on Memorial Day with five bags (2 in front, 3 in rear).  In the photo, you see only 2 bags - and that's because I only applied the fertilizer to the front yard.  Of note, though.... #9 on my 2020 to-do list was to work the turf - and apply the work that I have done on the main yard on the parkway and the north strip.  I've been cutting those other sections high - like my main yard - and now the fert application is continuing that trend of hitting #9 on my list.  Why not the backyard?  Well...I don't have the backyard automower wire set up, so I held off on the back application because I d

4 Summer Beauty Ornamental Allium - Planted May 2020

Image
Back in February, I outlined my #1 priority area for our backyard landscape to be addressed this year - the area to the south in between the espaliered Lindens and the large Oak tree.  That part of the plan called for a series of Oakleaf Hydrangeas, Fanal Astilbes, some ferns, a couple of columnar trees and a number of Summer Beauty Ornamental Alliums.  A couple of weeks ago, we went out to The Growing Place headquarters location in Aurora where they had setup a 'drive thru' situation where you could shop from your car.  This was the same trip that we bought the Harry Lauder's Walking stick contorted tree .   As we drove through the perennial section, we saw these Summer Beauty Allium.  Our plan calls for 12 of them.  But, we bought four to start.  You can see them in their nursery pots below.        Here's the tag - below - that calls out the name Allium tanguticum 'Summer Beauty'.   And here, below, is the back of the tag.  The plan

DIY Passive Compost Aeration - Perforated PVC Pipe Inserted Horizontally - May 2020

Image
Number 6 (#6) on my 2020 To-Do list in the garden this year was to add some passive aeration mechanism in our compost bin setup in the backyard.   I have a three-bin setup (one active bin, one carbon storage bin, one nitrogen storage bin) and a 50 gallon tumbler.  Last Fall, the active bin (on the left) was about half-full and I was storing the excess leaves in the carbon storage bin (middle) . Earlier this year, I posted some discussion about various passive compost aeration techniques - including one design with vertically installed pvc pipes and another with horizontally inserted perforated pipes.    After poking around on the Web, I decided to go with 10' sections of 2" perforated PVC pipe inserted horizontally in the pile.  My bins are 3' x 3', so I cut down 6 40" sections.   Then, I grabbed my garden fork and started to dig out the active bin of compost to get the volume low enough to install the pipes at a level that would make them work well

Transplanted Ostrich Fern - Priority Area #2 - May 2020

Image
This is the third in a series of posts all addressing some transplants that are now in what I have been calling ' Priority Area 2 ' between the Hornbeams and the Oak tree swing.  First was this post showing some hostas being added under the Hornbeam hedge . Yesterday was a photo showing four transplanted hostas under the Oak tree and Flowering Pear . Today I'm showing a recently transplanted Ostrich Fern that you can see in the red circle below.  This is in the area between the Oak tree - swing tree - and the River Birch tree .  It came from the area in the yellow circle where there are a series of "Survivor Ferns" that I first documented in April of 2017 while our house was still being constructed .  In the blue circle below, you can also see another hosta that was planted around the large Oak tree. The plan calls for eleven (11) Ostrich Ferns in this area - so I have more transplanting to do.  You can see some grass poking through the mulch in this

More Transplanted Hostas - Oak Tree and Flowering Pear Beds - May 2020

Image
Yesterday, I posted a photo of a few of the teardown hostas that I divided and transplanted underneath the Hornbeam hedge and talked about how it was getting me closer to fulfilling my goal on " Priority Area #2 ".  I mentioned that I planted a few more as part of this set around the Oak and flowering Pear tree in that area.  In the photo above, you can see an existing hosta in the blue circle that I *think* is one of these Bessingham Blue hostas that I planted a few years ago as a bareroot plant .  On the backside of this Oak tree is this miniature variegated hosta that I transplanted last year .  It has started to pop through the mulch.  The hosta that you see in the middle of the photo at the top is one of the hostas that I dug up from in front of the house that was on our property before we tore it down.  I stuck it back by the Dawn Redwood for a few years.  Now, it is here.  And, below, you'll see three more clumps of that same hosta around the larger Chant

A Few Transplanted Hostas - Under Hornbeams - May 2020

Image
The hostas that are emerging from the mulch in the blue circles are ones that I've planted over the past few seasons.  They were taken from other parts of the yard, divided and planted in this bed.  I have nine blue circles, but I think that there are 11 current hostas with a couple of them being just 'tips'. The two hostas in red circles are non-variegated hostas that I dug up from around the kitchen window, divided and transplanted here.  These are some of the 'teardown hostas' that I've posted about over the years including when they flowered last year .   If I get around to it, I'm going to dig up another bunch to split and transplant further back in the bed - along the fence - like the two current transplants.  I think a blend of different color hostas would look nice filling in this area below the trees. I also transplanted some of these hostas around the tree swing Oak tree - and I'll post about that tomorrow but the most critical part of t

Topdressing With Biosolids On Parkway - April 2020

Image
Based on the results of the test patch in our backyard where I applied 5 gallons of biosolids to our turf, I've decided to move ahead with the application in front.  I'm starting with our parkway.  #9 on my 2020 to do list was to continue to work the turf in front and, in particular, improve the condition of the parkway grass to match the main lawn.  Topdressing with these biosolids is step 1 in that process.  Prior to the application, I used my new thatch rake and removed as much thatch as I could get up.  Last Fall, I also did some limited core aeration on this section, so I'm hoping that I've set it up for success this growing season.  Down near the curb the area has been compacted a bit, so I might be looking at amending that soil a couple of times as the grass grows and can retain the organic material.  Of note, I think this time of year (early Spring) is a good time to deal with biosolids on smell alone.  There isn't a ton of time spent out in the yard

Lawn Lime - Application #1 - Spring 2020

Image
Our Home Depot is doing curbside pickup with online orders, so I put through an order for some lawn care products including pelletized lawn lime and (wait for it....) ten bags of Milorganite.  Yeah...it seems like they've figured out their supply chain issues this year?  Our local Home Depot is showing over 600 bags in inventory right now.  Based on my 2020 plan , I need 18 bags for the season, so perhaps I should buy the balance and store them (hoard them) for a few months.  Also, based on the 2020 lawn plan , I outlined a 4 bag application of lawn lime to the back in Mid-April.  You can't get any *more* Mid-April than April 15th, right?  That's a bag of the stuff from Home Depot (curbside FTW.) in the Chapin spreader that I was sent last Fall.  Mark it down.  Lawn lime applied.    #5 on the 2020 to-do list was to continue to wage battle against the Wild Onions .  This lawn lime is *supposed* to help do just that.    I'm going to go at the lawn with a small spad

Potential 2020 Garden To-Do List Addendum: Upgrade Garden Gloves

Image
Over the weekend, I started to organize some of my garden tools in preparation for the Spring garden season and began to turn to my hand tools.  Part of stimulating my organization this weekend was the whole 'social distancing' thing that we're doing, but it was also this video from Erin - the Impatient Gardener - where she talked about how she sharpens and treats her garden tools . I'll come back to that video in another post (mostly because....ummm...the whole Niwaki pruners are pretty sweet and warrant a post where I lust after them, right?) I have collected my tools and have begun to think about how to store them in an easy-to-use way for the season.  I also began to look at my gloves and inventory'd them.  Out of that exercise, I think I'm going to call it now:  I need to add something to my 2020 to-do list:  Upgrade my garden gloves.  Here's my full 2020 list .  For the past few years, I've been MOSTLY using disposable gloves in the gar

Winter Lawn Domination Line And Potential Bed Extension - February 2020

Image
I posted (in jest) last September a look at what Allyn Hane calls the 'domination line' in our front yard showing the fruit of the efforts of tending to the turf look like after most of a season.  Back in September, you can tell that the grass that I had fed over the season appeared darker.  Today, I'm posting a photo that I took recently to add to the [ garden diary ] of what our front yard grass/turf looks like after a rough Winter.  I'm including the 'domination line' as a way to see the difference in my grass over time.  The photo above is shot from the sidewalk toward the house with my yard on the right side.  The brown-est part in the middle of the photo (closer to the bed) is also the 'highest spot' in that area.  So, I'm not certain that it has to do simply with feeding or if the contours or grade of the yard is involved, too.  I have a gutter that comes out in the area of the bed near the house that runs each time it rains and the I

2020 Yard & Garden To-Do List

Image
The time has come to call my shot on the yard and garden plan and overall priorities for the year.  I've done enough thinking and planning and dreaming and posting.  Walt Disney has said that "Everyone needs deadlines" .  This is my version of creating a deadline.  By creating a list of projects/items that I want to tackle this year.   In what has become the second annual version, I did this, for the first time, last year when I posted my inaugural list in February of 2019  - one year ago tomorrow. This is intended to provide focus for me as we enter the Spring frenzy. That initial list from last year had ten items on it. Then, in April (when Spring had actually sprung), I added seven items to the list in an addendum . When the season wound down, I graded myself at the end of October 2019 .  12 of 17.  C-. But, in that same scorecard post, I also began to turn the wheels on what my 2020 list would look like.  I mentioned (at the time) 19 things I thought shou

Belgian Fence Apple Trees: Need Pollinators

Image
I've been talking about a Belgian Fence Espalier since we saw a nice setup at Disneyland in a couple of spots.  In my mind, I'm going to likely want to use fruit trees like Apple trees because the ones at Disneyland are made from Pyracantha - which I think is not hardy down to our zone 5b. There are a couple of spots that I'm thinking of/considering for the placement of the Belgian Fence.  The first is kind of as the 'backdrop' for that priority area #3 along the fence.  This is southern-facing.  You can see the approximate location in the red arrows below.  The second spot is on the south side of our house where we've planted the pair of Disneyland Roses.   This is a somewhat narrow spot that having a set of trees clinging to the house would work well.  We also have a big space of blank wall.  As for impact, I'm thinking that the first spot - next to the Frans Fontaines is of higher 'impact' in terms of being visible from our house and pa

Backyard To Do: Build a Bird Nesting Box or Platform

Image
Yesterday, I posted a photo and a short video of (a first-time) male Cardinal visiting our window-hung bird feeder box that had been up for more than four months.  In that post, I mentioned that I was a skeptic of window-hung feeders and nesting boxes, but now my own eyes have shown me that - in the right conditions - a bird will perch on something right outside your windows.  It also had me wondering if one of those window-hung nesting boxes (where you can *see* the nest and eggs from the inside of the house) would actually work.  I'm still not sure that they're viable (based on the Amazon reviews), but going down that path also had me nose around for plans for nesting boxes and platforms. After all, we're a Certified Wildlife Habitat and that comes with a requirement of providing shelter and places to raise young.  To that end, a couple of Summers ago, we built a bird nesting shelf and hung it in the back of the yard .  It hasn't gotten much attention/action, but i

Backyard Priority Project #3: Behind Yews & Along Fence (Walkway + Screening)

Image
You can't swing a gardening blogpost around the Web these days without people warning gardeners like me (beginners!) to be VERY careful of plantlust and Spring Black Friday mania.  That means...don't fall in love with plants and then 'find a home for them'. That's what I've done far too often. Instead, all the gardening bloggers/experts (dare I say....ummmm..."influencers") will tell you that having a plan is the KEY to a garden design. In an effort to reinforce this notion with myself, I'm publicly committing to trying to stick to my priorities this year.  We have a large yard that is NOT anywhere near done.  We need so much plant material.  But, we also have a professional plan.  And, instead of winging it, I'm going to try to stick to it as best I can.  And, because I did some "winging it" over the past two Summers, that means adapting the plan to incorporate some of the existing materials. This is the third in the series of

Backyard Priority Project #2: Hornbeam/Oak Gap Filling

Image
A couple of days ago, I discussed that I'm very susceptible to 'plant lust' and 'tree lust' once the Winter thaw breaks and Home Depot and Menards start to put out their nursery stock.  The traps there are well-established.  First, buying stuff and then trying to 'figure out where to put it' is not a good approach.  Not to mention that the Big Box stores tend to feature A LOT of Spring/early Summer flowering items (so we are naturally drawn to them!) and if you plant what they have in stock and on sale, you often-times end up with a NON-four-season garden.  You get a lot of show in say...Spring.  But, you have a boring Summer and Fall (and even Winter) garden.  Because we had a professional do our plan, I just need to stick to it.  And not stray too far. Unlike years past, I'm going into this season of plant buying with a FIRM plan.  That means focusing on three areas - maybe two and a half areas - for enhancing the view from our patio.  The fir

Backyard Priority Project #1: South Fence Line - Oak Leaf Hydrangeas + Astilbes + Allium

Image
As part of my 2020 planting/buying plan, I've begun to focus on a couple of areas for prioritization.  We have SOOOO much to do in regards to buying new plants per our plan that I thought it would make sense to break things up into chunks.  The first one up on my priority list is this section of the landscape plan that is visible from our patio.  It calls for seven new Alice Oak Leaf Hydrangea bordered on one side by a series of Summer Beauty Allium and underplanted with Fanal Astilbe out front.  You'll see in the image above that I've called out 3 'columnar trees' in teal.  That's based on this tree-planning post .  We have three existing hydrangeas in this area - where the Oak Leaf ones are supposed to go - including this Tuff Stuff and this Everlasting Revolution and this teardown Limelight .  The first two were planted very small and have NOT bloomed, but the Limelight one that I transplanted bloomed last year , so I want to think about what to d

Preparing For My Spring Battle: Wild Onions

Image
Is it too early to be thinking about Spring lawn care and turf treatments?  I don't think so.  I need to put together my full annual timetable for the lawn.  But, before I do that, I wanted to post that establishes my main Spring lawn enemy. Mid-April is one of the first milestones - at least based on last year's temperature:  that's when I put down pre-emergent on the lawn - mostly focused on crabgrass and other broadleaf/grass leaf weeds .  Last year, that was followed by a large-scale attack on something that we have present ALL OVER our backyard:  wild onions .  In late April, I documented how I was going around and attempting to dig out the full clumps of bulbs .  My turf was pockmarked with holes from the extraction all Summer.  Come September, I used the soil temperatures to my favor and threw down some seed and soil in these holes and it germinated pretty fast .  I seem to have managed the crabgrass piece of turf care and I'll likely follow the same setup

Front Yard Boxwoods - Winter Check-in (February 2020)

Image
I was out in the yard recently wiring up that one errant trunk on the Saucer Magnolia and snapped a couple of photos of our front yard boxwoods.  You can see them above and you'll note that a few of them are showing quite a bit of brown/orange color on them.  Wondering if this is normal Winter behavior or something else.  I also note that they're all experiencing different amounts of this orange/rust coloring.  The first boxwood on the left is the most orange - and you can see a photo of this one below: The ones further North - which start to get out of the top photo are the most green.  The end one (on the North) has a 'hole' in it that was from some damage the previous few Winters.  See that one below that shows an orange section that has a large gaping 'hole' behind it.  The first time that I posted a photo of these boxwoods was in May of 2018 in this post about mulch .  You can tell that these have grown in size in the (almost) two years sinc

Building a Japanese Moon Gate - DIY Exploration

Image
Late last week, I posted about the idea of building a 'garden nook' or a secluded area that draws you in as something that is 'on trend' this year and maybe something to consider for our backyard.  In that same post, I made a reference near the bottom of Japanese Moon Gates .   I included the moon gate as a way to potentially create a 'nook' but after looking around the Web, I now realize they're so much more. From this Old House Online story , you can find out the details of the structure: A moon gate is a circular opening, usually in a garden wall, which acts as a passageway. In China, where the gates were built in the gardens of wealthy nobles, various parts of the form and its ornamentation carry meaning. More generally, though, a moon gate is thought to offer an auspicious welcome or fortune to those who pass through. English gardeners borrowed the idea from China in the late 19th century. American gardeners immediately followed suit. A moon gat

Revisiting Compost Aeration Techniques - For Springtime 2020

Image
A slight pause from the [ tree dreaming ] posts to quickly revisit my three-bin compost setup.  Winter means idle time for me in the garden, so I've been thinking about projects to work on this Summer and that includes my compost pile setup.  I have two compost setups:  first....a large 80 gallon tumbler.  And then a 3-bin fence setup.  The tumbler is in our yard and I filled it with quite a bit of browns this Fall and included some greens (grass clippings).  With Winter here, the composting is very slow, so I've been bringing some kitchen scraps out there including vegetables, coffee grounds, egg shells to try to add some nitrogen. The three-bin setup is one that I haven't touched since the Fall after I piled on leaves. I set it up in Spring and started to add some material. I revisited the bin on December 1st when I had filled the left bin and the middle bin with Fall leaves (carbons).  A couple of weeks later, I posted about how I haven't been good about '