Posts

Showing posts with the label garden projects

Creating A Stumpery Garden - Getting Ahead of A 2024 Garden Trend - November 2023

Image
I spotted this annual outlook on gardening trends from Garden Design and will - I think - post about the full list at some point.  I've done that the past few years - 2022 trends -  and last year - 2023 trends .  There are a few items on this years list that are worth a blog-post-level exploration.   But...there's one item that was totally BRAND NEW to me.  Borderline revelation.  It was that in 2024, more gardeners are going to 'rediscover stumpery gardens'.    I read that and was like... Wait a second.  Stumpery.  What the heck is a stumpery?   I've never heard of a stumpery let alone thought about adding one or 'rediscovering' stumpery gardens.   Here's what Garden Design says : While once a Victorian fad designed to show off fern collections, stumperies are again making a comeback. Only now, the focus isn’t only on plant collections but also on creating wildlife sanctuaries while showcasing shade-loving plants. Simply speaking, a stumpery is a shad

Backyard Retractable Hose Reel Mounted to 6x6 Post - May 2023

Image
Beginning in Spring 2022, I have talked about installing a second yard hydrant in our backyard featuring a self-rewinding hose reel.  I included it on my 2022 to-do list and failed to install the post and reel in 2022.   I carried that task over to our 2023 list and put it at #5:  install a second hose reel .  I had the hose reel for more than a year, so it was simply a matter of installing the post to hold the reel. This is the third of these reels that I have at the house - the first one is in the garage .  The second one is about half-way back attached to our fence .  This third one is planned for close to the spigot.  I have historically used a loose hose to water the patio containers.  I thought this upgrade would keep things a bit more tidy.   Ahead of digging the hole, I called J.U.L.I.E. and had them mark any underground utilities.  In the photo below, you can see the red line for electrical underground.  And the orange stake is where I wanted to dig the post.  All clear.  I c

Garden Bed Edging Inspiration: Boulders To Divide Bed From Neighbor

Image
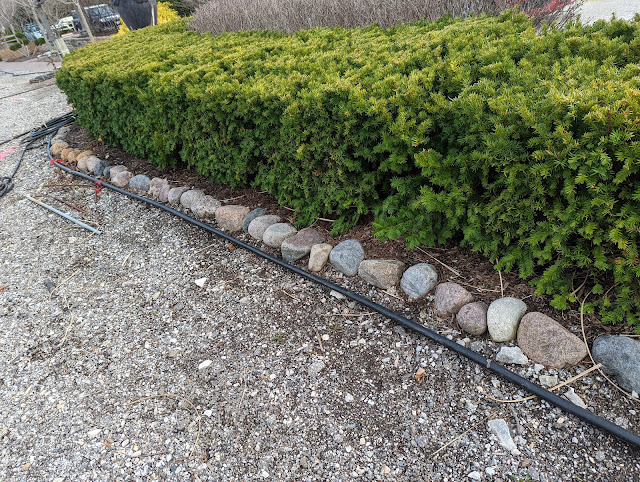
We have a bed that lives *right* on the property line in the IB2DWs area that has never had a real, proper edge other than the one that we dug with a spade.  The issue is that there's a little bit of elevation change - by design - between the two properties.  My plan for this season is to make that bed feel a little bit MORE finished by removing some sod, shaping the bed a little bit and edging it along the property line in some way.  This bed runs up against a tiny strip of grass next to my neighbor's driveway, so I'd like SOMETHING to keep the mulch from running/floating over onto their driveway. I've thought about using the green metal edging that I used for our gravel paths.  But, Nat doesn't love it.  She wants something that works with the existing gravel, so I decided to start to keep my eyes open for edging that works to divide mulch beds from gravel and hard surfaces.  It wasn't long until I saw something like this below: And, then...something similar l

Mounting A Staghorn Fern - Project with Kids - February 2022

Image
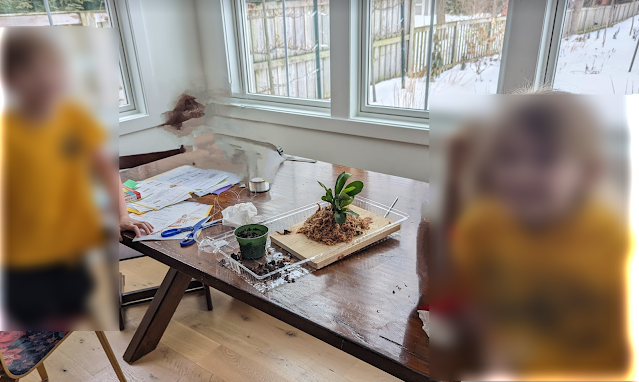
Yesterday I posted a couple of photos of our second Staghorn Fern - a tiny one that we bought with the intention of trying to mount it to a board - as is typical for these kind of ferns.  Having poked around the Web and watched dozens of YouTube videos of how-to's, I settled on this process: 1.  Find board, cut to size. 2.  Seal said board.  I used a can of clear coat spray that I had on hand.  Don't think this is necessary, but since you dunk the board AND fern in water to keep it hydrated, I figured this little extra step couldn't hurt. 3.  Draw a circle on the board, a little bigger than the container it arrived in. 4.  Drill a couple of short screws in the back that I can run picture-hanging wire from.  I did these first, because I figured that once the fern was mounted, I wasn't going to be able to flip it over and apply pressure with an impact driver to get these screws in. 5.  Flipped it back over and laid down a temporary piece of wood that it rested on top of

Garden Obelisk - Lumber Order - Spring 2020 Projects

Image
Yesterday, I posted (for my own thinking) a lumber order for the building of a Versailles Orangerie Planter box and mentioned that it was one of a couple of projects I'm thinking about as part of our social distancing program.  I recently received the catalog from Gardeners Supply Company - which is a joy to read right now - and saw this large cedar obelisk.  They're asking $199.00 for what seems to be a pretty " good quality item ".  But, I know that I can beat that price if I built them myself. Here's the Gardener's Supply Company Obelisk.  This is NOT my photo - it is via their catalog here: Source via Gardener's Supply . As for the 'why' add an obelisk, well...I'm not totally sure just now, but thinking about growing something like hops.  We had Golden Hops planted in our yard back in Elmhurst and I liked having them grow up a trellis.  It took a couple of seasons to get them to grow vertically, but by the time we moved, they