Posts

Showing posts with the label slab

Stripping Concrete Slab Forms - DIY Pizza Oven - May 2024

Image
Just 48 hours ago, I shared the details and photos of how I poured our backyard wood-fired pizza oven reinforced foundation slab using 46 sixty-pound bags of 4000 PSI concrete and a MudMixer.  I've kept the slab (mostly) wet using a garden hose and covered it in plastic.  48-or-so hours after the pour, I knocked down the supports and began to remove the forms.  Here's what was left:  an almost (for a first timer with a non-super-discerning eye) perfect 5.5" thick reinforced concrete slab: The light color (and discoloration) is from the plastic sheet touching the concrete as it cured.  I'm not the least bit worried about that as I know the slab will continue to change color.  I'm happy with the straight lines and the lack of air pockets around the edge.  I used a heavy hammer to vibrate the forms in an attempt to get the concrete mix down along the edge/face of the forms.  It seemed to have worked.   After a few more days, I'll get out there and snap some chalk

DIY Pizza Oven Foundation Slab Pour - May 2024

Image
After bending and installing the rebar, reinforcing grid and vapor barrier , it was now time to pour the foundation slab for our diy backyard wood-fired pizza oven.   As I posted about last week, I shrunk the foundation slab down to be 72" wide and 80" front-to-back.  It is 5.5" thick (2x6's for concrete forms).   This is sitting on top of six inches of 1/2" compacted gravel and a 48" deep of large rock drywell.   I used an online concrete estimating calculator tool and when you put those dimensions in, it says that I needed 42 60# bags.    I have to pour two slabs - this foundation slab and then, once I build the stand, an insulated hearth.  Each approximately the same size.   When adding those two up, I ordered 85 60# bags and had them delivered.  I opted for 4000 PSI concrete - as a little bit of an upgrade over the baseline concrete. Knowing that the labor involved in this pour is in two parts, I opted to split them up:  first...hauling the concrete

Pizza Oven Dimension Changes - Slab and Stand (Actuals) - Cinder Block Construction - May 2024

Image
This past weekend, I went out and began to assemble the frame for the concrete slab pour that will sit on top of the 4" or so layer of gravel for our backyard pizza oven.  I have posted about and pretty much considered my dimensions for this oven done.  The last time I shared the dimensions, I called them 'final, final'.  That was this post - where I included these as the final dimensions :   Slab: 78" wide, 86" deep. 6.5' wide, 7'2" deep). Stand: 72" wide, 80" deep (4.5 blocks wide, 5 blocks deep) Leaving reveal of 6" total both dimensions. 3" all ways. That's what I have now - for lumber.  78" wide slab x 86" deep slab.  But....after I assembled the forms, I decided to lay some of the concrete blocks inside the footprint to make sure I was accurate in my dimensions.  And, that's when it looked like this: I put down 4 blocks wide and 2.5 blocks (so far) deep.  Knowing that I spec'd a 3" reveal, my mind

Adding Gravel to Pizza Oven Foundation Prep - Backyard Wood-Fired Oven - March 2024

Image
The last progress-report on our backyard pizza oven was earlier in March when I showed the cut-down concrete slab framing pieces (2x6's) that I cut to the final dimension s (Slab: 78" wide, 86" deep. 6.5' wide, 7'2" deep. Stand: 72 wide, 80 deep - 4.5 blocks wide, 5 blocks deep).  In that post, I talked about the next step is to fill the excavated cavity with gravel ahead of the rest of the slab prep. I went over to Menards and picked up 10 0.5 cubic foot bags of their multi-purpose gravel.  Each bag is supposed to cover about six square feet.  I wasn't sure how far these ten bags would go, but I figured that was about the limit that I wanted to push my car weight-wise.   I brought the ten bags home and hauled them (one-by-one) to the site and piled them up: Opening each bag and spreading it out, I quickly discovered that I was FAR short of the amount of gravel that I REALLY needed to complete the project.  Below, is what the site looks like after ten ha

Backyard DIY Pizza Oven Construction - Slab Framing - March 2023

Image
Over the weekend, I went out and picked up four 2x6x8 boards and brought them home to begin to figure out if I've done enough excavation for our wood-fired pizza oven project.  I've been using a tape measure to figure out how much I needed to remove and if my dig was large enough to support the slab framing - along with the necessary bracing.  But, that's an imperfect science, so I decided to just go out and cut the lumber down to the final dimensions and place them in the hole to see - without guessing - if I've excavated enough. As a reminder - mostly to myself - my final dimensions are based on 8x8x16 construction blocks:  Slab: 78" wide, 86" deep. 6.5' wide, 7'2" deep). Stand: 72 wide, 80 deep (4.5 blocks wide, 5 blocks deep) Leaving reveal of 6" total both dimensions. 3" all ways. This allows for 2" face brick and a 1" reveal. I cut the two side pieces of the frame to be 86" and the front/back to be 81" (to acco

DIY Wood-Fired Pizza Oven Construction - Initial Excavation For Foundation - February 2024

Image
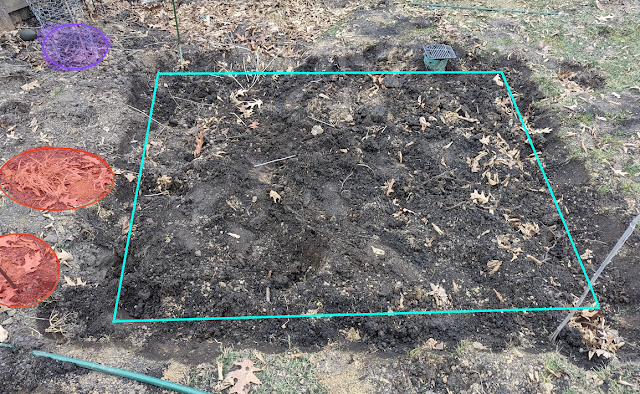
This past weekend, I posted a list of 'early potential priorities' out in the yard and garden for the upcoming 2024 growing season .  That list featured a number of projects/ideas/areas that *could* be something that I'm going to prioritize in 2024.  But, it also featured one item that has certainty when it comes to being a priority:  the backyard wood-fired pizza oven construction. The location/site of the oven has been an open question for me ever since we moved in back in 2017.  I wrote about a couple of final options in the backyard in early January where I narrowed it down to two locations :  built into the berm/closer to the patio vs. down on the drywell, lower-elevation. With the run of warmer temperatures this week, I got out one night after work and just got busy:  digging the foundation.   I went with the drywell location.  Further from the house, but anchoring a secondary, lower-tiered patio.  Below is a look at the site - annotated to show the outline of the fou