Posts

Showing posts with the label order of operations

Garden Water Feature Dreaming: Patio Fountain Wall

Image
What's better than one garden water feature and 'garden dreaming' post on the blog?  Certainly...You could say that: Two of those posts would be better.  But, even better than two?  That's right....three of said posts.  Especially when they run in close proximity to each other...as it serves as a document of the evolution of my thinking on projects like this and allows me the ability to work in draft format in my garden diary. First... I started this series with a look at some available stock tanks that could be used as ponds . Then, a few days ago, I posted about how I learned all about rills and what they are in the garden .  Today, I'm posting about some further inspiration that I've come across that has appeal to me as a gardener.  In terms of location, I'm talking about the patio-adjacent area to the north of our current patio .  I posted some drawings and thoughts about doing a second Belgian Fence in this area .  You can see the location here .   I st

15 Lancifolia Hostas Transplanted - South Bed Border - April 2021

Image
Yesterday, I posted a photo showing the new location of the dozen Fanal Astilbes that I transplanted out to the edge of their new bed and commented that that was the FIRST of a few posts showing the transplanting that I have been doing this Spring.   Today, the photo below shows the new location of 15 teardown hostas that I planted on the southside of the yard in the curved border of this new bed.  You can see the first three on the left taking the 'second row' spot and if you look closely, there are two more in the 'second row' under the Oak tree at the top of the photo: Here's an annotated version of that photo showing the 15 hostas: A few important notes: 1. These hostas are (I'm pretty sure) Lanifolia Hostas .  Based on this "What hosta do I have?" page , I found this Lancifolia page in the Hosta Library.  Things check out.  I inherited them when we moved in.  They're plain green with glossy leaves.  2.  They get to a nice size - if left alone

Fanal Astilbes Transplanted Into New Beds - May 2021

Image
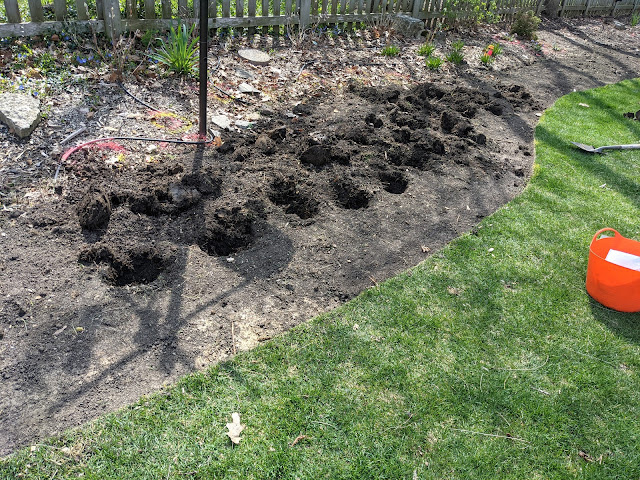
Now that we've set the final edges of our backyard beds using the notion of curvilinear design/layout , I'm able to begin to transplant some of the items that I have on hand to put them in their final spots - closer to the edges of these new final beds.  The first set that I took on were the dozen Fanal Astilbe plants that I planted last year.  I was happy to see that all twelve came back this Spring and below you can see the twelve holes where I transplanted them further out.  You can see in the photo below the pole of the bird feeder and some of the pink circles.  So, these are moving up about 24" but also not TOO CLOSE to the edge of the bed to be sure they have some room to spread out. This is the first of a bunch of transplants - including hostas, ferns and grasses that I'll be making in the next week or two ahead of mulch.  As a reminder (to myself) that I laid out an 'order of operations' with my beds this year - that starts with removing the Automowe

8 Bressingham Blue Hostas Planted in Focal Curve - April 2021

Image
Six weeks ago, Nat came home from Costco with some bareroot plants including 18 Bressingham Blue Hostas that I intended to put into the yard as soon as I could this Spring.  Bareroot season comes at you fast and I wanted to get them in right away.  But, the order of operations got in the way.  And, I had to wait to plant these until after the final edges of the beds were set.   I've planted these very same Bressingham Blue Hostas in 2018 .  I actually don't know where those ten went nor how many of them have made it.  I'm assuming that some of them are along the north side of the house, but I'll take a closer look this Summer when they all come up. As for these 18, I planted two of them already outside the screened porch .  Leaving 16.  In the post where I talked about buying these, I mentioned a bunch of spots where these COULD go.  I ended up convincing myself that the three places to start with these were: 1.  Priority Area #2 for 2021.  Calls for 8. 2.  Hicks Yew

New Backyard Beds Step 1: Automower Wire Removed

Image
Back in March, I decided that one of the projects that we wanted to take on this season was the creation of clean, new, swooping bed edges in our backyard.  And, in order to figure out what I needed to do - and by who - I created a simple order of operations list of the steps as I see them . Step one:  pick up the Automower boundary and guide wire that rings the perimeter of our backyard.  I started on that project recently and have made some progress.  Here, below, is about 40% of the backyard boundary wire that I've pulled up out of the grass and collected the spikes that hold it in place. This set of wire is littered with those little pigtail plugs that connect the wire in various places that it has severed over the years.  This section of the wire has been picked up and reset various times over the years, so it wasn't that hard to pull up.  There are other parts (the remaining 60%) that hasn't moved since I put it in initially back in 2017, so it is buried in the thatch

Order of Operations - Spring Beds, Transplants, Locations and Mulch

Image
Yesterday, I shared a post talking about the concept of creating curvilinear flower beds in landscape design and how one of my initial backyard projects is to move towards a final shape with our beds.  That requires us to carve up a bunch of the current lawn and creating new beds that jut out into the grass.  But, before I can even begin to think about how to make those swoop'ing, curved beds, there is some thinking that I have to do in in order to get both ready for the days of sod removal AND what has to happen AFTER the creation of the new beds to get them ready and dressed for the season.   To arrange my thinking - and to pressure test on what I want to do - I thought I'd create an individual (for me) order of operations document that details the steps in the order I need to take in order to make this all work.  So, let's go. 1.  Remove our Automower wire.   Around the entire perimeter of our backyard, we have a low-voltage green wire buried about 3" or so from th