Posts

Showing posts with the label moss

Foraged Moss + Boxwood in Shade Garden - Side of Garage - April 2024

Image
The small, linear bed that is up against the foundation of our garage received some attention last year with the planting of three 1# Green Velvet boxwoods  and  a pair of Kousa Dogwoods that I'm going to espalier against the house.  This bed has been home to a bunch of orphans - including some Ostrich Ferns, hostas and the various Coral Bells that I've planted in containers and transplanted into this bed at the end of the growing season.  ( Note to self:  lay off Heucheras going forward, they just don't perform that well for me .) Historically, this has been a VERY informal bed, but my goal with the boxwoods were to add a little bit of structure, winter interest and formality to the garden.  This is 'on the way' to our backyard, so is viewed by anyone who 'comes back' via the gravel pathway. In the photo below, you can see the boxwood evergreen shrub that has managed the winter just fine, but you'll also note a clump of moss that we stuck into the soil

Using Boulders In My Garden - December 2023

Image
One of the things that I've been thinking about is boulders.  How to use them.  Where to use them.  Why to use them.  In my garden.  That's because (mostly) my new conifer garden. But, also...because of my dream of a pond.   Like most things, you can wander around the Web and find all sorts of tips/tricks/inspiration for how/when/why to use boulders.  Like this post from Nelson Landscaping in Oklahoma where they  give a few ideas, including: Highlight a single boulder as a focal point. Group boulders together to create a cohesive and natural look. Incorporate boulders into your patio design to add texture and visual interest. Use rocks and boulders to add height and dimension to your front or backyard. Surround boulders with pebbles and gravel to create a cohesive look. Everybody is talking about large boulders.  That's what the pros use.  When I say 'large', I mean HUGE.  Boulders that you need heavy equipment to move around. I don't have heavy equipment. But,

Mounting A Staghorn Fern - Project with Kids - February 2022

Image
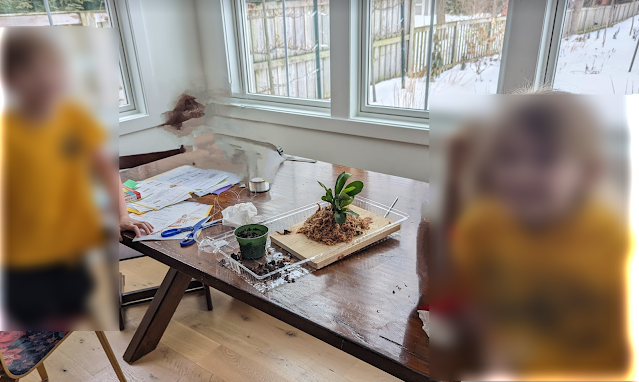
Yesterday I posted a couple of photos of our second Staghorn Fern - a tiny one that we bought with the intention of trying to mount it to a board - as is typical for these kind of ferns.  Having poked around the Web and watched dozens of YouTube videos of how-to's, I settled on this process: 1.  Find board, cut to size. 2.  Seal said board.  I used a can of clear coat spray that I had on hand.  Don't think this is necessary, but since you dunk the board AND fern in water to keep it hydrated, I figured this little extra step couldn't hurt. 3.  Draw a circle on the board, a little bigger than the container it arrived in. 4.  Drill a couple of short screws in the back that I can run picture-hanging wire from.  I did these first, because I figured that once the fern was mounted, I wasn't going to be able to flip it over and apply pressure with an impact driver to get these screws in. 5.  Flipped it back over and laid down a temporary piece of wood that it rested on top of

A Second Staghorn Fern - February 2022

Image
My journey with Staghorn Ferns starts where a bunch of my gardening, craft and DIY interests came from:  Martha Stewart.  Back in the aughts, we used to get Martha Stewart Living magazine delivered in print.  In one of those editions, she covered Staghorn Ferns.  That was my first exposure.  I found this old, 2008 Martha Blog post about her Staghorn Fern that might have been *around* the time of the print piece.  Since then, they've been on my radar.  She posted again in 2018 when she talked about mounting a few new Staghorn Ferns and how she puts them on her front porch.   In March of 2021, I bought my first Staghorn Fern - a six-inch container from Home Depot for $10.  In that post, I talked (again) about Martha .  I kept this one in the container and moved it outside during the Summer where it spent a few months on our front porch - just like Martha.  Because I left it in the container, I decided to drill a bunch of holes in the plastic nursery pot to make it more basket-lik