Posts

Showing posts with the label biosolids

More Lazy Garden Bed Extensions - Front Porch, Patio Corner and Boardwalk Landing - October 2024

Image
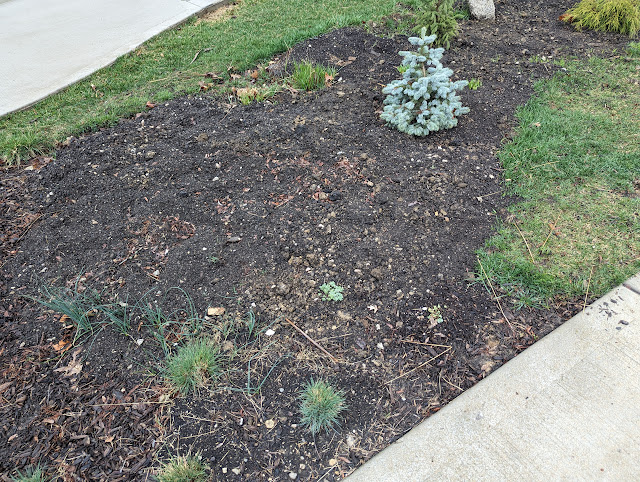
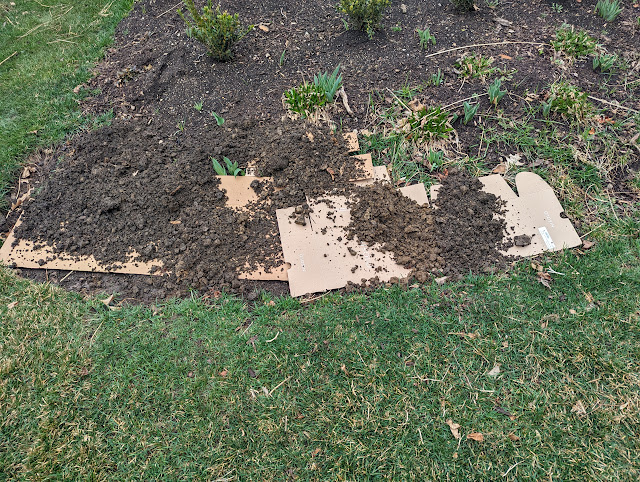
A couple weeks ago, I posted a Fall project that I called "Lazy Garden Bed Extensions" where I first used my mower to scalp some turf followed by laying down cardboard to extend the front border of the front porch bed out a little bit.  On top of that cardboard went biosolids and compost followed by some wood mulch (from a big box store) that I had on hand.  I didn't do the full front porch bed border (then), but recently....I was able to get around and finish the entire border. I ended up extending the front porch border out by 18-inches or so out from where the French Marigolds were planted this season.  You can see the in the photo below the new edge of the bed is now stretching out a bit into the grass.  If you look closely, you can see the Marigolds (in decline) and the lone Dusty Miller (this is year 3 for that "annual"), so that gives you a sense of the new extension. I also found a couple of other spots where the bed was 'too small' for the plan

Dividing Red Panicum virgatum ‘Shenandoah’ Red Switchgrass - October 2024

Image
In October of 2021, I bought and planted a single Shenandoah Red Switchgrass down by the sidewalk - IB2DWS .  It was an end-of-the-season #FallPlanting purchase and I put it in that spot because the description said that Panicum are well-known for being 'drought tolerant' .  This was a VERY hard-to-grow spot with harsh conditions:  hot concrete on two sides, competitive mature tree roots and gravely soil.   It went in and hasn't done super well, but...persisted.  There's something to be said for persisting in a spot like this was planted.   In the years since, I've left it alone.  But, as I've learned over the years, ornamental grasses need to be tended-to and do well to be divided every few years.  They will end up with 'center rot' and will get rejuvenated when they're divided.  I've typically done my ornamental grass dividing in the Fall, so this past weekend, I decided to divide a few - starting with this Shenandoah Switch Grass. Here's w

Fall Project: Lazy Garden Bed Extensions - October 2024

Image
Over the years, I've created and expanded garden beds using various methods including digging out all the turf, flipping the turf and (more recently) doing some combination of digging/flipping the turf and layering on cardboard to supress the grass.  That cardboard smothering method seems to work pretty well and it is well...easy.  At least it is FAR easier than digging out the turf.  But, the cardboard method has a big drawback - the grass is *STILL THERE*.  So, that means it is tricky to plant in the bed immediately. If you plant in the cardboard zone, you have be careful to remove the turf around any 'holes' in the cardboard that you want to plant in - otherwise you'll end up with grass peeking through around the stems/trunks of whatever you plant.  Trust me...I know.   My problem is that I don't plan ahead enough and get the beds ready BEFORE I want to plant them.  So, why shouldn't I use some of this "Fall Planting" time to build out new/extend ex

Late Summer Growth on Northern Glow Korean Maple Tree - Front Yard - September 2024

Image
Back on July First, I posted the details of a new (to me) Northern Glow Korean Maple tree that I planted in our front yard in a newly created island bed.  I tucked it in next to our third Spring Grove dwarf Ginkgo tree.  Planting a new tree in the middle of the summer Summer is always a risk - with the heat and drought conditions that usually occur around here in Zone 6a/5b.   But, I learned last year that some shade cloth (50%) is a pretty good path towards helping young, dwarf trees get established during the heat of July and August.  So, that's what I did:  I put up a shade cloth covering both the Ginkgo and the Northern Glow Korean Maple .  With the cloth down at the end of August, I've begun to provide supplemental water to both of these small trees.  And, what I'm seeing on the Maple is a surprise (to me):  new, late-Summer foliage growth.  There are a handful of new buds that have emerged on some of the tips of the tree and some new leaves are beginning to unfurl.  S

Penstemon Midnight Masquerade In Bloom - Early June 2024

Image
Last Fall, I planted a three-pack of Penstemon Midnight Masquerade in the conifer garden IB2DWs and talked about how I needed to keep going (out of my comfort zone) with flowers.  There was a lot to like about these perennials - they're drought tolerant, can handle heat and humidity, full of dark foliage and bloom purple and white flowers.  When I bought them, they were past bloom-time, so that flower part was taken on faith. This Spring, I marked their reemergence for their first Spring in early April when new foliage clumps came back from dormancy .   I topped this part of the bed with some big box mulch (not leaf mulch...) and mostly moved on in the gardening season.  Until this week.  When these things started to bloom.   Have a look at my three one-year-old Midnight Masquerade Penstemons ( or Beardtongue ) with their showy light purple and white clusters of flowers: This spot is full sun and is part of what I've always called the 'hard to grow' section.  The thick

New Bed for Cut Flowers - South Sideyard - May 2024

Image
The southside sideyard of our property is like most suburban sideyards.  Long and narrow.  It is also one of the very few areas outside of our front yard where we get A LOT of sun.  Over the years, I've planted some things over there including three Disneyland Roses , a pair of espaliered Sugar Tyme Crabapple trees , some Summer Beauty Allium, Karl Foerster Grasses, a few various allium bulbs, our Indiana Street Iris  and last Fall I added a small Blue Star Juniper .  Closer to the front of the house, we have a pair of Limelight Hydrangeas that are adjacent to the porch. The bed along this side of the house has been the same size since we moved in:  long and thin and hugging the foundation.  Something about 18" wide.  Below is a photo showing the bed as it looked before I started this new bed project.  One other note (to future Jake) - the orange spray paint shows where the cable line is buried.   I've been talking about growing flowers since last Fall - and pushed myself

Parkway Tulips Spring Show - April 2024

Image
The pink tulip bulbs that are planted down close to the sidewalk IB2DWs are up and showing out this week with blooms that are opening up.  This area was grass until September of 2021, when I declared this a 'hard-to-grow' spot that wasn't supporting turf.  Between the poor soil conditions (clay + gravel from the driveway and sidewalk installation) plus the heat that radiates from those during the Summer made this an inhospitable spot that held Kentucky Bluegrass turf that ALWAYS went dormant during the heat of the Summer.  Look back here for a photo of this section when it was grass .  In the Fall of 2021, I planted a number of tulip bulbs down by the sidewalk and they had their first Spring in 2022 .  That makes this (2024), their third year of blooms. That same Fall (2021), I added an ornamental grass - Panicum Shaenandoah Red Switchgrass in that same bed that has come back each season.  Last Fall, I planted a pair of variegated sedums - Sedum Kamtschaticum Variegatum

Biosolids Added To Turf Improves Early Green-Up - April 2024

Image
This photo below is of a small corner of a lawn that sits between hardscape and is notoriously hard-to-grow-in.  It is also in the crotch of a driveway - which means that it gets driven-on from time-to-time.  That causes compaction and both a drop in the level of the soil AND a deterioration of the grass.   Last Summer, I filled the area with municipal biosolids.  Have a look at what the area looks like in early Spring - and compare it visually to the rest of the turf. The green-up difference is striking, no?   Biosolids.  Plus...(I presume) the warm-up that comes from the driveway retaining heat = a happy turf.

Cardboard To Smother TurfGrass in New Mulch IB2DWs Bed - March 2024

Image
Earlier in March, I posted the details of a partial project in our front-porch bed that included the application of some cardboard to smother turfgrass that has crept into the bed .  I laid down cardboard, the topped with with a mix of clay, topsoil and biosolids.  I still need to finish the rest of that bed. But, in the meantime, I also applied the same treatment to a couple of spots in the expanded IB2DWs bed.  Last Fall, I carved out some new beds and removed SOME turf.  Turns out, I left behind A LOT of it, so...cardboard was the play here.   I did this in two spots - closer to the Bald Cypress - 'above' the first Baby Blue Spruce.  Then, again, closer to the sidewalk by the other Baby Blue Spruce tree.   Below are a some photos showing the post-cardboard + top soil + biosolids application.  There's still more grass to smother in this bed, but this is a good start: I used topsoil, clay and then a big batch of biosolids.  In an attempt to mix those biosolids with even mo

Pruning Disneyland Roses (Floribunda Roses) in Late Winter - March 2024

Image
This past season, I opted for a different method of winter crown protection for our Disneyland Roses (Floribunda Roses) than I've used in previous years.  In each of the past few Falls, I have set up a ring of chicken wire and filled it with chopped-up fallen tree leaves to serve as insulation on the crown of the rose bush.  This year, I opted for mounding of biosolids .  A 'hilling up' in the traditional way, but using municipal biosolids vs something like compost.  As Winter started to fade away, I went out and inspected the roses and discovered a good part of the canes were still green - so that means that the combination of a mild Winter, their protected location and the mounding of biosolids did their job.   That also meant that it was time to get out there and do an annual pruning of the roses - part of my 'seasonal tasks' that I keep-up on in each of my annual to-do lists. (This year will be no different.) I've done this each of the past-few late Winters/

Backyard Peonies Are Back - March 2024

Image
Over the years, we've had a tough go-of-it with peonies in our yard.  I suppose you can say that we were totally spoiled when we lived in Elmhurst.  We had a number of peony plants that were very productive.  But, in Downers?  Not a lot of luck.   I have long suspect that was a result of too-much shade, so that lead me to a number of years of moving them around.  From the far back to near(er) to the house.  And then, in 2022, I moved a couple of them out to the IB2DWS bed.   And guess what happened?  We got our first peony bloom in 2023.   Or, should I say 'blooms'.  The IB2DWs peony produced a number of blooms.  And, so too, did the ones by our curved-kitchen-window bed .   Each year, they emerge in late Winter/early Spring with their redish-purple tips.  Here's the 2023 version when they showed-up in early April .   Last year, because of the production, I decided to leave them as they were - a mix of front and backyards.  I'm now re-thinking that and have some ear

Front Porch Bed - Cardboard to Smother Grass + Top Soil + Biosolids - March 2024

Image
Just a week ago, I spotted some issues in the corner of our front porch bed .  It is a low-spot and because of that was taking on some water from the downspouts.  But, the front part of that bed was also showing some signs of turf coming back.  This was a small extension that I carved out of the lawn last year.  And...it turns out...I must not have pulled out/dug out all of the turf.   I decided to kill-two-birds in this project.  (Well...half of a project since I didn't have enough materials to finish it.) First, I laid down some cardboard to smother the grass.  I cut holes for the handful of tulips in the area, then spread out some thick, unpainted cardboard on top of the turf.  I then went back to the pile of topsoil and clay that I excavated from the Pizza Oven foundation and spread that on top of the cardboard.   I started by the property-line edge and went north.  Below are a few photos showing the progress - first with the cardboard and topsoil + clay.   I initially only di

Compost Bin Compaction Progress - Late Winter Activity - March 2024

Image
Well...things are STARTING to happen in my 3rd, storage bin in our three-bin compost setup.  That third bin (which I put up last year) is a storage bin full of non-mixed material.  It is LOADED with last season's fall leaves as well as where I've been stashing our kitchen scraps.  Most recently, I topped it off with all of the cut-downs from our ornamental grasses. Three things have happened all in the past week or so that have managed to move things along in this bin. First, I applied a top-layer of municipal biosolids.  Both as material to balance the browns (I'm considering biosolids to be a green due to their high nitrogen content) as well as a WEIGHT due to their mass . Then...(on accident), some of the bin caught on fire . (eek). And, now, have a look at the bins.  In particular, look at the level of the storage bin on the left.  The top of it is now BELOW the top of the frame: Look back at this post from a week ago when the biosolids and grass clippings were mounded

Second Load of Biosolids Applied - Perennial Garden Topdressing - February 2024

Image
Last week, I posted the details and photos of the first late-winter application of municipal biosolids in our garden and talked about how I was going to try to find some time to head to the mulch pit to get a few loads before gardening season heats up.  I applied that initial load to some areas that needed the soil amendment including the Spring Grove Ginkgos, the epimedium colony and my Hellebores.   I mentioned (in that post) that for every spot that I dumped a bucket of biosolids, I spotted 2x more spots that could use a top-dressing.  Not to mention the lawn, the parkway and the compost bins.   Over the weekend, I ran out and picked up another load.   About 8 five-gallon buckets filled up 2/3rds-of-the way.  And dumped and spread out around the backyard.   I added another partial-bucket under the Linden trees: And, right at the base of my bird feeder pole: At regular intervals along the front of the south border: Around the trunk of the south-side Northern Red Oak tree went a coup

Compost Bin Fire - Dry Material Burned in Late Winter - February 2024

Image
I was feeling pretty good about my prescribed burning of tiny piles of leaves and some perennial litter from last season.  I posted the details of it yesterday .  Over the weekend, I went out and did a little bit more burning.  I used my small hand rake to pull together a pile of (mostly) oak leaves - creating a little burn break from other leaf litter - and use my small propane torch to light-it-up.   But, I think I got a little too cocky.  Burning and burning and burning.  And feeling good about returning the carbon to the soil via little ash piles.  All the while...cleaning up the beds a bit.  I was puttering around the beds making little piles and burning them.  They light up, then expire on their own when they exhaust all the material.  A little smoldering for a minute or two, then the piles of ash go dark.  And leave behind some white, burned out material.   I found myself back by the compost bins, where I recently filled-them-up with a bunch of ornamental grass cut-downs that I

Amending Compost Bins With Biosolids - February 2024

Image
Yesterday, I shared a round of photos showing the first (for this growing season) load of municipal biosolids that I added to our perennial garden beds as a topdressing .  The goal is to improve the soil and feed the trees and plants.   I also used these biosolids in a different spot:  as a compost bin amendment.   I've done this in the past - here's a post from March of 2023 - when I dumped some biosolids in as a sort-of accelerant/enhancement to my bins due to them being overloaded with 'browns'.  I thought the biosolids - full of Nitrogen - would help balance out the blend.   Right now, all three of our bins are F-U-L-L.  The clean-up that I did recently of all the ornamental grasses produced an enormous amount of material.  I posted some photos back a couple weeks .    For this round - I added a 5-gallon bucket (filled 2/3rds of the way) into my 'storage bin'.  The one with the "Feed Me" compost bin sign .    Below is a look at that mound of mater

Late Winter Biosolids Top Dressing Application In Perennial Garden - February 2024

Image
Late last Fall, I found some time to head over to the mulch pit to pick up a couple of loads (in 5 gallon buckets) of municipal biosolids and brought them home.  I dumped the biosolids out and scattered them across a number of the perennial beds in the front/back/side yards .  A top dressing of sorts.   And a dormant application of organic material with the goal of improving the soil conditions.  I also thought that by applying them in early Winter/late Fall...there would be ample time for them to 'age in place' during the dormant period.  With the return to the garden in the past few weeks to begin to prune back/remove old stems and lightly begin to clean up, I've noticed some areas where the naked soil is 'showing'.  What can fix that?  Mulch!  Oh...I guess that's true.  But, I also thought...biosolids could do the trick.  And...off I went to pick up a load.  Here, below, are a few spots where I spread the material out.  I think I have 8 five-gallon buckets.