Posts

Showing posts with the label basement

Basement Wainscotting

Image
The beadboard *should* hold up better than just regular sheetrock when the kids go crazy down in the basement.  We got it up in *most* places and just have to caulk and paint the boards before we're all done.

Basement Fridge Installed

Image
After a bit of shaving down, the fridge fit *PERFECTLY* into the hole and with the water and power connections set back into the closet behind the fridge, it looks like the room was built around it. It is a 27 cubic foot box, so there's a lot of space in it.  Can't wait to fill it with various beverages! I'm really quite pleased with how it turned out.  A bit more work left to do around the little counter area and we'll be ready to have the party.

Basement Stairs - Stained

Image
Once the floors were finished up, it was time to get the stairs to match.  After two coats of stain, I'm still not satisfied with the final color, but time is short before the Babe's Second Birthday party so for the next few weeks this will have to do.

Basement Laminate Flooring Installation

Image
Just 2 days ago, I posted this photo of the bare floored hallway in our basement . Last night, here's what the same hallway looked like with the new floors.  It is really starting to feel like a finished space. And here's what the main room looks like with the floors installed.  They're called "hand scraped" - which Nat picked out - and look pretty nice installed.  They're a wide board, too, which is different than what I've seen in lots of places.

Basement Floors Going In

Image
That red stuff is the fancy underlayment that they put down before the floors.  They're starting in the southeast corner and hopefully by the end of today they'll have most of the floor installed.  The basement will be totally transformed once these floors go in - and will feel A LOT more finished and useable. The underlayment itself is made up of 3 layers and is called the Roberts 3-in-1 Harmony Underlayment .  The bottom layer is a permeable layer that keeps moisture down, the second layer is this thin section of little styrofoam balls that provide some bounce, noise deadening - and most importantly - the ability for any moisture that is underneath to travel through this layer and out the sides.  The top layer is a vapor barrier that keeps any and all moisture out from the bottom of the boards.

Basement Walls Painted, Trim Started

Image
There's paint on the walls.  A lot of it.  Nat picked out the color - and it looks nice.  There's a lot of green right now, but that will change.  We're going to put up wainscoting along the lower half of the walls (below the white shelf), but that will happen after the floors get installed. Here's a view of the hallway as you come down the stairs and head towards the main room.

Flooring Has Arrived, but We're Delayed

Image
We're now way past the 48 hour 'acclimation period' - where the wood floors have to sit in the space and adjust to the conditions of the room where they'll be installed - but unfortunately, the self-leveling concrete isn't fully cured yet, so the flooring guys came and went this morning; promising to come back first of next week.  We had a few 'patches' to make in the floor yesterday that caused the delay, but I now have a little space heater running down there, so it should speed up the process. That means that we're going to be busy painting everything - the walls and maybe even some of the trim - before it gets hung - this weekend.

Roberts Harmony 3-in-1 Underlayment - Laminate Floors

Image
Roberts Harmony 3-in-1 Premium Underlayment is the top of the line laminate flooring underlayment and is perfect for basement laminate floors as it seals out moisture while giving it a chance to breath and push the moisture out the sides instead of trapping it. Home Depot sells the stuff for $60 for a 100 square foot roll, but the web has that beat.  You can buy a 630 square foot roll on Amazon for $210 .  That's more than $150 less than it would cost at Home Depot and it ships for free with Super Saver shipping.  Just plan ahead! The underlayment is made of 3 layers - with a specially designed middle layer made of little styrofoam balls.  You lay the stuff down quickly and this stuff has a really nice 7-inch overlap layer that helps seal the floor from the bottom all the way across the seams. I'd recommend this underlayment to anyone - especially if you're looking to lay laminate floor in the basement where there is bare concrete floors.  I wouldn't however

Basement Floors Leveled - Self-Leveling Concrete

Image
In this case, a picture doesn't really tell the story, but that reddish-brown stuff is self-leveling concrete that was poured all over our basement floors recently.  The grey stuff is where it had to be "thick" I was told.  There's more needed in the hallway(s), near the bottom of the stairs and in the bedroom/office left to do, and then (hopefully) on Saturday they'll begin laying the floor.  

Second Coat - Basement Drywall Mud

Image
The corners, seams and screwholes have all been hit 2X with drywall mud and tomorrow, we'll have the final coat done and ready to sand.  Monday is the day to prime and Tuesday we'll be painting.  Hopefully.

Can Your Toilet Do That?

Image
An entire bucket of golf balls in a single flush.  That's what I'm talking about! This is the Eljer Titan 4 toilet that I bought to put in the basement bathroom.  The tile guy is coming on Thursday, so once the walls get painted this weekend, we'll be able to trim the toilet and get down to business.  Literally.

Water-testing our Laminate Floor Choice

Image
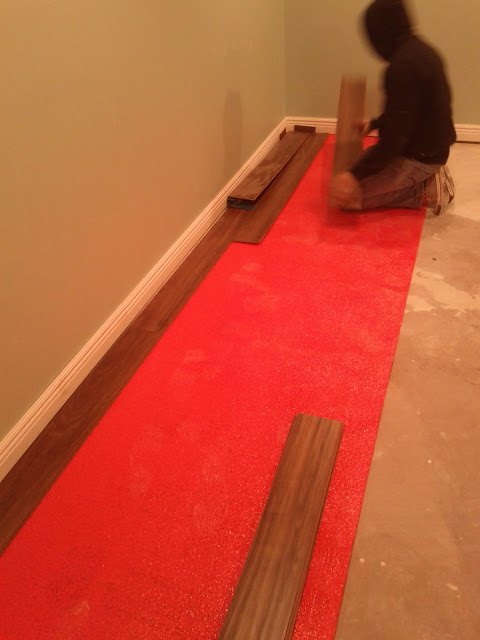
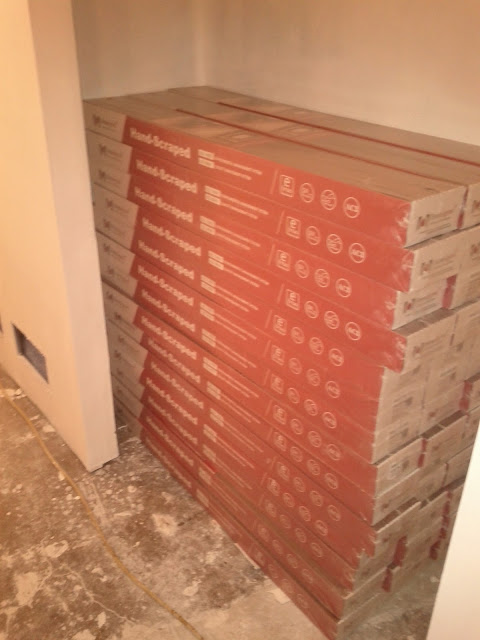
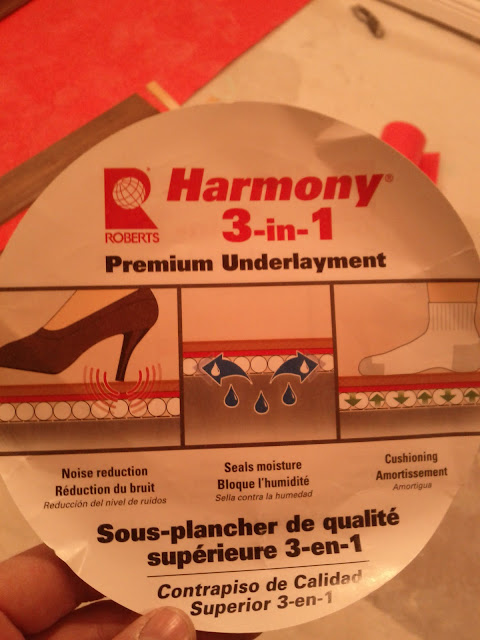
Nat picked out a flooring that claims to do a better job than *most* other laminate wood floors do against moisture.  I was a bit skeptical, so I took the sample home and stuck it on the counter.  And poured water on top of it.  And then stuck a glass on top to try to make a 'ring'.  I came back 8 hours later and the water was still pooled up and the floor stood up to the challenge without any warping/flaking/damage. Now...I'm not sure if the samples are different than the real thing, but if they are the same, then we should be in good shape with the floors.  They're being installed next week (hopefully).  The material is a special order, so it takes a few days for it to arrive in, then it needs 48 hours of 'acclimation' to the conditions present in our house.  Then...gets installed in just one day.  The walls will (hopefully) be painted already by then, so the place will start to fell a lot more finished once the floor goes in.

Basement Drywall Hanging

Image
Then sheetrock has begun to be hung.  The guys started on the ceiling and they said they hope to have most of it done by the end of today - including the walls.  Thanks to my mother-in-law who bought me the Mike Holmes basement book , we're using green board - which is a moisture/mold resistant material everywhere except for the bottom of the walls where we're using purpleboard -which is a *more* mold/moisture resistant board all the way through.  (BTW...that green board you can see in the photo laying by the wall is just being stocked in place there against the wall and isn't screwed in place.) Sounds like it is a newer product that came on the market more recently but is a better fit for any place (like a basement) that might be susceptible to any little bit of moisture.  (which...thanks to the basement waterproofing, ours should not get!)

Basement Insulation Installed

Image
I spent a good bit of time over the past few days stuffing every orifice down in the basement with insulation.  Based on not running the furnace all day yesterday and me working down there, I think the room is pretty tight and will (hopefully) stay warm on those cold winter days.  

Shower Plumbing Installed

Image
And so is the toilet and sink.  A bit of gasline work left to do after today, but we're getting awfully close to closing the whole thing up!

Gator Grip Universal Socket

Image
Down in the basement, the floor is a bit uneven due to the old floor drains, some cracks and just the general age of the entire place.  In order to properly put in the floors, I have to throw down quite a bit of self-leveling concrete.  The stuff comes in a 5 gallon bucket and you just add water and mix to get the consistency right. The problem?  The instructions recommend that you use a 'mixer' - which is this metal thing that attaches to your hand-held drill.  Unfortunately, the mixer that Menards recommended requires a 1/2" chuck and my drill doesn't open up that wide.  So, what's the solution?  This thing above:  the Gator Grip.  It is perfect for this application - as it turns my simple drill into a socket that will hold the mixer stick. It was $11.99 so hopefully I'll find more than just this one application.  The packaging calls out using it on stripped/rusty/broken nuts and bolts, so it might be good to have on hand.

Shower Base Arrives for Basement Bathroom

Image
The plumber was waiting on the arrival of our shower base because he wanted to do all of the rough work with pvc and copper in one visit.   Because of the size/shape of our bathroom, the shower is an odd shape and therefore this shower base was a special order unit from Menards.  I picked it up in the store recently and (thankfully!) it fit perfectly.  The carpenters hit the marks perfectly. That means the plumber can get started and bang out all the plumbing asap. But...there's always *something*, right?  Well...when I opened the box for the shower, there isn't a drain.  So, I'm guessing the plumber will have a problem with getting this done.  He's set to be finished by the weekend and the drywall guys are starting on Monday.

Gas Meter in Basement

Image
If there is one truism during construction it has to be:  "There's always something." Things pop up and slow you down (and cost you more money) all the time and this basement job is no different.  This specific instance is this odd configuration of gas pipes.  The plumber tells me that this rig was in place because (back in the day) gas meters were once hung in the basement.  Inside. This is the remains of that configuration and the plumber who installed our fireplaces upstairs took a bit of a shortcut and never took this out. It is going this week, but not before costing me a few days.  The plan was to get the drywall hung this week, but that is looking less and less likely.  Still have to plumb the bathroom/fireplace, insulate and have the carpenters come back to build one more soffit.

Titan 4 Toilet - Menards

Image
Late last week, before it went off sale, I went over the Menards (my favorite place!) and picked us up a new toilet for the basement bathroom.  With my dad's help, I settled on the Titan 4 from Eljer - which I think is a Menards exclusive.  I'm a little embarrassed to say that I got the "Tall Elongated" version - because my dad bought the two toilets for our house when we were in the midst of construction and they happened to be "Tall Elongated".  I grew up with "Elongated" - which gives you a bit more room than the tradtional "Round", but we certainly didn't have "Tall" toilets back in the day.  As you can see from above, the "Tall" version is ADA approved - and it has a bit of a throne feeling.  I kinda like it! But...the real reason for the Titan?  It is a 10 out of 10 in "Flush Power".  Nice.

Basement Heating Ducts

Image
Well...actually this picture is of a return, but you get the point.  The ductwork for heating and cooling the basement is *mostly* in the new furnace is helping heat the space up nicely. Down to 3 things to do before the drywall:  plumbing, insulation, and cable tv wires.