Posts

Showing posts with the label diy projects

DIY Disney Parks Tree Twinkle Lights Project (Part 3 - Testing)

Image
This is the third in a series of posts about my attempt to recreate some twinkling lights that used to be inside of Disney Parks (and...I think are still at Downtown Disney/Disney Springs).  While this project has come together in the past few weeks, this has been something that I've been thinking about for a number of years.  For background, here's the outline of the idea from last week .  Then, a couple of days ago, I posted about the bulbs and the specific fixtures that I'm using .  Now that I had the bulbs and the fixtures, I wanted to see if I could figure a way to get them going without making the investment in the larger, outdoor transformer, the run of low-voltage wire and the waterproof connections.  I wanted to see if I could get them to power up and to see how "random" they actually were. Each of the bulbs are 4 watts.  And they run on 12v power.  I went to the Google machine and searched to see what my Lionel transformers were running at power-wi

DIY Disney Parks Twinkle Light Project - Bulbs and Bases (Part 2)

Image
A couple of days ago, I posted the first part - in a series - about my journey to replicating some twinkling lights that Disney uses (or used to use) in their parks.  In that post, I mentioned that by reading various forum posts from the past 10+ years, I came to find the bulbs and then what I thought were the right e10 miniature lamp bases. These are the bulbs that I bought - you can see a photo of the box above.  Looks vintage, doesn't it?  Bought 15 of them - just to have a few spare on hand. (NOTE:  I do NOT run any affiliate links - so I'm not making any money on sending someone to any Amazon/other seller items.  So, click away...and no need to strip out any ref?/affiliate tracking codes when you buy. ) Below, is a photo of the box and some of the bulbs - quarter on the desk for size reference. Side of the box stamped "258". And, here, below is the package of 10 lamp bases that I bought from Amazon .' Here, below, is a close-up pho

DIY Beginnings: Disney Parks Tinkerbell Lights via 258 Flasher Bulbs

Image
When we first went to the Magic Kingdom when the Babe was very young, I remember being struck by these twinkling lights that they had in the park.  At one point, they had a bunch of trees in the 'hub' - that have all been removed so people can view the castle/projection show.  On *those* trees were these twinkling lights that they turned on at dusk. I can't find a video of *those* lights, but I do have this one of what I think are the same lights up at Downtown Disney. Those lights give off a little bit of a firefly vibe and are what I remember. And, it isn't just *me* who remembers the lights, as if you put in the phrase [twinkle lights disney trees], you'll see dozens of forum posts all about buying or replicating those lights.  I've spent the past few months wading through them and I think I've come up with an approach that I'm going to attempt to DIY here at home. First, the bulbs and the fixtures. Again...based on wading through the

DIY Passive Compost Aeration - Perforated PVC Pipe Inserted Horizontally - May 2020

Image
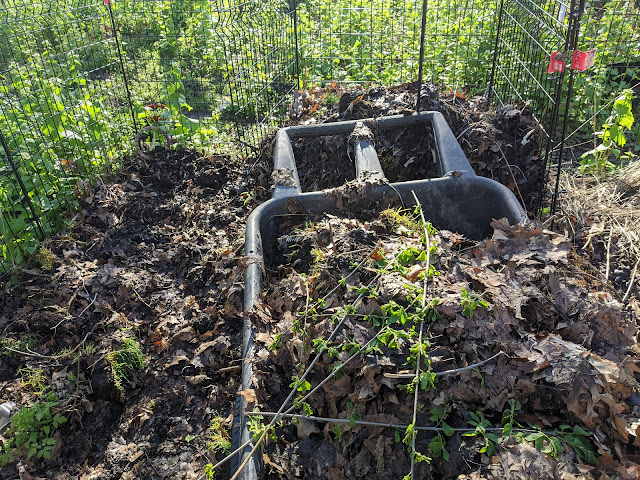
Number 6 (#6) on my 2020 To-Do list in the garden this year was to add some passive aeration mechanism in our compost bin setup in the backyard.   I have a three-bin setup (one active bin, one carbon storage bin, one nitrogen storage bin) and a 50 gallon tumbler.  Last Fall, the active bin (on the left) was about half-full and I was storing the excess leaves in the carbon storage bin (middle) . Earlier this year, I posted some discussion about various passive compost aeration techniques - including one design with vertically installed pvc pipes and another with horizontally inserted perforated pipes.    After poking around on the Web, I decided to go with 10' sections of 2" perforated PVC pipe inserted horizontally in the pile.  My bins are 3' x 3', so I cut down 6 40" sections.   Then, I grabbed my garden fork and started to dig out the active bin of compost to get the volume low enough to install the pipes at a level that would make them work well

Social Distancing Project: Versailles Orangerie Boxes - Lumber Spec'd

All this social distancing and being on quarantine has me putting together a lumber delivery from the fine folks at Menards.  Or...at least assuming that *if* I put a lumber order in that they will deliver it.  The list of 'essential' jobs and stores includes hardware stores, so I'm thinking that they're open? There are a few projects that I included in my 2020 to-do list including a raised planter or a Versailles box.   With all the time spent at home, I've also added another project or two to my list:  a garden obelisk and a boardwalk.  More on both of those at some point. Today, I'm thinking - once again - about the Versailles planter box that we first saw at Luxembourg Gardens in Paris .   Why?  Because I recently came across this photo on Instagram that features a couple of the Orangerie boxes: View this post on Instagram Love this pair of Versailles boxes, with their wonderful metal topia

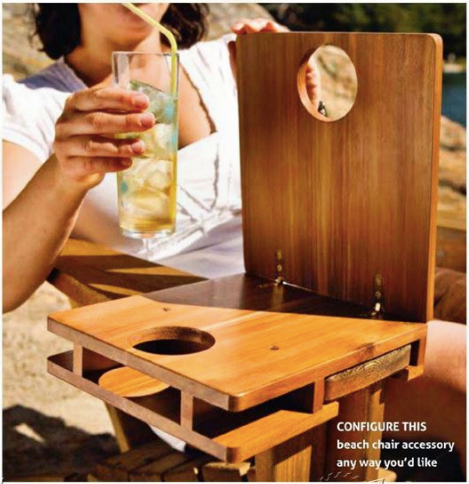
Summer Project: Outdoor Chair "Desk" Build

Image
Right at the end of last year, I posted a photo of a Wave Hill Garden chair and talked about how I was struck by the design of the chair - and the fact that it wasn't a traditional adirondack chair that you see everywhere.  We had spent some time in Luxembourg Gardens in Paris last year and fell in love with lots of things - including their chairs - and have been thinking about how I bring a chair or two to our backyard and garden.  The Wave Hill chair seemed to scratch me right where I itch. A gardener named Dan Benarcik has developed plans for the chair and is selling them for $35 (the updated plan version) on his site . I put the idea of creating a chair like this on my 2020 Gardening To-Do List .  #11 on the list is to 'build something' like these chairs (or a raised bed).  I haven't sprung for the plans (yet), but I've been nosing around the Web for some additional inspiration.  I came across this post on Reddit that featured a photo of a modified Wave

Backyard To Do: Build a Bird Nesting Box or Platform

Image
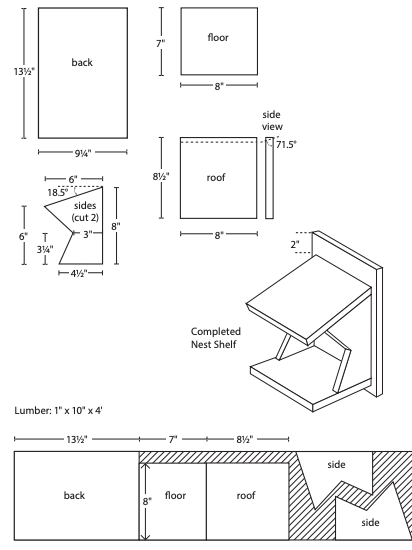
Yesterday, I posted a photo and a short video of (a first-time) male Cardinal visiting our window-hung bird feeder box that had been up for more than four months.  In that post, I mentioned that I was a skeptic of window-hung feeders and nesting boxes, but now my own eyes have shown me that - in the right conditions - a bird will perch on something right outside your windows.  It also had me wondering if one of those window-hung nesting boxes (where you can *see* the nest and eggs from the inside of the house) would actually work.  I'm still not sure that they're viable (based on the Amazon reviews), but going down that path also had me nose around for plans for nesting boxes and platforms. After all, we're a Certified Wildlife Habitat and that comes with a requirement of providing shelter and places to raise young.  To that end, a couple of Summers ago, we built a bird nesting shelf and hung it in the back of the yard .  It hasn't gotten much attention/action, but i

Our Blowmold Santa And His Sleigh and Reindeer - Flying for 2019

Image
For the first time , our blowmold 1 Santa Claus - sitting in his sleigh - has his three blowmold reindeer up and flying up, up and away.   He's in our front yard and all lit up with a brand new set of reins that are made of 30' of rope light from Menards.   I have been trying to think about how to get the reindeer to 'fly' for a number of years.  We didn't even put this set out last Christmas because I was caught in 'planning mode' too long and never got around to getting them to fly.  My initial design called for them to be 'wired up' between the ground and the large Maple tree in our front yard.  I went so far as to install two large metal eyelets directly in the trunk of the tree about 12 feet up in the air.  I was contemplating running some wire (kind of like the wire I used on the espalier system in the back ) from the eyelets down to some sort of grounding mechanism.  My initial thought was to buy one of those spiral metal things that

Mason Bee House - Fall 2019

Image
I posted this Mason Bee house structure to our fence back in early Spring of 2018 and it was immediately put to use with some of the cavities filled by Summer .  Posting this photo in the Fall of 2019 to mark in the [ garden diary ] that it seems that none of the cavities have been filled/utilized this season.  Early this Spring, I went in and tried to clean out all of the cavities that had previously been occupied in an attempt to make it as insect-friendly as I could.  For whatever reason....I don't think the tubes were used this season.  I've started to wonder if this is something that I can look to create as a Christmas gift for some family members?  There are plenty of plans online - but it is a simple project just with a cedar box with a roof structure, then following some best practices to make the best home for various insects .  My instincts are to go *big* and think multi-insect environment, but I don't think that's actually best for making something th