Posts

Showing posts with the label landscape beds

Surprise (Volunteer) Daffodils - 2018

Image
I went out to the yard to check in on the allium and tulip bulbs that I planted last fall and came across this nice little surprise:  a series of rows of daffodil clumps that had popped up in the yard behind one of our big Oak trees.  You can see the doubled-up Automower wire in the ground and the plastic mesh that the landscapers put down last Summer.  That means that this area was seeded, and as you can tell, it didn't take that strongly.  They'll give us a nice pop of color soon and then recede back into the ground.  I believe that this area is called out as a landscape bed eventually, so I'm not sure that we'll re-seed it this Spring, but probably just let it go as it is.  Since the Automower is wired to run in this area, it will keep the growth short and ready to be swapped out at a later date.  That plastic mesh, though.  I'm thinking that's a project to take on this Spring.  A lot of cutting and some ripping to remove it, where it hasn't been enca
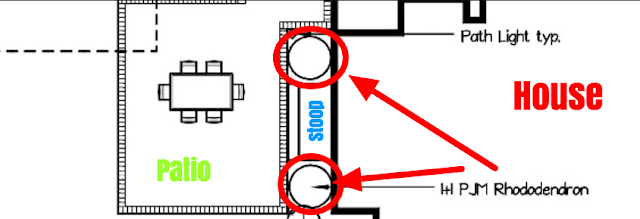
Rear Stoop Planting: Rhododendrons in Landscape Plan

Image
This is the fifth chapter is a series of our landscape plan posts that show off various portions of our #newoldbackyard in the planning stages.  The other four are here: 1.  Part of the southern fence line that includes some hydrangeas, hostas, ferns, allium and Canadian Hemlocks.   2.  Part of our rear foundation planting areas , right outside our breakfast nook/kitchen windows. Grasses, boxwoods and even a peek at one of the rhododendrons that *this* post is all about.  3.  The hornbeam/privacy hedge on the north fenceline near our screened porch .   4.  Far southwest corner by the trampoline that includes some Canadian Hemlocks . This fifth chapter covers just two plants that you can see in the sketch above.  They are both PJM Rhododendrons that occupy some foundation beds on either side of our rear stoop heading to our back patio.   Here's a look at those beds that I took this past weekend: You can see the two beds are good-sized and fall on th

Far Southwest Corner - Landscape Plan including Hemlocks

Image
This is the fourth in the series of different snapshots of our emerging landscape plan for our #newoldbackyard.  The other three are here and are worth visiting to get a sense for the overall plan.   Here's a look at part of the southern fence line .  Includes a set of hydrangeas, some hostas and ferns, allium and some Canadian Hemlocks.  I got a little bit of a headstart on this section last Fall when I planted some hydrangeas that we were given by Nat's Mom.   Here's a look at part of the rear foundation planting areas.  This one is right outside our breakfast nook/kitchen .  It includes some grasses, boxwoods, a rhododendron and some hostas.  This is right where our bird feeders are located, so the grasses are perfect.  Also, I harvested some hostas/ferns from our neighbor's house down the street late last season and got those started in their spots.  Hoping they'll come back this Spring.  Unfortunately, I also planted our Disneyland Rose there, so

Water Wiggler for our Bird Bath - Round 2

Image
We've had the same birdbath for a number of years now - it is a heated one that we can put out all year long.  I posted in November about how we put it out for the winter after I found it when I was unpacking part of our basement.  But, as part of the birding-related Christmas gifts, the kids also gave me a Water Wiggler.  This isn't the first one of these I've had - I posted about our first Water Wiggler here back in 2013 - but based on that experience, I wanted another one.  For details on how/why it works, check out my old post here .    The biggest difference this time is that the bird bath is now directly adjacent to our feeder set-up.  In our old house, we hung a feeder where we could see the birds, but the bath was connected to the railing on our porch so it was easy to refill.  Those positions were in two different locations.  Now?  You can see that we've put the bath out just a few feet away from the feeders.  I think this isn't likely the final loca

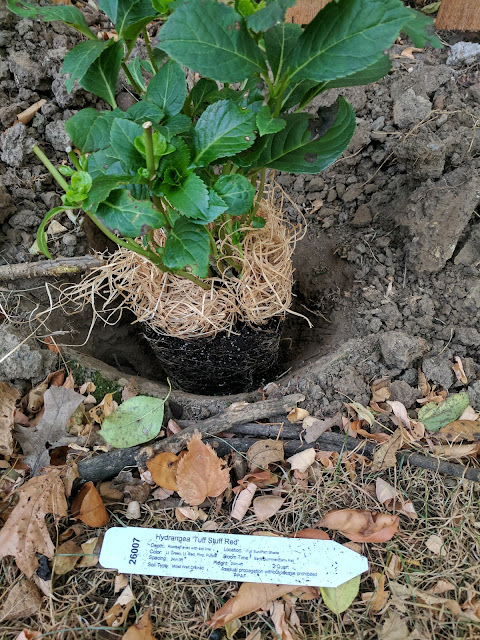
Tuff Stuff Red Hydrangea: Planted Fall 2017

Image
This fall is the first fall in our #newoldbackyard, so I've been busy with various fall plantings.  Starting with the tulip and allium bulbs, the harvested hostas, ferns and hydrangea from our neighbor's yard and most recently with a Disneyland Rose plant and a Everlasting Revolution Hydrangea - both from Jackson and Perkins.  This one above, the Tuff Stuff Red Hydrangea, is the last in the series of plants that we were given by Nat's mom as an anniversary gift.   I put it in a spot adjacent to the Everlasting Revolution variety (the multi-colored one) as outlined in the most recent landscape plan documents .    If you look closely at the photo above, you can get a sense for the soil we're dealing with in the #newoldbackyard.  It isn't great.  In the Spring, I have plans to amend the soil with some organic material and till it in where the beds are located.  That might require me pulling some of these plants out and replanting them, but they'll b

Everlasting Revolution Hydrangea: Planted Fall 2017

Image
In addition to the Disneyland Rose , Nat's Mom also gifted us a few other plants that were shipped this fall including this Everlasting Revolution Hydrangea that you see above.  I mentioned in the post a week or so back that the #newoldbackyard landscape design called for hydrangeas on the south property line tucked in front of a few new hemlock trees .   And that's where I ended up placing this one. This one is three posts down from the tall 6' section of fence on that side.    I planted it fairly close to the fence and if you look at the drawing in this post , it is where one of the Oak Leaf Hydrangeas are placed and I also planted another one (that I'll post about soon) in a similar location.  I've never planted hydrangea in the fall, so I'm not sure how these are going to turn out, but the nursery shipped them knowing our USDA Zone, so I have my fingers crossed that this one survives the winter. Also, if you are following along closely at home, you kn

Rear Foundation Planting Beds In New Backyard Landscape Plan

Image
Just a few days ago, I posted the first snapshot of part of our design for the full landscape plan of the #newoldbackyard and discussed how I had planted one of the hydrangea plants that I had earlier last week harvested from a teardown on our block .  Today, I'm sharing another look at part of the design - this time the southernmost section  of new landscape beds that are adjacent to the rear part of our foundation.  This bed that you see above is actually already in place.  It was dug out and mulched when we did the initial landscaping, but we didn't plant anything in this spot as part of the first round install ahead of our occupancy permits being issued.  If you look closely, you'll see four different types of plants called out in this section: PJM Rhododendrons Green Velvet Boxwoods Karl Forester Reed Grasses Hadspen Hostas Of the plants that I dug out of the lot down the street (which...mind you...was invited by the owner!  She told neighbors to go ove

A Look At A Part of #NewOldBackyard Landscape Design

Image
Just yesterday, I posted a photo of some of the harvested perennials from a teardown a few doors down that I dug out of their lot .  Included in the trug in this photo is a hydrangea, a few hostas and some ferns.   I also mentioned that I was planting these 'new to us' plants in spots that were outlined in one of the plans that we received after we had two landscape design firms give us proposals for the hardscaping for the 'entrance' to our #newoldbackyard.  Here's a look at the first proposal .  Above, you'll see a screenshot of just a portion of the second proposal.  In addition to giving us some idea of how they'd approach the 'entrance' to the backyard , they also gave us a look at the entire yard and what they would plant and how they would shape the beds.  It is incredibly detailed and while isn't perfect, gives us a lot of ideas on the direction of the future of our #newoldbackyard. Importantly, you'll note that in the sketch a