Posts

Showing posts with the label landscaping

Espaliered Linden Trees - Update

Image
Just a few days ago, I posted some of the steps on the espalier system that I put in our #newoldbackyard arboretum for a pair of Linden trees .  A slight update here.  I made more progress on both espalier systems.  (or...do you say ' pleached '??)  Here's a look at the Linden on the left in the two photos below.  You'll see that I now have three courses of wire up and you can really get a sense for how much longer the lowest branches/limbs are than the ones that are higher up on the trunk. An overview of the way I'm thinking about this espalier project can be found here on the blog . And a look at how I rigged up my DIY espalier system can be found here . I am planning on one more run of wire across the top and will have a four-level espalier.  You can also get a better look at the turnbuckles that I'm using.  Also, on the right, you can see that I have the first course/level/wire up on the Linden on the right.  These will end up matching.  But won't

DIY Espalier System For Linden Trees - Part 1

Image
Back in May, I b ought two very small/young Greenspire Linden trees with designs on giving the art of espalier a shot with them in our #newoldbackyard.  I initially trimmed/pruned them up to make them two-dimensional and they sat for a more than a month in the driveway in Elmhurst before we moved into Downers.  Then back in July, I posted a few photos that showed these Lindens in their containers awaiting their final position as our new fence went in.   Once the fence was in, I was able to plant them in their final locations, along the south property line, butted right up against the cedar fence - which in this part of the yard is 6'+ tall.   There were additional steps including the installation of the posts for the espalier system back in the beginning of August .  I s unk 3 steel posts in the ground in preparation of the wire system.   And that leads me to this post and an update on the process.  After a few trips to Menards and some thinking/cogitating, I was able

Fir Tree With Purple Cones On Twin Lakes

Image
Up in Twin Lakes, there is a row of fir trees in the side/rear yard close to the property line.  Well...at least I *think* they're fir trees.  I'm no conifer expert, so they might be spruce trees?  Chime in here if you know for sure.  Anyway...they were there when we arrived and they provide a good amount of screening.  And I never thought about them too much until I was recently walking by them as I dragged a tube from the garage to the pier and notice something pretty incredible about them:  They have purple cones.   They're pretty tightly wound up cones, but they're definitely purple.  A little bit of searching says that they might be Picea purpurea or they might be Korean Fir - Abies koreana .  Either way, they're pretty great to look at up there right now.  I'll keep an eye on the cones to see if they turn from purple to brown as they dry out and drop.

Posts Installed for Espalier Linden Trees

Image
All the way back in May, I shared a photo of two young Greenspire Linden Trees that I had begun to prune to be two-dimensional with the hopes of - once we moved into our #newoldfarmhouse - that I could try my hand at espalier or pleaching of the trees to train them into a specific habit.  Back in July, in a post on the blog about our new fence , I pointed out the final placement of these Lindens right next to the southern lot line butted up against the 6' portion of our cedar fence.  I got these in right after the fence was installed and then began to plan out the framing/system that I was planning on using to create the espalier. Over the past week or so, I have made some additional progress on the setup that you can see above:  the three posts have been installed in the ground.  I ended up shopping around and ultimately buying these 10' green 12 gauge steel sign posts from Grainger .  Grainger has a location on Ogden Avenue in Downers Grove and like a lot of places, the

What about decomposed granite for the #NewOldBackyard?

Image
I've pointed it out before, but one of the spots that I'd like to tackle first in our #newoldbackyard is t he 'entrance' or traffic path that we use to get from the front to the backyard.   I posted about a walkway, bridge and pond setup that I thought might work here on the blog back in July .  Recently, I had our landscape contractor come out to talk about some options and how we'd tackle them - and in what order. There's screening material needed (trees), hardscaping and maybe even some retaining walls involved.  And that is just to get us to the point of having a setup where we could think about something like a water feature/waterfall (which...I really want.) One of the ideas that came up in my conversations with landscape designer was the idea of decomposed granite walkways.  That's a photo of one up top.   It came from here .  I like the look of paths made out of the stuff and you see it in lots of places both formal and informal.  There are d

"Limbed Up" Our Front Yard Saucer Magnolia Tree

Image
I mentioned in the post about our King Crimson Maple tree last month that we had planted nine trees including a Magnolia tree that we put in our front yard.  That's it above.  After I 'limbed it up' a bit by taking the leaves/shoots/small branches off the bottom few feet of the main trunks of this Saucer Magnolia.  We've never had a Magnolia of our own, but Equation Boy/Man and Vic had one at their house and Greg, our former neighbor had one.  Nat has long fancied them, so in working with Chris Paul at Green Grass Landscaping , we decided to put in a Saucer Magnolia in the front yard. In looking through the care and pruning advice in this piece , I decided to work on the tree to put more of the energy into the top range of the young tree to try to grow it up a bit.  Ours had leaves all the way to the ground, but if you look at photos of intermediate growth Saucers or larger, mature Saucer Magnolias , the successful ones have been 'limbed up' to get the f

Our Vanilla Strawberry Hydrangeas Are Turning

Image
Part of our initial plant/landscape installation included a few sets of hydrangeas out front of the porch.  I think both Nat and I really like hydrangeas - they're pretty easy to tend to and they have a bit of 'showiness' to them.  Our #newoldfarmhouse is white, so one of the ideas that Nat's Mom had was to try to bring in a hydrangea that had a bit of color to it.   Chris Paul of Green Grass Landscaping (and my fraternity brother!) came back with these Vanilla Strawberry ones. They bloomed this first year and have good-sized white flowers.  But, just this week, you can see that some of them are turning pink.  Exciting stuff.  From the sounds of this story from HydrangeaGuide , it sounds like the show lasts all summer: It will start to produce them show stopping flowers around the start of Summer and flowers appear from white pinkish buds and open into white flowers.   The large white coned shaped flowers then start to turn pink before slowly turning a strawberr

Fence Install With Posts - In Progress (Step 2)

Image
Last week, I posted a BF (before fence) photo of the #newoldbackyard and here above is an in-progress look at the fence posts going in the ground.  The above photo is clickable, but here is a link to the Google Photos version where you can zoom in and scroll around.  This is the second fence that we've installed and I documented almost the exact same point in installation from the first time .   Check it out here from seven years ago . If you look closely, you'll notice the posts aren't traditional 4x4 cedar posts.  We opted for steel posts as an upgrade this time over the standard cedar posts.  They cost a bit more, but they perform much better and will last much longer.  I'll post something on the posts themselves in the coming days. The fence is one of the first steps in the evolution of the backyard.  Once it is finished being installed, I can move on to planting some of the trees and then move on to deciding on some of the locations of the landscape beds

Envisioning the "Entrance" to our Backyard

Image
There's this spot on the rear/side of our house - right next to the screened-in porch and behind the garage that is sandwiched up against the fence and is on a grade appears to be the likely 'entry point' for our backyard.  Right now, it is grass (some of it yellowed!) and a few stepper stones that you can see above.  The concrete pad that you see on the left is the bottom of a few steps that come out of my office and is right behind one that comes out from the side door of our garage.  Behind where I'm standing when I took this photo is one of the fence gates. The grade poses a problem and that's revealed by the current installation.  You have to kind of walk sideways on the pavers as they make the turn on their angles.  It is *fine* for now.  But, not ideal. The first thing that pops into my mind is to contemplate how we engineer or build out a little footbridge that incorporates a water feature/pond.  I can imagine excavating a good portion of the area whe

Our #NewOldBackYard B.F. (Before Fence)

Image
Posting this panoramic photo of the backyard at our #NewOldFarmhouse (or...rather... our #NewOldBackyard) of the state of play BEFORE the cedar fence is going in.  That version above is clickable, so you can get a larger look at the yard, but I'll also share this version on Google Photos that allows you to zoom in and take a look at the panoramic that was stitched together from a few photos I took.  If you look closely, you'll see the crew delivering some of the materials like posts to the various locations around the yard.  Also, on the left side of the yard property line, you can also get a good look at the Japanese Cherry Blossom tree that we planted a few weeks back. And, those of you with sharp eyes who have kept up with some of the tree talk here on the blog, might also see the Greenspire Lindens that I am planning on espalier'ing .  They're still in their containers up along the rear portion of the house. You can also get a sense for the density of the

Volunteer Peony Plant Shooting Up?

Image
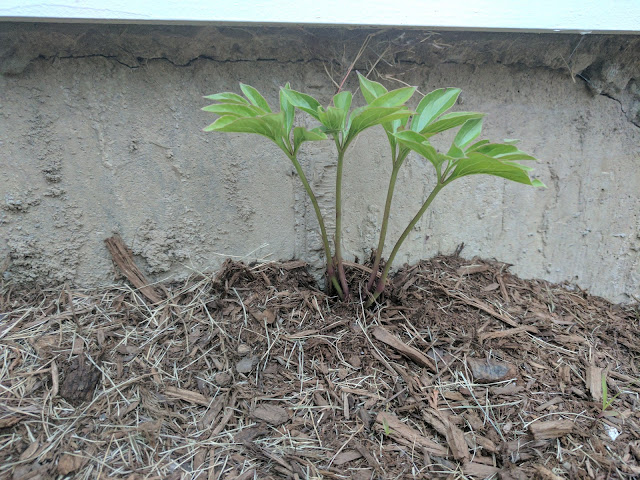
I was out in our #newoldbackyard over the weekend doing some weeding of the various beds along our foundation and came across this four-stemmed set of shoots.  I was mindlessly wandering around the perimeter of the house looking for green shoots in the mostly brown mulched (and empty beds).  I was about to bend over and rip it out when I realized that these look a lot like a young peony plant. Could we have some volunteer peonies?  I don't think they're 'survivors' like our ostrich ferns .  Based on these being right up next to the foundation around our screened porch, I'm thinking that if these are, indeed, peonies, that they hitchhiked along with the mulch when our landscaper put it down before we moved in. Volunteer peonies?  Wouldn't that be delightful.  We still have to move our foster peonies from Nat's Mom's garden in Naperville.  Maybe this is a sign?  Could this bed be destined to house our peony plants?  I'm going to keep an eye on t

Two Months In - Our Dawn Redwood

Image
Two months in the ground and here's what our little Dawn Redwood looks like in our #newoldbackyard.   We planted it on Earth Day this Spring .  After buying it at Menards (of all places!) and storing it on the driveway for a few weeks .   We planted it about 2/3rds of the way back along the north property line.  It is going to spread out quite a bit as it grows (slowly) so we might end up 'limbing' it up based on where the fence ges, but I'm pleased to see some new growth on some of its extremities.  It has a slight lean to the trunk, but you can see in the photo that I just brought out some yellow cord and a few stakes that I'm going to apply to it to see if we can help straighten it out.  Nature, of course, will do it's own thing, but we'll try to lend a hand.  The lean is heading to the north, so I think over time, the sun will pitch in and straighten it back out by encouraging southern growth. This is the 2nd of a few updates coming on some of the

Water Management @ Our New Old Farmhouse

Image
About a month ago, I showed the last pictures of our #NewOldFarmhouse where we were having our driveway poured out front.  More recently, the crew moved on to the landscaping and that includes the underground routing of drain pipes.  We're putting the downspouts and the sump pump drain into pipes underground.  You can see one of the big runs in the image above.  They're taking some of the pipes and running them towards a dry well and others...they're running into the yard and installing some 'pop ups' and then letting the grading of the property take over.   I took some photos of the drywells (yes...there's more than one) that we put in underground and I'll post the details of those over time.  It seemed that we had a few choices:  put in the drywells or include a water garden - like the one that the City of Elmhurst recently installed as a demonstration .   From a landscaping perspective, I had a really unique experience.  The subcontracto

Corkscrew Willow Tree - Far Backyard Location

Image
More tree posts!  Yeah...just what you were hoping for, right?  Another post about the tree situation at our new place in Downers, but this one is a bit special.  It's because the kids and I went out and picked out this tree just for Natalie.  She wanted a Willow, so we went hunting at Menards and came up with this interesting one:  a Corkscrew Willow.  Salix matsudano 'Tortuosa'. As a refresher, there's been a bunch of new trees that we're adding/added to the backyard. We picked up a Dawn Redwood .  And planted it.   I posted about the north side of our backyard and how we're going to fill it in.   I am trying my hand at the art of espalier.   With two Linden trees .   And, after being inspired by the Cherry Blossoms in Tokyo, I picked up a flowering Cherry tree . And now add this Willow to the mix.  We picked it up at Menards and it was priced to sell. Listen...I know the reputation of willows.  Dirty, filthy trees.  That don't last long.

We're Adding A Flowering Cherry Tree To The Arboretum

Image
Earlier this Spring, I spent time in Tokyo where in addition to heading to Tokyo Disneyland and checking out the fish market, we were also there during the peak Cherry Blossom season.  I wrote about the trees here on the blog back in April .  I've been enamored with the trees ever since.  And trees have been on my mind lately as we continue to think about our yard.  I'm trying to get an early start on trees, because unlike sod or even flowers or bushes, trees take much longer to mature to the point to where they've grown into their size.  I've already posted about how we picked up a Dawn Redwood tree and planted it.   I also posted about the space we're going to fill in with either flowering pear trees or perhaps European Hornbeams along our northside.  And, of course, there's the Linden trees that I'm going to try to espalier .   (At what point, can we start calling it an arboretum??) For Mother's Day, I also picked up Nat a Japanese flowering

Planting Our Dawn Redwood Tree

Image
Even though our #NewOldFarmhouse is still under construction, that isn't stopping us from having an impact on the backyard.  And that started with transplanting some of the ostrich ferns and now it includes the planting of the Dawn Redwood tree that I posted about last week .  I was lucky to have a little bit of help from my crew getting this tree in the ground.  All three kids helped decide where we should put it and then helped me (kinda) dig the hole and backfill the rootball. We placed it close to the north property line, with enough room for it to grow while being able to put a fence in behind it.  There was an opening in the tree line that I think this will fill in nicely over time. It also is on the low side of the property, so it will enjoy whatever groundwater we get over time.  My experience tells me that this thing will go through a little shock soon, but I'm hoping that with some care and watering, it will weather this first year and begin to fill in and grow

New Espaliered Linden Trees

Image
Earlier in May, I posted about one of what I called 'troublesome privacy spots' in our new backyard .  This post, covers what I think will be the solution to the other one of those 'troublesome privacy spots' - this time being on the south side of our lot close to our neighbor's patio.   We're looking into fences and will likely get a 6' privacy fence close to the house, tapering down to a four-foot fence for the balance of the yard, but I'm also taking this opportunity to try something I've wanted to for a while:   espalier'ing a pair of trees. Don't know what an espalier tree is?   Here's a post that chronicles the history of the practice  that is worth reading, but in a nutshell it is the intersection of the science of how things grow with the art of gardening.  You trim and train trees to be just two-dimensional objects.  That's espalier. At our previous place, our landscape architect spec'd an espaliered fruit tree alo

Update on Foster Ostrich Fern - Spring 2017

Image
Last month, I posted about a few of our 'foster' plants out at Nat's folks' place in Naperville including the giant hosta that had emerged this Spring and Nat's Great Aunt's peonies and the miniature variety of Hosta Venusta that came back to my surprise.  But, there was also a big bunch of Ostrich Ferns that we transplanted into foster care.  Just about a month ago, on May 2nd, 2016, I posted this photo showing the ferns emerging from the ground  and in June, I posted this photo showing the giant Hosta and the Ostrich Fern all unfurled in their full glory.  They were doing so well last year, so I never thought for a minute that they wouldn't come back this year. That photo above is what they look like now:  they've not only sprung up ahead of last year's pace, they're also big, vibrant and strong.  How nice to see them doing so well.  I'm not surprised, because a few years back, we divided some of our ferns and gave them to Nat'

Transplanted Survivor Ostrich Ferns

Image
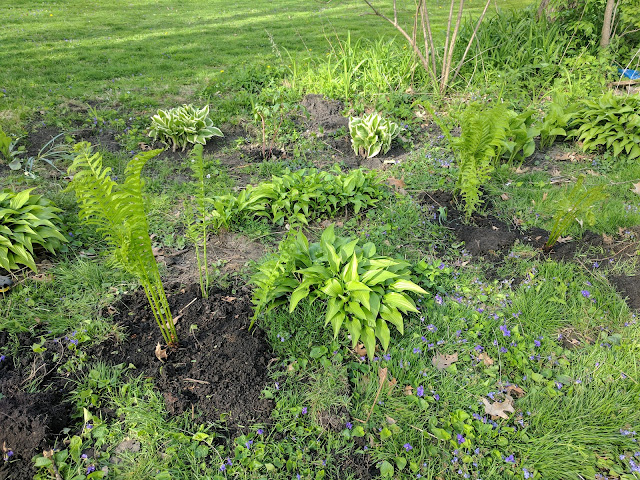
Over the weekend, I posted this photo of a handful of 'survivor' ferns in our new backyard and mentioned that they deserved a shot at being transplanted because they're clearly hearty souls.  Having been able to thrive without anyone tending to them in years means they'll likely be easy to care for, right?  That's what I'm going to assume.   Plus the experience I've had with these ferns before make me love them. I ended up bringing out the spade shovel and dug up a few clumps of them ahead of the landscaper coming out to grade the backyard.  I ended up sticking them in with a bunch of other salvaged plants in the rear of the yard.  Here, in the photo below, you'll see them mixed in amongst the hostas that I took from the front yard as well as a few of the variegated hostas that we picked out of our old neighbor's compost bin in the back. I'm thinking that this isn't likely their end destination (my current thought is to put these on

Survivor Ostrich Ferns In Our New Backyard

Image
The work over at our #NewOldFarmhouse has begun to shift to include the outdoors areas as the project continues to come together.  That means hard surfaces, grass and landscaping.  In the back, we're going to tend to a good chunk of the yard, but there is going to be the back portion that we won't be getting to out of the gate.  That means, we'll be leaving it in it's natural state for now. The whole thing is kind of in it's 'natural state' for now, meaning there are clumps of weeds and trees and ground covering scattered all over the place.  The landscape crew that is coming in to straighten things out will be clearing some of this stuff out.  But, check out the photo above.  See what is in those red circles?  That's right?!?   Ostrich Ferns.  My favorite .  I've covered them extensively including this post where the University of Illinois Master Gardener confirmed the species and I even transplanted a good set of them out in Naperville to be