Posts

Showing posts with the label patio

Rhododendrons Added To Backyard - 2018

Image
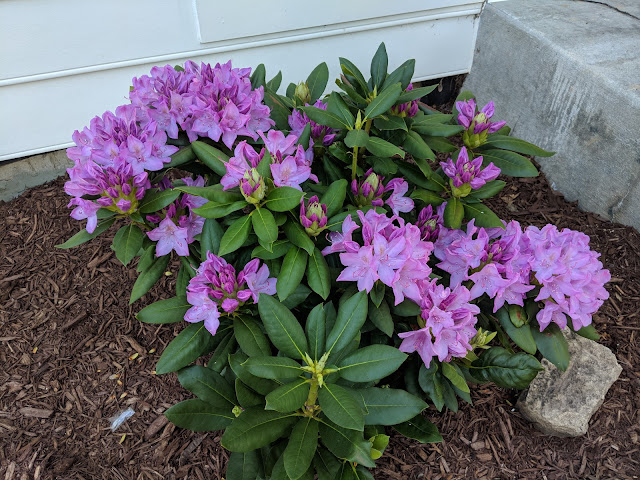
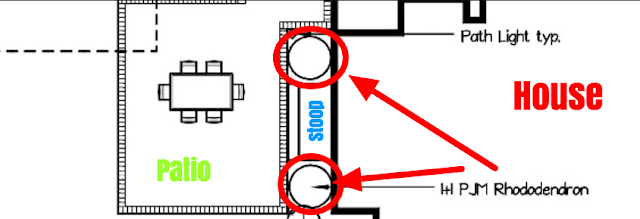
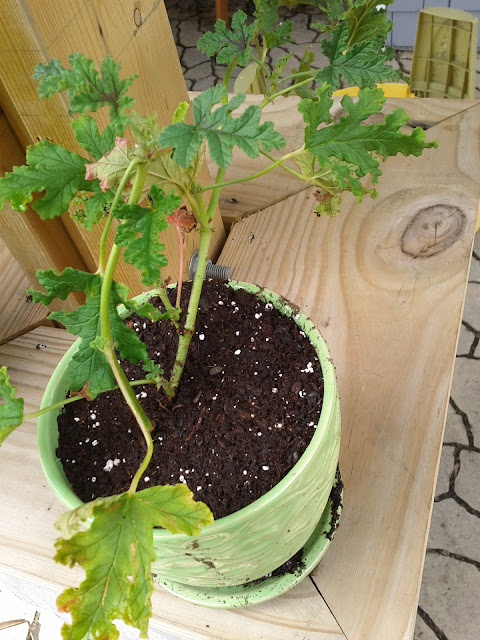
Back in April, I shared a small look at the landscape plan that was specified for either side of our rear stoop .  These are the stairs that come out of our family room and lead to our patio.  That plan called for a pair of rhododendrons that flank each side of the stoop.  Earlier this Spring, I picked up the plants and got them in the ground before the mulch arrived.  After a bit of acclimating, they seem to have stabilized and have begun to throw off a series of beautiful, almost out-of-this-world blooms.  The photo above is one of them.  And you can see both of them in the image below. (pay no attention to the hose or shoes or sidewalk chalk in the photo!  We live in a perfect backyard, folks!) One other thing to note in that photo:  the pot on the stoop contains the dahlias that I planted inside earlier this Spring .  Look how big and happy they are!?!?

Rear Stoop Planting: Rhododendrons in Landscape Plan

Image
This is the fifth chapter is a series of our landscape plan posts that show off various portions of our #newoldbackyard in the planning stages.  The other four are here: 1.  Part of the southern fence line that includes some hydrangeas, hostas, ferns, allium and Canadian Hemlocks.   2.  Part of our rear foundation planting areas , right outside our breakfast nook/kitchen windows. Grasses, boxwoods and even a peek at one of the rhododendrons that *this* post is all about.  3.  The hornbeam/privacy hedge on the north fenceline near our screened porch .   4.  Far southwest corner by the trampoline that includes some Canadian Hemlocks . This fifth chapter covers just two plants that you can see in the sketch above.  They are both PJM Rhododendrons that occupy some foundation beds on either side of our rear stoop heading to our back patio.   Here's a look at those beds that I took this past weekend: You can see the two beds are good-sized and fall on th

Outdoor Electric Patio Heater. Yea or Nay?

Image
I was perusing the outdoor furniture section of Menards over the weekend and sandwiched in between a pair of these weird Lazy Boy-style chairs (cammo one?  Seriously?) was this electric patio heater from Optimus.  It stands up on pole, has a football-sized heating element and a pretty heavy/sturdy base to (hopefully) avoid tip-overs.   Down near the base of the heater was this product/price detail: And here's the online product listing .  Description reads: Imagine being in your garage, in your four season porch or on your patio and enjoying warmth as the weather turns cold. This Indoor-Outdoor Standing Infrared Patio Heater with Remote Control will do the trick. It is made primarily from steel and functionally rainproof. It’s dominant color is black and the quartz heating elements provide infrared sun-like warmth which does not get blown away by wind, it heats you, not the air. It does not generate UV rays and operates silently. It employs a pull cord manual power switch

Halloween Inflatables - Big Pumpkin and Frankenstein

Image
It is no secret that I have a soft spot for two holiday-related items that are, umm, not super cool.  The first is Christmas Village structures .  Have you met Mantleburg ?  The other?  Holiday-themed inflatables .  Most recently, I've covered how we picked up this blinking eye owl Halloween inflatable .  And I've posted some photos and videos of other Christmas and Halloween inflatables at Menards over the years.  I even have a playlist on my YouTube Channel showing some of these Menards inflatables. The spark for this whole thing around inflatables can be traced back to this post in December of 2013 .  That's when I finally caved and bought our first inflatable .  You'll note that the Christmas of 2013 lines up with the Babe growing up and having some holiday-related awareness.  She and now her sister and brother have certainly influenced my purchase behavior. And, to be fair, I think Nat isn't sold on them.  Scratch that....I *know* she isn't sold o

Growing A Pineapple Plant - Giving It A Try At Home

Image
Ever since we first saw the little pineapple plants growing in the gardens at Epcot's Flower and Garden show back in Spring of 2016 , I've had the notion in my mind that it would be fun/interesting to try to give a pineapple plant a try.  But, where would we ever come across one?  The answer, surprisingly, was Menards.  Yeah...my favorite store.  Menards.  For some reason, they carried a handful of pineapple plants - Ananas Comosus - earlier this Spring.  I was wandering out to the garden center and passed by the tropical section and they had four or five of these things on the end cap.  $11.99?  Can't pass it up, right?   I planted it in a clay pot that seemed size appropriately.  Here's a close-up of the fruit that is on the plant currently: Once the weather moderated and we seem to be having no more cold spells, I transitioned it outside to the back patio where it is living amongst our upside tomato plant (well...not quite 'ours', but we'

Patio Planning @ Our New Old Farmhouse

Image
With the weather turning, and the inside of the house moving along at it's scheduled pace ( like with the installation of this leaded window ), it is time for our builder to turn some of their attention to the outside of the house.  In this case, it means a look at what our patio is going to look like out back.   The world is, indeed, a small place, and on this project it meant that I was able to reconnect with a friend from my college days who it turned out was the subcontractor chosen to help us with our landscaping by our builder.  As part of the project, Chris, our landscape team lead went out and spray painted the outline of our proposed patio.  You can see that in pink above. Nat did what she does best:  picked some great materials, and soon enough, the team will be leveling and grading the site, cleaning up all the various debris and then installing the patio in pavers.  We have a good-sized yard, so we were trying to strike a balance between installing a 'large eno

Citronella Plants - Do they Work?

Image
I've been poking around the Mosquito Magnet site for the past few weeks trying to figure out if the investment is worth the expense.  It seems that I am going to wait for the end of the season and see if I can snatch one up on a deal because with July already moving along, it might be too late in the season for them.  Because, I (like most people I'm assuming) thought that the Mosquito Magnet would just "work" immediately, I was hot to trot after one of them.  Our backyard is where I want to spend A LOT of time n the evenings, but the bugs are crazy.  Turns out, the Magnet is more of a 'life-cycle disruptor'.  Over the course of three or four months, it will drive down the population in the area by getting the young and aging bugs.  It will NOT pull or attract every mosquito in instantly.  Rather it is more of a long-term solution that appears to NEED to start right in the Spring. Because of the time-frame, we opted for a much lower-tech solution:  A ser

Paver Sealer - Wet Look from Menards

Image
I finally bit the bullet and bought a 5 gallon drum of concrete paver sealer.  Menards (of course!) ran a sale on the stuff and with the 20% off discount, it was priced well.  I've been slowly watching our backyard patio slowly fade from a beautiful multiple-color paver patio into a mostly blah tan-looking average patio.  This stuff - Ultra Gloss Sealer - not only claims to brighten/bring back the true colors of the pavers, but it also seals them down (plus the sand joints) and gives them a "wet look" permanently.  Well...permanently in this case is a few years until we have to re-apply.  I have to hit the pavers with a powerwasher to clean them up, replace the lost sand in the joints and then leave it to dry.  The next morning, I break out the roller and cover the surface with this stuff.  24 hours later, the patio should look almost brand new.  As soon as I get to this project (hopefully) in the next week or so, I'll report back.  This 'to-do' list is g