Posts

Showing posts with the label projects

Dollhouse Stairs

Image
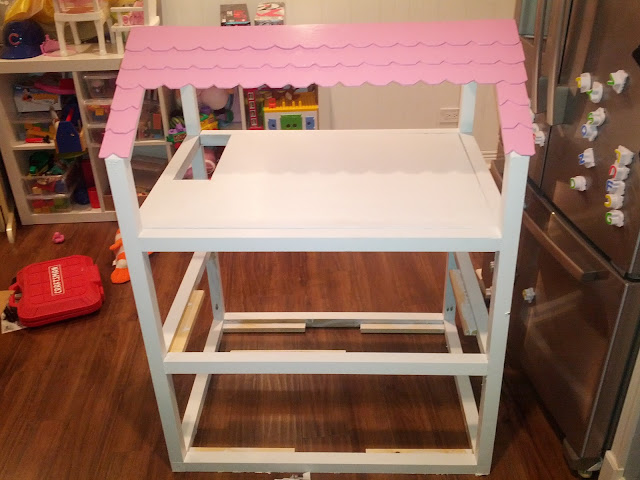
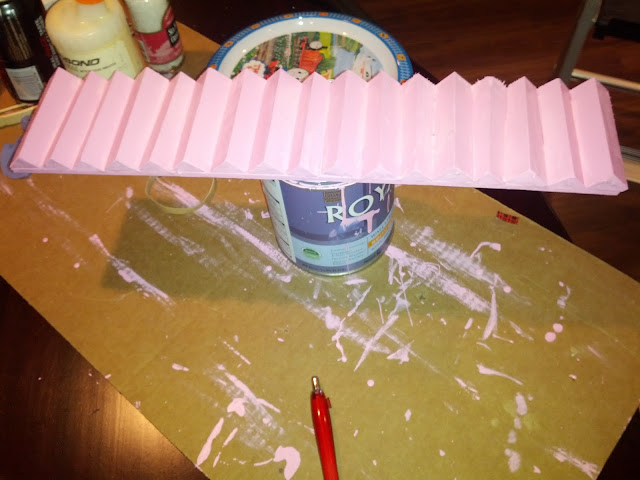
With the help of Nat's Dad, we built these dollhouse stairs by slicing a 1x1 in half on a 45 degree angle.   Then I glued them to a thin veneer board. A little bit of obnoxious pink paint and we have a sweet set of stairs.  For the dollhouse, I had to make two of these - one for front, one for back.
Cowboy Cooler - The Other Project

Image
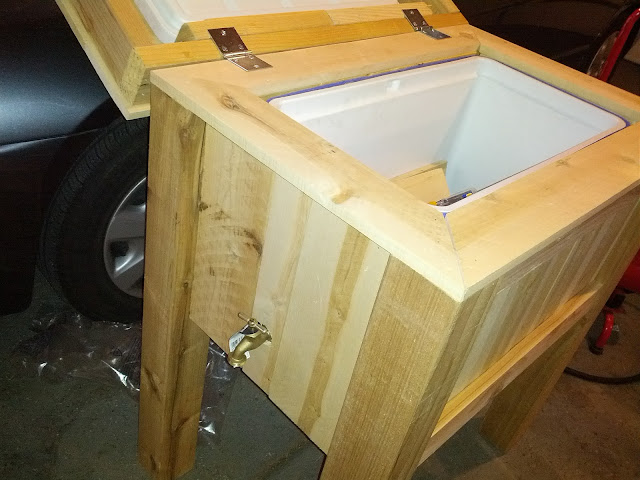
In addition to the dollhouse for the girls, I have been making a rustic cowboy cooler for one of my brother-in-laws for Christmas.  Last year, I made Equation Boy/Man a basketball rack (he had just put in a new hoop) and I had some cedar boards laying around, so this seemed like a nice project.  Today, I put the hinges on top, epoxy'd in the spigot and put on the last coat of polycrilic.  With just 2 more building days to go (Today and Saturday), I have to finish up a few of the last minute details and get this one done under the wire.

Dollhouse Progress - 4 Days To Go

Image
With Christmas just a few days away, the Elves at the Parrillo House have been getting busy trying to finish up some projects.  I've been at this Dollhouse for the Babe for a few weeks and things are finally getting close to completion.  Today, I made the shingles, painted them and tacked them on the roof tonight.  I still have to make a few more for the other side and then fit in the floors.  The walls are built, but waiting for my partner in crime to paper them up with wall paper. I don't have the stairs figured out, but by Saturday night, we'll have them built, painted and installed.

Dollhouse Progress - 6 Days To Go

Image
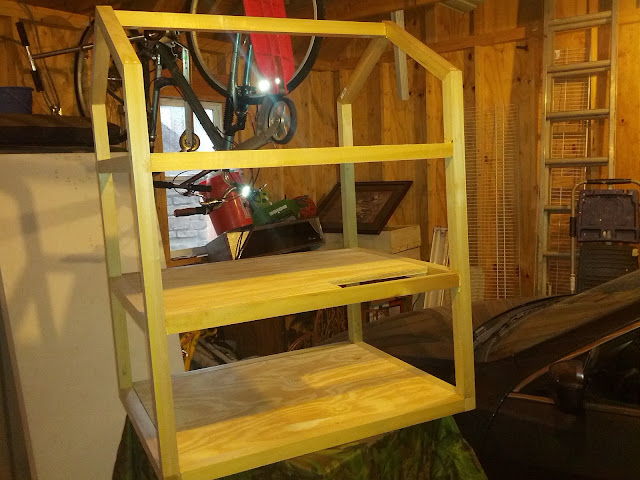
The frame is built, the floor boards are dry fitted and the glue is drying.  Off to the paint shop next, then on to walls and roof.  Just eight building days to go....going to be tight.

DIY Snowmakersnow

Image
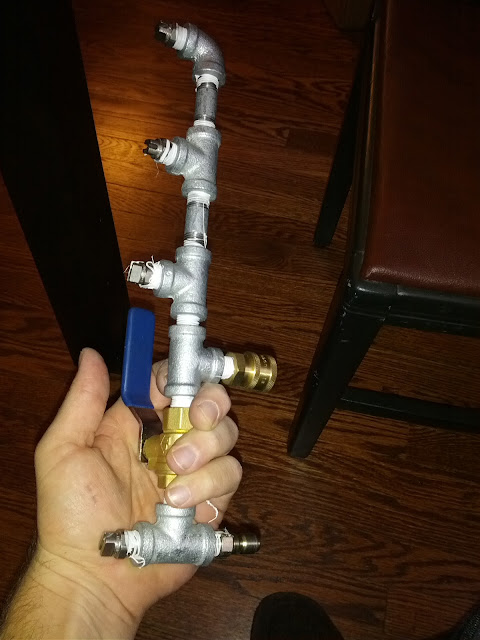
The forecast for later this week calls for snow followed by very cold weather.  I know I'm hoping that the snow doesn't actually come, but that we get that brutal cold weather.  Why's that?  Because holding in my hand up there is a DIY snow machine.  Add a pressure washer and compressor and we'll (hopefully) have some snow! The Parrillos will be having a white Christmas...

Dollhouse Progress - 8 Days To Go

Image
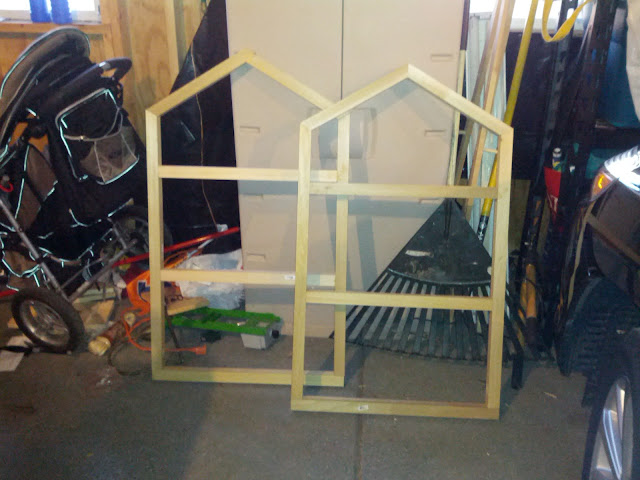
I put together both sides of the house using pocket screws.  This was my first project with pocket screws and the jig worked perfectly.  Really liking how they look and how strong they are.

Dollhouse Build - Day Two

Image
I got both end pieces framed up and built on the Babe's dollhouse.  I used poplar boards because they were straight as an arrow and after building the two frames, I'm glad I did.  They were easy to square up and with the help of the Kreg Pocket Screw Jig , they were easy to drill together without splitting.

Christmas Pyramid Cake Fan Assembly Arrived

Image
Look what arrived via the mailman yesterday?  My fan assembly for our Christmas Pyramid .  Yep...that means we have another project we have to tackle in the next two weeks to get ready for the big day.  I'm thinking I'm going to bring this thing to my mom's house for the big fest on the Eve. Another Christmas miracle!

Beads for the Christmas Pyramid

Image
Using my handy drying board, I was able to put a few coats of red paint on these eight beads that will adorn our Chistmas Pyramid.  Just waiting for the fan assembly, rod and bearing cup to arrive to give it a test run.

Poplar, Not Popular Hobby Boards

Image
These aren't the hottest selling items, guys....

DIY Outdoor Candle Lamps

Image
Last night, I finished up the first - of eight - diy outdoor candle lamps.  The inspiration and design came from Mrs. Martha Stewart , of course. That's a two-footer there in the photo and I have four of those along with four three-footers. I used 2" PVC pipe along with a 1.5" galvanized flange (the foot) and a 6" 1.5" (diameter) nipple to give it some stability.  The light is a simple IKEA Hemma fixture. I primed the pvc with plastic primer than sprayed the pipe green.  Due to the low temperatures and the fact that our detached garage isn't super warm right now, it took quite a while to cure.  I brought them inside and within a few hours the paint had set up. Once that happened, I whipped out the hot glue gun and drizzled big globs of glue down the sides to replicate some faux candle wax which I painted white.  I topped it with a flickering bulb and it turned out great! I have the other seven to hot glue/paint white then to make a platform for t

Dollhouse Furniture and Elevator Inspiration

Image
I have a project in mind for Christmas for the girls and this elevator (on the left) in this dollhouse at Costco has me thinking about how I can replicate it.  Motorized elevator?  Sounds like a challenge.

Pumpkin Cemetery Set Up - 2012

Image
Yesterday, we spent a few hours in the morning getting some of our Halloween decorations up in the yard and around the house.  Still plenty more hours left until we get our stuff set up. For the "Pumpkin Cemetery", I grabbed a few pieces of tongue-and-groove boards from the remnant rack at Menards and printed out the letters in a funky font.  Then I traced them on with pencil and painted the letters in black.  I threw on a few coats of polyurethane to seal it in and provide a little bit of weather-proofing. I picked up a little bit of edging fencing from Menards, too.  And stuck that in the ground. For the pumpkins, we debated between real and fake.  We ended up going with real.  Not sure if that is going to end up being wise in the long run, but only time will tell.  I painted on the eyes and mouths and then painted (with a pastry brush) a slurry of red pepper flakes and water all over them.  Before that water dried, I also sprinkled on a bunch of chili powder. You

Even More Shrinkage - Shrunken Apple Head

Image
The carved apple head continues to shrivel up.  Just two days later , we're getting the eyes to skrunch up a bit.

Shrunken Apple Head - One Week In

Image
Just six days after I peeled and carved a little apple into a head shape , we're starting to see a little bit of 'shrunkeness'.  The rice teeth turned out pretty great, but the eyeballs aren't skrunch-ing up enough for my tastes.

The Witches - They've Multiplied!

Image
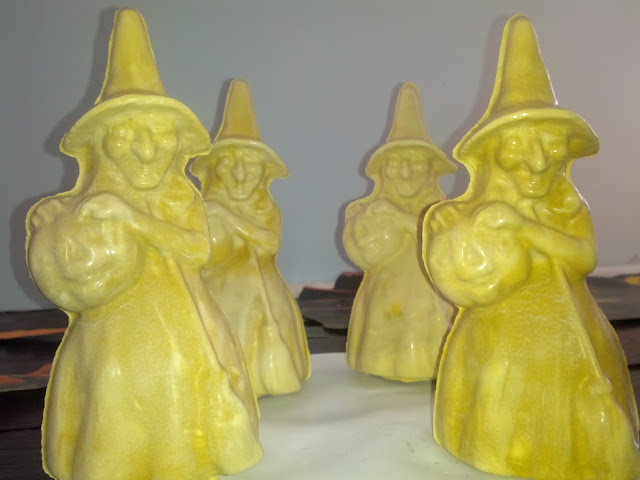
In a little bit more than a week, we've gone from one water putty witch on our mantle to four!  There's a lot of Dremel work left to be done to grind the seams - and bottoms - down to make them smooth.  Then the painting/decorating will begin.   Maybe I can send one of these home with my brother-in-law when he goes back to Denver this weekend?  He's the real artist and would likely be able to do the best job.

Shrunken Apple Head with Rice Teeth (Pre-shrinking, at least!)

Image
I carved this guy into an apple, stuck some rice teeth in his mouth and dipped him a lemon juice/salt wash.  Now we wait a few weeks for him to dry up and shrink.  Hopefully we'll have something creepy looking just in time for Halloween.

Outside Halloween Project - 2012

Image
I spent a few hours yesterday pulling together some pieces of my outdoor Halloween project.  With the help of my father-in-law (and his workshop!), I was able to get the wood cut.  With the help of my mother-in-law (and her craft supplies), I was able to get the sign painted. I'm going to put a layer or two of polyurethane on top of it so the sign lasts and then figure out how it will attach to posts before getting it set up in the front yard.

It is a Witch! Halloween 2012 Project

Image
That is the 2012 witch freshly pressed from the mold.  I made her with the help of the Babe and after a bit of grinding/dremeling, we'll have something we can paint.  If you look closely, you can see a void on the witch's face right where her right eyeball would be.  I'd rather be lucky than good, I suppose.

Witch Mold Halloween Project - 2012

Image
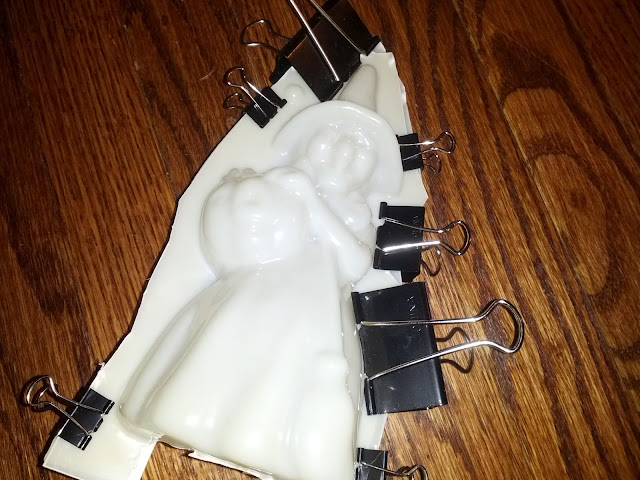
Back in the Spring, when I was ordering this year's new bunny mold , I also picked up this witch.  I cut down the white plastic molding on the sides last night to get room for the binder clips to grab hold.  I picked up the water putty last weekend, so now it is just a matter of finding time to make the witch(es). Have to get going on it early so they'll dry out in time to get painted and (maybe?) antiqued.