Posts

Showing posts with the label #newoldfarmhouse

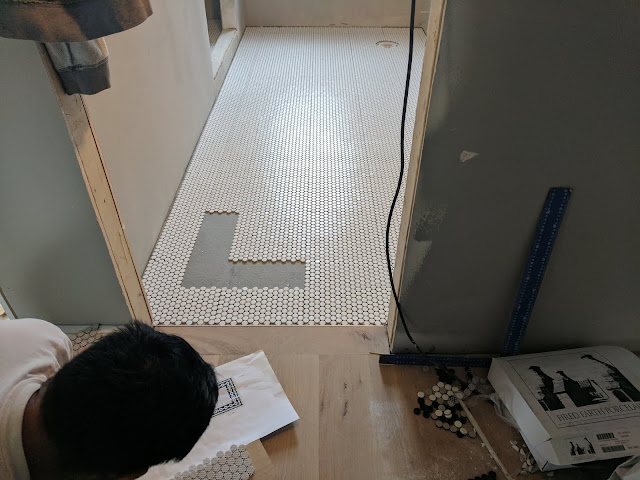
Schlitz Beer Glass Pitcher - Flea Market Find

Image
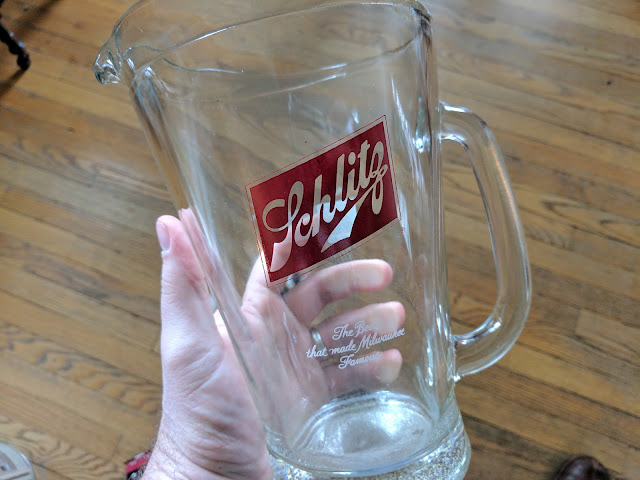
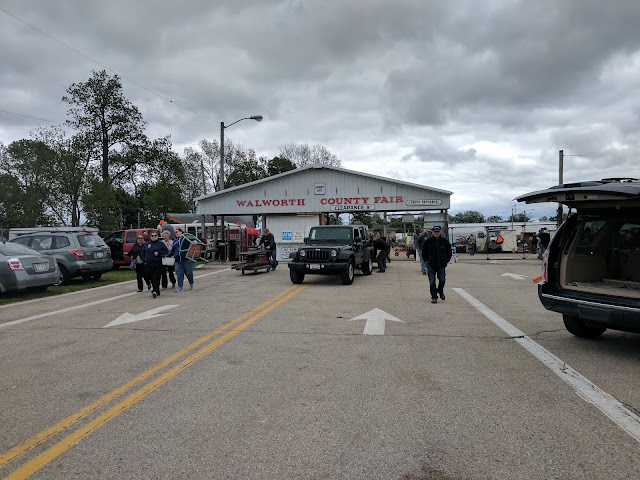
Last week, I posted about our experience at the Elkhart Antique and Flea Market up in Wisconsin and how we scored a few items including a chandelier for our #newoldfarmhouse .  One of the other items I picked up was this beauty of a glass pitcher from Schlitz.  It has "The Beer that made Milwaukee Famous" written in a cute script and was a steal at just $5.00.  We were walking out and I was carrying - gingerly - the light fixture that Nat had scored in a box and it was awkward.  So, about every 100 yards or so, I had to put it down and re-adjust my hands on it. One of those stops happened to be in front of a booth where the guy was packing up.  He had this pitcher on the table.  I picked it up, turned it around and looked at the price.  $15.  I set it back down and said.... "nice pitcher".  But it was too much for me.  The guy practically begged me to buy it.  He said it was a rough day for him and that he'd take anything for it.  I hemmed and hawed and fin

Elkhorn Antique Flea Market

Image
Back a few weekends ago, we packed the kids up in the van and headed up to Wisconsin.  The goal for the trip?  A visit to the Elkhorn Antique Flea Market .  Started more than 30 years ago, dealers, pickers, treasure hunters and lookie-loos descend on the Walworth County Fair four times a year (May 21, June 25, August 13, September 24 this year) to wander around and look for treasures.  We've been to the Kane County Flea Market , Shipshewana in Indiana and plenty of other one-off's or season ( Christmas ) vintage markets and antique malls . And, I have to say:  I think this was by far the most comprehensive and best of the bunch.  There is so much there that we didn't see it all.  And while there's *some* junk, there's LOTS of treasures.  Deals?  Fewer to find than you'd think.  But the 'merch' as they say was high quality stuff.  And, perhaps that's why the dealers were pricing their stuff the way they were.  I mean...I'm not expecting Gara

A Reminder of our Cuckoo Clock - From the Black Forest

Image
My sister Vic sent me this photo above from Oli's in Triberg, Germany - the home of the Master Carvers Club who handcraft *real* cuckoo clocks .  She was in Triberg with my folks recently to show them the town (it is awfully cute) and to show them how you can see/tell the difference between clocks (hint:  look at the side and if you see plastic in the little circle, pass on it.).  My sister and Equation Boy/Man bought a clock from Oli's and while they were there, they sent the photo you see above.   The one in the middle is the clock that Nat and I picked up when we were there all the way back in last Summer.  It has 'balusters', which is kinda awesome if you have been keeping up with our house build . It's funny, though:  we shipped the clock to Elmhurst from Germany and when it arrived, it was so well packed that, since we didn't have a place to put it, we just left it in it's box and mostly forgot about it.  This photo, though, brought me right back

Corkscrew Willow Tree - Far Backyard Location

Image
More tree posts!  Yeah...just what you were hoping for, right?  Another post about the tree situation at our new place in Downers, but this one is a bit special.  It's because the kids and I went out and picked out this tree just for Natalie.  She wanted a Willow, so we went hunting at Menards and came up with this interesting one:  a Corkscrew Willow.  Salix matsudano 'Tortuosa'. As a refresher, there's been a bunch of new trees that we're adding/added to the backyard. We picked up a Dawn Redwood .  And planted it.   I posted about the north side of our backyard and how we're going to fill it in.   I am trying my hand at the art of espalier.   With two Linden trees .   And, after being inspired by the Cherry Blossoms in Tokyo, I picked up a flowering Cherry tree . And now add this Willow to the mix.  We picked it up at Menards and it was priced to sell. Listen...I know the reputation of willows.  Dirty, filthy trees.  That don't last long.

We're Adding A Flowering Cherry Tree To The Arboretum

Image
Earlier this Spring, I spent time in Tokyo where in addition to heading to Tokyo Disneyland and checking out the fish market, we were also there during the peak Cherry Blossom season.  I wrote about the trees here on the blog back in April .  I've been enamored with the trees ever since.  And trees have been on my mind lately as we continue to think about our yard.  I'm trying to get an early start on trees, because unlike sod or even flowers or bushes, trees take much longer to mature to the point to where they've grown into their size.  I've already posted about how we picked up a Dawn Redwood tree and planted it.   I also posted about the space we're going to fill in with either flowering pear trees or perhaps European Hornbeams along our northside.  And, of course, there's the Linden trees that I'm going to try to espalier .   (At what point, can we start calling it an arboretum??) For Mother's Day, I also picked up Nat a Japanese flowering

Our Driveway Going In - New Old Farmhouse

Image
Last check-in on our house was showing the footprint of the patio out back , but things continue to move along both inside and outside.  One of the latest things is the installation of our new driveway.  Above, you see the apron or approach between the driveway and the street being installed by the crew.  We were able to get there while the concrete was setting up and Nat etched out name in the driveway. At our old place, we didn't have much of a driveway.  Our garage was out back off the alley and we had a kind of 'pad' for one car out front.  Thus, shoveling wasn't a big issue.  I'd break out the shovel and spend more time on the sidewalk than on the driveway.  But, just look at this thing!?!   We decided to set the house back an additional 20 feet behind where it had to be (by code) because we wanted to try to save a tree that we would have had to cut down.  But, that created 20 additional feet of driveway that I'm going to have to tend to this winter.  

Planting Our Dawn Redwood Tree

Image
Even though our #NewOldFarmhouse is still under construction, that isn't stopping us from having an impact on the backyard.  And that started with transplanting some of the ostrich ferns and now it includes the planting of the Dawn Redwood tree that I posted about last week .  I was lucky to have a little bit of help from my crew getting this tree in the ground.  All three kids helped decide where we should put it and then helped me (kinda) dig the hole and backfill the rootball. We placed it close to the north property line, with enough room for it to grow while being able to put a fence in behind it.  There was an opening in the tree line that I think this will fill in nicely over time. It also is on the low side of the property, so it will enjoy whatever groundwater we get over time.  My experience tells me that this thing will go through a little shock soon, but I'm hoping that with some care and watering, it will weather this first year and begin to fill in and grow

New Espaliered Linden Trees

Image
Earlier in May, I posted about one of what I called 'troublesome privacy spots' in our new backyard .  This post, covers what I think will be the solution to the other one of those 'troublesome privacy spots' - this time being on the south side of our lot close to our neighbor's patio.   We're looking into fences and will likely get a 6' privacy fence close to the house, tapering down to a four-foot fence for the balance of the yard, but I'm also taking this opportunity to try something I've wanted to for a while:   espalier'ing a pair of trees. Don't know what an espalier tree is?   Here's a post that chronicles the history of the practice  that is worth reading, but in a nutshell it is the intersection of the science of how things grow with the art of gardening.  You trim and train trees to be just two-dimensional objects.  That's espalier. At our previous place, our landscape architect spec'd an espaliered fruit tree alo

New Dawn Redwood Tree Destined For Our Backyard

Image
Earlier this Spring, we came home with this tree in the minivan on a normal trip to Menards.  I didn't plan on going there to look at trees, but when we were wandering around the garden center, I noticed this one.  It was over with the rest of the deciduous trees, but it looked different.  I pulled it out of the rack and realized it was a Redwood.  A Dawn Redwood.  I couldn't pass it up. Dawn Redwoods are one of a handful of deciduous conifers - which means that it forms cones and sprouts needles like evergreens, but it also turns colors in the fall and drops its leaves/needles late in the year like deciduous trees.  And, as you can imagine being a redwood, it gets huge!  Like 100 feet tall.  Fun to think about decades from now, all the trees in the neighborhood top out at like 40 or 50 feet.  Then there's this one massive tree, shooting up double that height. Menards trees aren't always the best quality, but the prices are always right.  This Dawn Redwood was i

1 of 2 Troublesome "Privacy" Spots In Our New Backyard

Image
Above is a photo of the northern side of our new lot in our backyard that is almost immediately outside our backdoor.  That fence, it turns out, belongs to our neighbor to the north, but is installed incorrectly (with the 'good side' facing his side and a bit too tall), so things are changing, I believe.  We've heard from our builder that the fence might be coming down and getting readjusted.  But, we hope it isn't going away.  That's because it is shielding their driveway - which is currently occupied by a few project cars and some other larger items. We are investigating a fence for ourselves (btw, this would be our second fence. Here's a post from way back in 2011 when I was staining our newly installed fence at our old place .) , but because of the way the lot is graded, this part of the property is a lot lower than the middle part, where our house is located.  That means that it is really easy to basically see 'over' the current fence.  And if

Patio Planning @ Our New Old Farmhouse

Image
With the weather turning, and the inside of the house moving along at it's scheduled pace ( like with the installation of this leaded window ), it is time for our builder to turn some of their attention to the outside of the house.  In this case, it means a look at what our patio is going to look like out back.   The world is, indeed, a small place, and on this project it meant that I was able to reconnect with a friend from my college days who it turned out was the subcontractor chosen to help us with our landscaping by our builder.  As part of the project, Chris, our landscape team lead went out and spray painted the outline of our proposed patio.  You can see that in pink above. Nat did what she does best:  picked some great materials, and soon enough, the team will be leveling and grading the site, cleaning up all the various debris and then installing the patio in pavers.  We have a good-sized yard, so we were trying to strike a balance between installing a 'large eno

Transplanted Survivor Ostrich Ferns

Image
Over the weekend, I posted this photo of a handful of 'survivor' ferns in our new backyard and mentioned that they deserved a shot at being transplanted because they're clearly hearty souls.  Having been able to thrive without anyone tending to them in years means they'll likely be easy to care for, right?  That's what I'm going to assume.   Plus the experience I've had with these ferns before make me love them. I ended up bringing out the spade shovel and dug up a few clumps of them ahead of the landscaper coming out to grade the backyard.  I ended up sticking them in with a bunch of other salvaged plants in the rear of the yard.  Here, in the photo below, you'll see them mixed in amongst the hostas that I took from the front yard as well as a few of the variegated hostas that we picked out of our old neighbor's compost bin in the back. I'm thinking that this isn't likely their end destination (my current thought is to put these on

Survivor Ostrich Ferns In Our New Backyard

Image
The work over at our #NewOldFarmhouse has begun to shift to include the outdoors areas as the project continues to come together.  That means hard surfaces, grass and landscaping.  In the back, we're going to tend to a good chunk of the yard, but there is going to be the back portion that we won't be getting to out of the gate.  That means, we'll be leaving it in it's natural state for now. The whole thing is kind of in it's 'natural state' for now, meaning there are clumps of weeds and trees and ground covering scattered all over the place.  The landscape crew that is coming in to straighten things out will be clearing some of this stuff out.  But, check out the photo above.  See what is in those red circles?  That's right?!?   Ostrich Ferns.  My favorite .  I've covered them extensively including this post where the University of Illinois Master Gardener confirmed the species and I even transplanted a good set of them out in Naperville to be

Leaded Transom Installed In Entry Vestibule

Image
All the way back in early January, I posted for the first time about the salvaged windows we were intending to use in our new old farmhouse.   You can see them in their original state here .  There is a pair of square-ish windows for use in one of the rooms and this large, horizontal-oriented transom that was destined to go in our front hall vestibule. In early March, I shared a photo of some of the window sashes that were removed .  We dropped them off at Drebohl Art Glass in Chicago to be fixed and preserved.  As part of that process, we had our builder strip the sashes off all three, sand them down to be smooth and then prime them with a white primer before bringing them back to the guys at Drebohl Art Glass for the final assembly. As the house progress continues, one of the trades that is moving along is the trim carpenter.  We didn't want these windows just laying around the jobsite because of their delicate state, so as part of his work, he moved ahead with installing th

Tile Install - New Old Farmhouse Bathroom

Image
The last update on our #NewOldFarmhouse showed off the drywall being hung and finished back a week or so ago .  Today, I'm sharing a few photos of the tile work being done in an upstairs bathroom that I think is coming together really nicely.  Nat has been the champion behind all of the design selections and she's done a really great job on all of it - including the tile. This bathroom has a retro-vibe to it and she's using 'penny tiles' that from this distance look a bit like hexagon tiles, but are all circles.  We had a hexagon tile bathroom floor in our last house, so I'm inclined to love the look, but in this one, she went in a little different direction by introducing a custom border around the room.  In the photo at the top, you can see the section that the tile guy is working on.  In that spot will be the pattern he's been building below.  If you look closely at the photo above, you can see a printout of the tile pattern right above the tile guy

Drywall Getting Hung - New Old Farmhouse

Image
The last construction update that I shared on our New Old Farmhouse was way back in early March when I showed the audio/visual 'chases' that were put in the walls to carry all the various cable-ing back to the basement.   Well, a lot has happened since then.  But let's start with what came after the chases.  The crew put in insulation.  We had a pretty cool mix of foam, batts and blown-in.  Different product for different applications.  As soon as the insulation went in, the street noise went to almost zero.  It was nuts.  After that?  What you see in this photo.  The drywall was hung. For the first time, the rooms took shape and we could get a sense for the light values in each room.  Exciting stuff.  If you're following along with Nat on the insta (as the kids say these days, right?), then you know where we are today and what's been done since I snapped this photo above.  Exciting times! Also, for those following along at home, I've covered other drywa

A Mechanical Doorbell: Crazy? Or Crazy Cool?

Image
We're at the point in the building of our new old farmhouse that we're starting to think about some finishes.  That means Nat is trying to wrangle all the choices with counters and tile and colors and trim and such.  But it also means things like railing hangers and garage floor epoxy and doorbells. Yeah...doorbells.   And Nat and I have been looking around online to find a doorbell that we both like and while there are some neat ones that seem right , I just haven't found anything that I'm in love with. I know...it is just a doorbell.  But, I loved our last one.  And I want to love this one. That's lead me to this crazy idea:  what about a mechanical doorbell?   See the photo above?  That's the 'outside' part of the mechanical doorbell.  You have to 'turn' the dial to ring the bell.  Below is a photo of the 'bell' part that would sit inside the house.   Remember, we're trying to build a #NewOldFarmhouse.  We&

A/V Chases Installed

Image
Last week, I posted about the masonry work that was taking place for the fireplace outside at our New Old Farmhouse and I also gave a little update about the salvaged leaded glass windows we are having repaired for reuse in our place by the craftsman at Drebohl Art Glass in Chicago .  (Drebohl, btw, is the ' oldest stained glass studio in Chicago ', so they're the real deal.) This week, the attention on the house construction turns inside as the tradesmen undertake their rough installations.  And that includes some low-voltage wiring work.  You'd think that in today's world, there wouldn't be the need for a ton of wires running all around the place with ethernet jacks and ports and what-have-you's installed in the walls in every room.  But you'd - like me - would be wrong. As part of our house build, we're getting a bunch of different wires put in - for use now, but also a bit of 'future proofing' things of sorts.  That means, Cat 5/6

Update on Leaded Glass Windows

Image
Back in early January, I posted about the three windows we bought salvage that included a big transom and a pair of more square-ish windows .  The transom is destined for our entryway/vestibule and the pair will go in the library/living room.   We wanted to do the windows right, so we found the folks at Drehobl Art Glass in Chicago and after talking with them, decided to undertake the restoration process on all three.   That meant taking the glass out of the sashes and work on the leading in between each one.  That also gave us an opportunity to work with our painter to have him restore the sash/frame.  Here's what one of them looked like in the back of Nat's van.  You can see that they're in pretty rough shape.  Peeling paint, weather damage.  They'll get stripped, sanded and then glued to make them just about new. And here's a look at the pair of leaded glass windows out of their sashes.  They will undergo a bit more work to get straightened out

Masonry Work and Fireplace: Done

Image
A few weeks back, I posted an update about our new place showing the installation of the windows in most* spots (The asterisk is because not all the windows are in...as we're still waiting on a few of the more 'fancy' ones...) and how that felt like real progress.  And there's been even more progress lately including the installation (do you call it that?) of the fireplace and chimney.  This one you see above is in what I think is going to be my favorite spot in the house: our screened porch. You'll note the the cables come out of the center of the masonry work above the fireplace, so one of the first jobs is going to be finding a tv that will work out there and getting it hung.   The room isn't huge, but I'm thinking Nat will do a great job finding the right seating mix where we can hang as a family out there and also where we can entertain folks.  And, frankly, something that I can take a Saturday afternoon nap on while watching some sports... The