Posts

Showing posts with the label 2024 to-do

Front Porch Bed - Drainage and Turf Issues - March 2024

Image
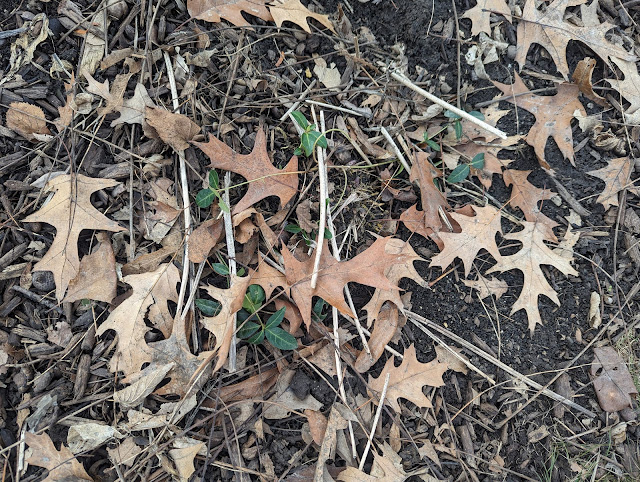
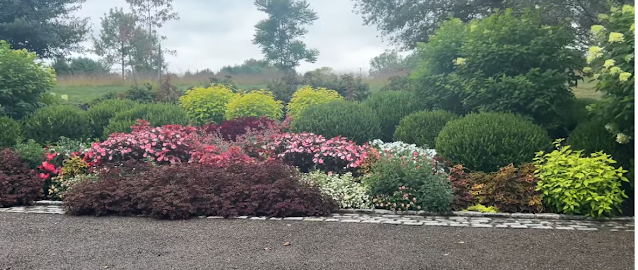
Last Summer (June), I extended and (attempted) to clean up the front edge of our 'front porch bed' along the south property line .  The edge had been creeping 'inward' over the years, so I decided to use a shovel to remove as much of the grass as I could, carve off a clean edge and sort-of 'extend' the swoop of that bed a little bit into the lawn.    If you look back at the photos in this post , you'll see a nice, grass-free edge that I planted with bedding plants ( dwarf, French Marigolds ) and Dusty Millers .   By September, the dwarf (French) Marigolds took off and filled in the new border.  They looked great and were thick/full of oranges, reds and yellows .  Behind those annuals went a colony of Summer Beauty Alliums .  Backed by some small Green Velvet Boxwoods to extend the existing short hedge of boxwoods.   All was good last year.   This year, I've already started to clean up this bed - cutting down grasses and raking out some of the season

Dahlia Tubers @ Home Depot - February 2024

Image
Last year, I started to learn how to put together cuttings from our garden into countertop arrangements .  I made a number of them from late Summer to Fall that were primarily anchored by the Disneyland Floribunda roses.   By the end of the season, I came the conclusion that I needed to get outside of my foliage-gardening 'comfort zone' and start to add some flowers.    On a late-season whim (sale), I planted a few new (to me) flowering perennials including May Night salvia , coneflowers and some Agastache 'Blue Fortune' to the front IB2DWs beds.   I also pulled the trigger on a small dahlia tuber order from Longfield - where I pre-ordered some Melina Fleur (Decorative) and Cornel Bronze (Pompon) tubers .  My (current) plan is to put those in by the Disneyland Roses on the side of the house.    I also bought some Cut-and-Come-Again Zinnia seeds that I'd like to start inside and move to my containers in the back  - to replicate the look of a  combo of Zinnias and E

Piling Excavated Dirt In Garden Beds For Berm - Smothered by Wood Chips - February 2024

Image
This past week saw the start of the excavation for my backyard wood-fired pizza oven .  After going back-and-forth with various versions of math...I settled on some dimensions.  The hole needs to be 90" wide and 98" deep.  That allows for a slab to be poured that is 78" wide and 86" deep.  12" each way to allow for framing, supports and what I'm calling 'wiggle room'.   I opted for the 'on top of the drywell' location ; which means that the excavation is going to be light in some parts (6 inches) and deeper in others (10-12 inches).   That means that I'm going to be removing A LOT of material.  Soil.  Clay.  Probably some rocks.   What do I do with it? What I'd *LIKE* to do with it is to either build a berm in our front yard .  Or...use it to build a waterfall for a backyard pond.   But, I'm not ready for the pond.  And, I'm too chicken to do the berm in front.   Will it look silly?  Will it look sloppy?  Will it look unfinis

Amending Compost Bins With Biosolids - February 2024

Image
Yesterday, I shared a round of photos showing the first (for this growing season) load of municipal biosolids that I added to our perennial garden beds as a topdressing .  The goal is to improve the soil and feed the trees and plants.   I also used these biosolids in a different spot:  as a compost bin amendment.   I've done this in the past - here's a post from March of 2023 - when I dumped some biosolids in as a sort-of accelerant/enhancement to my bins due to them being overloaded with 'browns'.  I thought the biosolids - full of Nitrogen - would help balance out the blend.   Right now, all three of our bins are F-U-L-L.  The clean-up that I did recently of all the ornamental grasses produced an enormous amount of material.  I posted some photos back a couple weeks .    For this round - I added a 5-gallon bucket (filled 2/3rds of the way) into my 'storage bin'.  The one with the "Feed Me" compost bin sign .    Below is a look at that mound of mater

DIY Wood-Fired Pizza Oven Construction - Initial Excavation For Foundation - February 2024

Image
This past weekend, I posted a list of 'early potential priorities' out in the yard and garden for the upcoming 2024 growing season .  That list featured a number of projects/ideas/areas that *could* be something that I'm going to prioritize in 2024.  But, it also featured one item that has certainty when it comes to being a priority:  the backyard wood-fired pizza oven construction. The location/site of the oven has been an open question for me ever since we moved in back in 2017.  I wrote about a couple of final options in the backyard in early January where I narrowed it down to two locations :  built into the berm/closer to the patio vs. down on the drywell, lower-elevation. With the run of warmer temperatures this week, I got out one night after work and just got busy:  digging the foundation.   I went with the drywell location.  Further from the house, but anchoring a secondary, lower-tiered patio.  Below is a look at the site - annotated to show the outline of the fou

Parkway Tulip Tips Shoot Up - February 2024

Image
We've had a VERY mild Winter.  There was a span of about three weeks when it was brutally cold and it seemed like it snowed every.single.day.  But, overall...it was mild.  And that's likely turned a number of gardening variables on their ears.  Emergence.  Bloom time.  Exposure to late Frosts.  And, more, I'm sure. One of the 'mild Winter' related change that I saw VERY early in January was that the tulip bulbs that I had planted around the parkway tree had ALREADY come up, out of the mulch.  By January 5th.   J A N U A R Y. That seems VERY early.  It was BEFORE that three-week spell of 'brutally cold' weather that I mentioned above.  But, tulips being tulips, the foliage didn't mind the weather.  (or...the snow blanket was sufficient insulation.) I'm *very* aware of mulch volcanoes around trees and worry that every year - when we add another layer of mulch - that I'm burying things and creating problems.  Everyone says that you're supposed t

Harbor Freight Cement Mixer - Pizza Oven Construction - Tools - February 2024

Image
After excavation, the first step of building my backyard pizza oven is framing and pouring a solid foundation for the oven to sit-on.  This foundation is going to be a 5.5" thick, reinforced concrete slab.  I've been probing for the boundaries of the in-ground drywell in our backyard ( post with photos here ) and have to decide on final location in the coming weeks.   Once that location is set, I can begin excavation.  Then, my brain will switch to construction material ordering - starting with bags of concrete/cement and concrete block for the foundation. The first consideration in that process is how I'll go about making/mixing the concrete.  One of the recommendations from the builder community on the Forno Bravo forums is to buy a 3.5 cubic foot cement mixer from Harbor Freight.  I went over to the local HF store this past weekend and sized the machine up.  Here, below is a photo of the cement mixer below: Here's the product page - shows the specs and the price : 

Dormant Pruning Crabapple Espalier Trees - Palmette Verrier - February 2024

Image
The pair of SugarTyme Crabapple trees that are planted on the southside of our house - up against the house via esapalier - are now entering their fourth growing season.  Planted in Fall 2021 , they've now been through three Winters and are beginning to be in a position to LOOK more like a tree being espalier'ed.   They flowered in their first Spring (May 2022 ) and I have SLOWLY pruned them into what I *HOPE* will be their final form:  Palmette Verrier Espalier.  That is a form that has horizontal branching that turns UP at the tips with the lowest branching being the longest.  The last time that I worked these trees was May of 2023 when I pruned/wired up the branches .     I've begun to adopt a pattern of dormant pruning on my espaliers including the Greenspire Lindens and these crabapples.   Here, below, is what they look like coming out of Winter.  These were untouched since last May: Below is a closer look at the tree on the left - closer to the back gate: And here, be

An Early Look At Some Potential 2024 Priorities - February 2024

Image
I've organized my approach to the yard and garden season a few ways the past couple of years.  First, I think about some of the potential options for where/how I want to prioritize.  In terms of effort, budget, time and thinking.   Then, I narrow those down to create some focus.  What falls out of those initial priorities is my annual to-do list that helps keep me honest in terms of what I am trying to accomplish.  Last year - I did an early look at some priorities as a way to organize my thoughts .  A few days ago, I marked 20 years of Blogging and in that post, I referenced Paul Graham; and how he has said the act of writing generates ideas.  That's what is at play here.  I need to sketch out an approach and with it, will come some clarity. This is different than my annual to-do list.  Here's last year's scorecard - which is informative in terms of what worked/what didn't work/what's left remaining.  But, this is more about sketching out a list of priorities.

Hitchhiking Vinca With Transplanted Division - February 204

Image
I noticed something new in the middle-back of our backyard:  A small amount of vinca that is evergreen mixed in amongst a bunch of leaves and fall tree litter.  The Vinca stands out because of the color.  But also...because of where it is located.  This is a brand new spot for this invasive groundcover.  See below for a look at the little bit of Vinca that is trying to establish itself:  We have some Vinca that creeps over from our neighbor to the south, but that is growing in a bed that is much closer to the house.  I'm NOT sure what I dug and (likely) divided and transplanted here (most likely a hosta based on what I'm seeing amongst the roots and tips there in the photo).  But, what *is* certain is that some vinca hitchhiked along with it.   Note to self:  stay on top of this.  Dig it up and toss it - if needed.  Don't let Vinca establish here, Jake.

Winter Kitchen Compost Snapshot - Pre-Mixing - February 2024

Image
Two days ago, I posted a photo of a new "Desire Path" in our backyard that appeared during Winter and was a result of walking back-and-forth from our house to our compost bin with our kitchen compost material.   We kept up with composting (thus far) through the cold weather and have been stashing the kitchen scrap material in the new 3rd storage bin.  The one with the "feed me" compost bin sign on it .  I just brought out a load of material and dumped it and thought I should document the state of this bin - pre-mixing this material.  Here, below, is a photo showing the top of the bin.  The bottom 98% of this bin is filled with autumn leaves.  The top 2% that you see here is pretty colorful.  And comprised of vegetables and fruits, cut flowers, egg shells, avocado peels, onion skins, coffee grounds and some spent hydrangea blooms.   The temperatures have STOPPED any decomposition the past 30-or-so-days and kept the colors vibrant.  I've left this material on top

Digging To Find Drywell For Backyard Wood-Fired Oven - January 2024

Image
A few weeks ago, I posted a couple of items related to my 2024 goal of building a wood-fired pizza oven in our backyard including a look at a couple of locations , some brickwork inspiration and how I could build the stand out of cinder blocks - including corners .   With the snow melting away this week, I went out to look at one of the locations and remembered...that ahead of the snow, I was digging around trying to find the 'edges' of the drywell.   Below is a photo showing a number of locations that I dug down to see 'how deep' the drywell is located and how I was probing to find the 'edge' of the well.   The drop from grade to drywell is variable across this six-foot-by-six-foot section.  Surprisingly so.  I also found (I think) two of the 'edges' of the drywell.  Which...if I sited the oven where I *wanted* to, would have a small portion of the foundation OVERHANGING the drywell.  That would mean that I'd have to bring in some gravel - which i

Front Yard Garden Design - Inspiration, Ideas and A Starting Point - January 2024

Image
Beyond the pizza-oven build, my mind has been thinking about the front yard for 2024.  I went ham on the IB2DWs extended bed last Fall with my new conifer garden , but I've been reading and watching things on the Web that have me thinking about the rest of our yard.   If I'm being honest, our front yard isn't bad. Not at all.  It is, however...traditional.  It is what everybody in the suburbs has: a foundation bed with a corner tree and a stretch of front lawn from that bed down to the sidewalk.  Followed by a turf parkway between the sidewalk and street.  Over the years, I've done a few things:  planned for some tree planting .  Tucked a Saratoga Ginkgo , some Stachys Hummelo and Sesleria Greenlees into the small island bed by the driveway.  And extended the front porch bed a bit this past year .   The rest is a blank canvas.   Some of the things that I've come across/influenced me a bit include this piece from Garden Design focused on curb appeal  that talks thr

Lego Model For Wood-Burning Pizza Oven Stand - January 2024

Image
I've been busy getting to know Sketchup - in an attempt to create a true, accurate model of my (hopefully to-be-built-in-2024) backyard wood-fired pizza oven .  But, I also figured out a different, three-dimensional approach that will work (at least for me).  The stand of the oven is built from typical cinder blocks:  16x8x8 (16" long, 8" tall, 8" deep) and half-blocks of 8x8x8 (8" long, 8" tall, 8" deep) that are commonly available from any big-box hardware store.   I was playing around with sketchup one afternoon when I realized that I could build out a model using some common bricks.   I wanted to get a sense for how the stand would come together and also begin to build out a parts-list for the blocks.   I went up to the kids lego bins and quickly figured out how to build this: Part 3001 (2x4 brick)  has 8 studs on top and is the typical rectangle brick that you think of when you think of LEGO bricks.   Using a one-stud for 4" each direction, t