Building a Floating Backyard Boardwalk - July 2023
As far back as Summer of 2017 (the Summer we moved into our house), I've been posting, talking, dreaming and planning for the 'entrance' to our backyard along the northside of our house. This post from July 2017 shows where we started - a small, narrow strip of land between our screened porch and our fence that has a grade down from our house. In the six (yes...SIX) years since then, I've looked at this problem a ton of ways. I've had pros come up with designs. I found inspiration on YouTube that included a waterfall. And, I began to address some of the issues with this spot.
What were those issues?
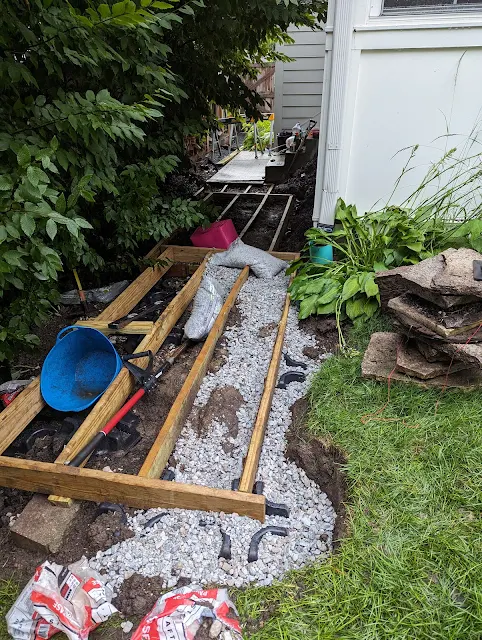
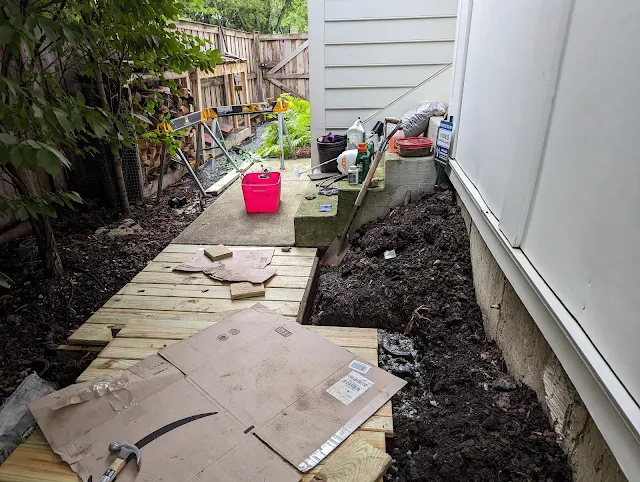
On the higher-side, where the ground was going to come in contact with the boardwalk, I poured in a thick later of gravel to provide that drainage barrier. You can see that in the photo above. I also pounded in a number of 4' 1/2" rebar pieces right up next to the inside of the first joist - to help protect against shifting. Then, as a way of helping 'lock-in' the deck sections, I filled as many of the cavities as I could with gravel to sort of weigh them down.
I opted to go with treated lumber - even though the base line of composite decking wasn't much more cost-wise. I wanted the wood-feel. Below you can see that sort of zig-zag form taking shape.
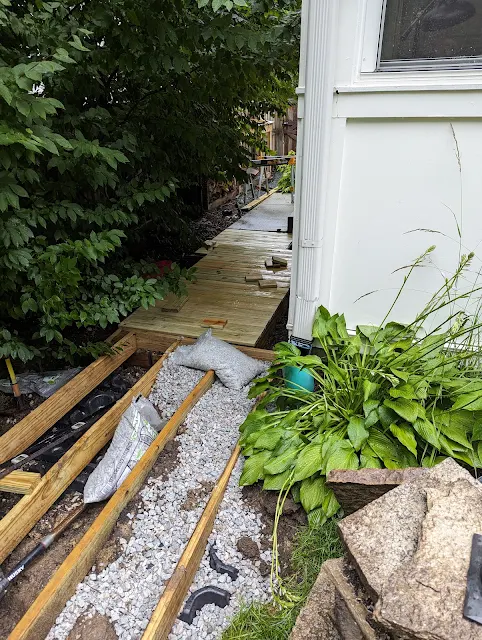
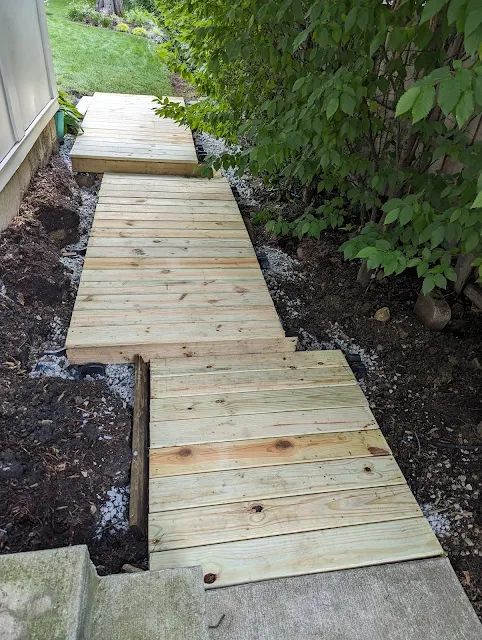
I was able to get the initial section level with the concrete slab - which I though was a nice touch in terms of helping people navigate that transition.


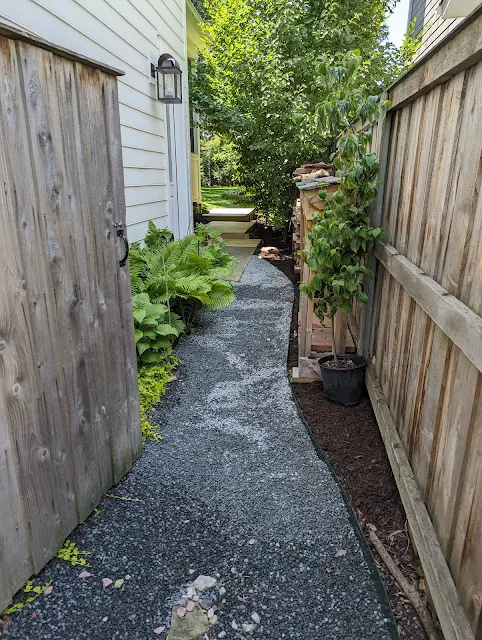
I left some planting beds along the house - you can see those below:
I used this Deck Flashing tape on the top of the joists - who knows if it does anything, but the $30 seemed like an easy investment.


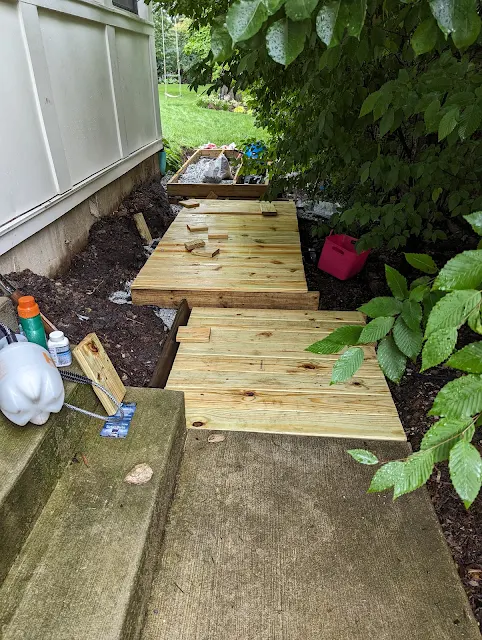
And, below is the final boardwalk. It runs 20' linear feet and is 42-to-45-inches wide.
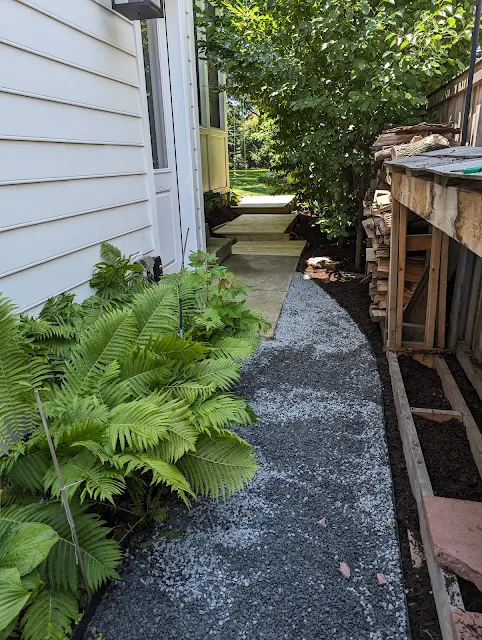
And how does it look from the gate? See below for that mixed-material walkway. Bluestone chip gravel, concrete slab and treated lumber Japanese-inspired boardwalk. I really like it. See below for a little bit of miegakure going on - hide and reveal.
What were those issues?
1. Privacy. We needed to add some screening along this fenceline to make our patio and screened porch usable.
2. Access. Getting from our driveway to our patio has been tough - the grade has been the biggest pain.
3. Size. It is narrow in there.
4. Cost. How can I accomodate the right mix of materials and construction to make the costs work.
Now...over the six years, I haven't just been doing nothing.
I've addressed some of the access and privacy issues. We planted a full hedge of Frans Fontaine European Hornbeam trees. And they've thrived. Planting these trees was the single best decision I have made in our garden.
As for access, in 2021, we took on building out a Bluestone Chip gravel pathway from our driveway to the concrete stoop that is about half-way back. That project solved partial access. But, it left the hardest part - the portion with the grade-change - left unfinished.
For size, the Hornbeams continue to grow, so that meant that size mattered more than ever. I wanted to make sure we were maximizing our walkway for comfort, but NOT hurting those trees.
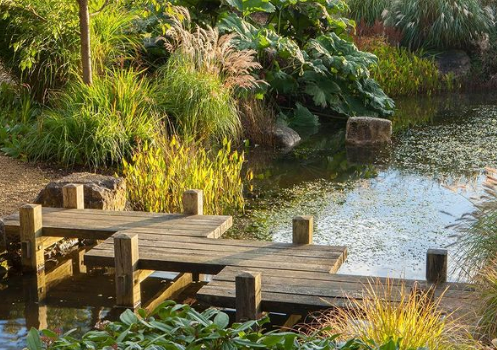
And for cost - I organized my thoughts earlier this March with a post that went through various design concepts. It was then that I first came across the idea of a wooden boardwalk and/or bridge. I filed away this zig-zag bridge/pier design that felt very right - and very Japanese-inspired - to me. See below for a quick peek at that inspiration (source).

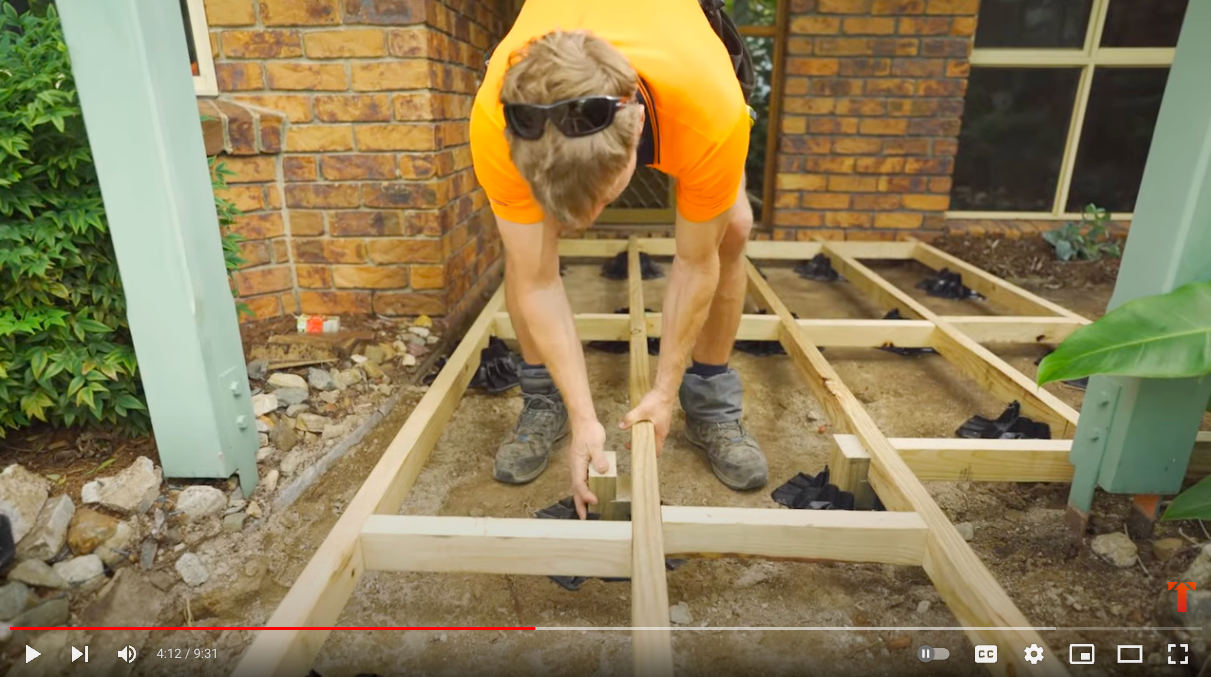
That zig-zag walkway uses piers and as I mentioned above, I wanted to make sure I was 'doing no harm' to the Hornbeam trees, so I wanted to find a different way. That's when I found this video of a floating boardwalk using these plastic piers and started to go deep on the topic. Below are a few screenshots showing their construction techniques - one that I *knew* I could replicate.
 |
| Screenshot - Source is from this video. |
 |
| Another screenshot - Source is from this video. |
I began to dig around and found that there are a few makers of these plastic piers - TuffBlock and CamoBlock. Home Depot ran a sale on Camos in May and I jumped at the discount.
I then shifted into layout/design mode. Turns out, a boardwalk like this is VERY MUCH a 'Build-as-you-go' kind of project.
With some time off from work, I started to excavate to get down to a spot where I could have the initial run of the boardwalk be level with the concrete slab.
I used this how-to from the Family Handyman a little bit and just began the project.
A little bit at a time and pretty soon, I was building my framing and joists. And, after a couple of sessions, I started to get the hang of this. I had to navigate grade change two ways. First...from side-to-side, as the grade dove off from the house foundation down to the property line. And, also...the grade went *up* from the concrete slab stoop on the side of the house back to the backyard.
Using a mix of that zig-zag and the family handyman projects as inspiration, I built out my frame. I created three sections. The first one at 48" long. The next two at 96" long. And stacked each of them on top of each other. So, I gained 11" in height from front to back. I used A LOT of gravel to set the piers. And worked to make everything level. I also added way more piers than necessary - especially along the low-side where I put a pier every 18-or-so inches. I even went in and used some retaining wall blocks in the tighter spots where a CamoBlock pier couldn't fit (due to the width).


#14 on my 2023 to-do list was to pick a project - Orangerie box or boardwalk. I chose Boardwalk and I feel really good about knocking this off my list. It was a big one.


This is exactly what I've been looking for!! Thanks so much for sharing.
ReplyDelete