Posts

Showing posts with the label screened porch

Considering Eze-Breeze Windows For Our Screened Porch
Image
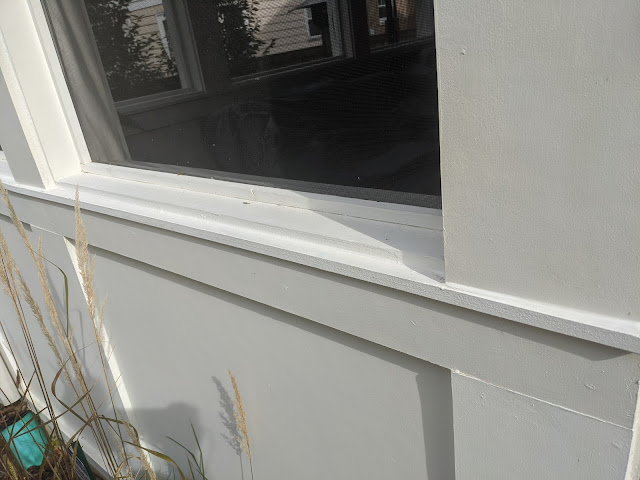
The favorite spot of Natalie each morning during the late Spring, Summer and early Fall is in one place in our house:  our screened porch.  I can find her out there most of the time enjoying a cup of coffee, reading her kindle or sorting through her email. But the season isn't too terribly long.  In fact, it has been more than a month that she's been out there and that's too bad.  However, our neighbors have seemed to solve this and made their screened porch a lot more like a real 3 season room and less like a screened porch. They installed these things called Eze-Breeze windows .  They are these '4 track' windows that are made up of what I'd call something akin to shower curtains.  You can move the panels up and down and have the screens open to the rest of the space.  Here's a shot from the Eze Breeze website that shows how far you can push the windows: These windows really cut down the wind in a big way.  They don't quite seal the whole p
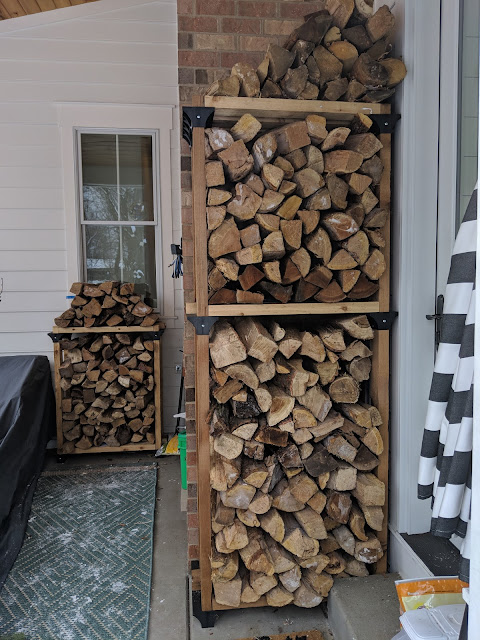
Early February 2019 Firewood Update - Replenished

Image
Just two weeks ago, I shared a photo in my ongoing tracking of our firewood consumption and mentioned that we had mostly exhausted our Fall supply of Cherry and Birch that we had delivered and stacked in our screened porch and side porch.  This photo you see above is from a week or so ago after we had a second, late-Winter delivery of another Facecord of firewood from Best Firewood in Aurora.  This would be the third Facecord of wood that we've worked through since early October.  That's four months - at approximately 1/2 of a Facecord per month.  The supplier that we use has a different type and caliber of wood available in late January/early February vs. what they have in September and October.  So, this order included a wood that we haven't bought before:  Oak.   This is a Facecord that is split 50/50 between Oak and Cherry.  But, the Cherry is *different* than the Cherry we had delivered in October.  If you look at the rack in on the right, you will see the to

Screened Porch Ferns Making A Late Summer Comeback

Image
I planted two different ferns on the northside of our screened porch earlier this Summer.  That post with the full details can be found here in the garden diary .  One of them (Autumn Fern) was planted on the left of this transplanted hosta and one of them (Japanese Painted Fern) was planted on the right.  If you look back at the post when I planted these , the hosta in the middle wasn't there yet and we didn't even have our mulch for the season, so I planted these in some clay. They both immediately sufferend.  Dried out.  Figured they were dead.  Only thing I lost was the two bucks apiece, I figured. Well, on a recent walk around the screened porch, what did I discover?  That both of these ferns have made a comeback of sorts!  They're both green, and have shoots popping through the mulch.  Amazing!  You can see their little beings on the far sides of this photo.  Incredible, right??  Well, maybe not to you, but this is an incredible sight to me.  Hey...thanks, Audr

Work-in-Progress DIY Firewood Rack

Image
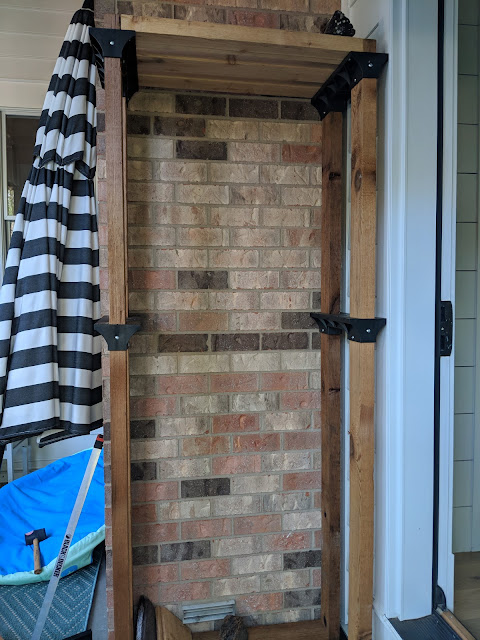
Just a few days back, I posted a link to these DIY firewood rack brackets that Menards was carrying on their site .  I ordered five sets and got busy working with three of them.  Here, above, is a work-in-progress show that shows the position of one of the racks that I'm building.  This one is the one right outside of the family room door and I've built the rack in a vertical orientation.  I ended up using some rough sawn cedar that was left over from my fence installation, but that move caused some issues.  Turns out, rough sawn cedar 2x4's aren't the same size as normal, dimensional construction lumber.  They're a bit bigger.  Not true two inches by four inches, but bigger by just a hair.  Here's the height difference.  On the left is a traditional, Home Depot bought 2x4.  On the right is a rough sawn Cedar 2x4.  And the thickness difference. I first went to Home Depot and the one by us has just an indoor lumber yard, so they have limited su

A DIY (And Custom) Firewood Rack For This Season?

Image
Image of firewood rack via Menards (not my photo above) Last year was our first Winter in our house and was also the first year where we ordered a Face Cord of firewood.  I documented that Face Cord - and the location of the rack - here on the blog .  I set up our only rack in our screened porch, where it was covered and protected from the elements.  But last year we didn't have any furniture in the porch, so it was easy to do.  This year?  Nat has set up the room with a full set of furniture and even an indoor/outdoor rug.  So, that means space is limited inside.  At the same time, I've considered firewood rack options - including posting some inspiration here on the blog .  The placement of the rack has been bouncing around in my brain for the better part of the Summer.  I want to put it in a place that is protected from the elements, but not too far from the door because I know I'll want to walk out there in my house shoes to grab wood for the fire.  Also, I know

(Really) Last Look At Sideyard Locations For Columnar Hornbeams

Image
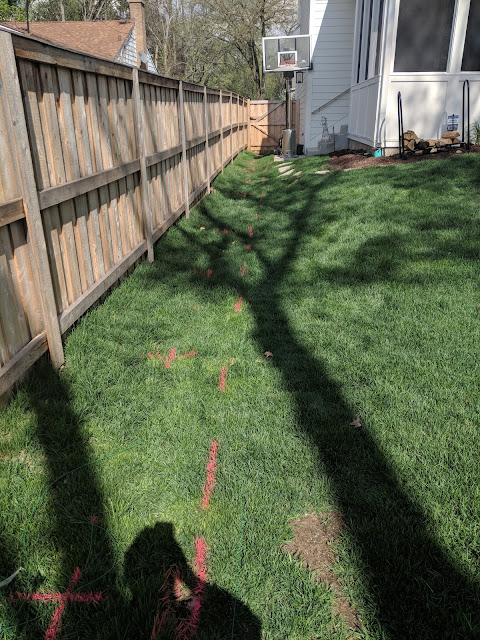
Back at the beginning of April, I posted a photo of the sideyard where we've been planning on putting up a privacy hedge/screen consisting of European Columnar Hornbeam trees.  At the time, I called it a 'last look' at this area, but here we 50 days later and guess what?  Still no trees.  Still no privacy in the screened porch. But that pink paint you see above?  That's a good sign!  The trees are on their way.  Working with Chris Paul of Green Grass Landscaping (did I mention that Chris was the Consul - aka President - of my Fraternity House in College!) just marked out the locations of each of the eight trees that are being installed. The photo above is the one looking east towards the front of our house.  In the top right, you can see our screened porch. The pink x's painted on the grass are where the tree trunks are planned to go:  6 feet apart and 30 inches from the fence.  That will allow them to spread a bit and - over time - become a hedge.  Take

Last Look @ Sideyard Pre-Hornbeam Hedge Installation

Image
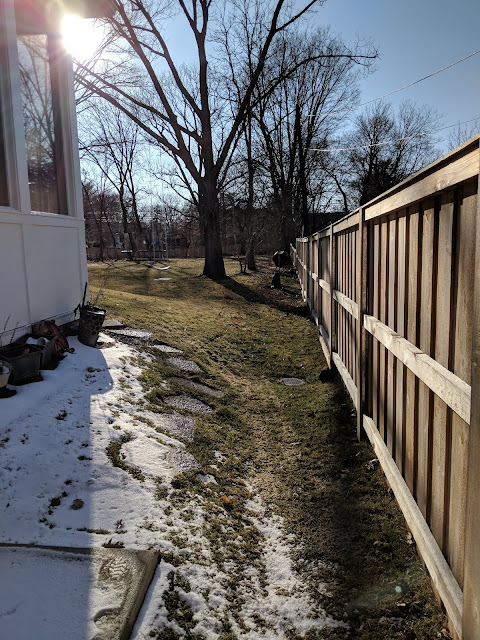
I've posted a few times about our plan to add some European Hornbeams to the side yard alongside of our screened porch to provide some privacy from our neighbor's house.  In the photo above, you see the run of fence that will soon be lined with some 2.5" caliper trees.  You can go back to this post to see the drawing of where they are located , but they're going to cling to the fenceline and, I hope, peek over the top of the fence.  In the photo above, you can also see the grade difference with the porch on the left being a good four or five feet above where the bottom of the fence is located.  Once these trees mature a bit, they'll end up growing into a hedge of sorts ( like this ) and we'll be able to enjoy the screened porch without looking at our neighbors smoking cigarettes on their back stoop.  With April here, I'm just waiting word from the landscaper as to when these trees can be dug up and planted in our yard.  I took this photo a few week

Outdoor Electric Patio Heater. Yea or Nay?

Image
I was perusing the outdoor furniture section of Menards over the weekend and sandwiched in between a pair of these weird Lazy Boy-style chairs (cammo one?  Seriously?) was this electric patio heater from Optimus.  It stands up on pole, has a football-sized heating element and a pretty heavy/sturdy base to (hopefully) avoid tip-overs.   Down near the base of the heater was this product/price detail: And here's the online product listing .  Description reads: Imagine being in your garage, in your four season porch or on your patio and enjoying warmth as the weather turns cold. This Indoor-Outdoor Standing Infrared Patio Heater with Remote Control will do the trick. It is made primarily from steel and functionally rainproof. It’s dominant color is black and the quartz heating elements provide infrared sun-like warmth which does not get blown away by wind, it heats you, not the air. It does not generate UV rays and operates silently. It employs a pull cord manual power switch

First Firing: New Fireplace

Image
We marked the evening fall temperatures lately with the maiden fire in our new fireplace recently.  I posted photos of this fireplace being built earlier on the blog back in March of this year, so you can see the location of this fireplace in that post.  I've posted a bunch of pieces on our various fireplaces over time that you can check out here .   We loved our outdoor fireplace back in Elmhurst - especially during the fall - when we broke out the s'mores, so I'm thinking we'll get a lot of use out of this new one.  Here's a photo from seven years ago showing the kid's cousins toasting their marshmallows .  We didn't do any toasting this time, but there's still plenty of fall left, right?  And in this one?  We have a gas burner, so I don't have to round up kindling and work to get it started each time. 

Masonry Work and Fireplace: Done

Image
A few weeks back, I posted an update about our new place showing the installation of the windows in most* spots (The asterisk is because not all the windows are in...as we're still waiting on a few of the more 'fancy' ones...) and how that felt like real progress.  And there's been even more progress lately including the installation (do you call it that?) of the fireplace and chimney.  This one you see above is in what I think is going to be my favorite spot in the house: our screened porch. You'll note the the cables come out of the center of the masonry work above the fireplace, so one of the first jobs is going to be finding a tv that will work out there and getting it hung.   The room isn't huge, but I'm thinking Nat will do a great job finding the right seating mix where we can hang as a family out there and also where we can entertain folks.  And, frankly, something that I can take a Saturday afternoon nap on while watching some sports... The