Posts

Showing posts with the label workshop

Wood Storage and Clamp Rack of My Dreams

Image
On a Sunday morning recently, Nat packed us all up into the Swagger Wagon and took us out to Homer Glen for a trip to one of her friend's/acquaintance's barn where she was liquidating her inventory of vintage furniture and props and what-have-yous from a cool vintage rentals business .  There was plenty of stuff that Nat was drawn to (glasses, furniture, etc), but the barn and the workshop was what I was mostly drawn to.  Just look at that wood storage above.  Heavy duty racks.  And lots of different lumber types and sizes.  Cool, right? Well, the shop just got better.  First, it was immaculate.  Not a speck of dust around.  And things were organized.  How organized?  Just peep at this clamp rack.  What a show!  Big clamps, little clamps.  A whole bin of clamps! And then there's the *other* lumber storage system.  This one in the bottom floor of the barn.  What kind of man keeps this kind of inventory laying around?  I'll tell you:  a real man. Look at th

Getting Smart About Plywood

Image
With my shop floor done, my attention is now turning to some shop fixtures. And that has lead me down a path of learning all about plywood.  Veneers, cores, grades, types.  All of it.  It is a surprisingly deep rabbit hole to go down . 

Basement Workshop Epoxy Floor Installation - Rocksolid Metallic

Image
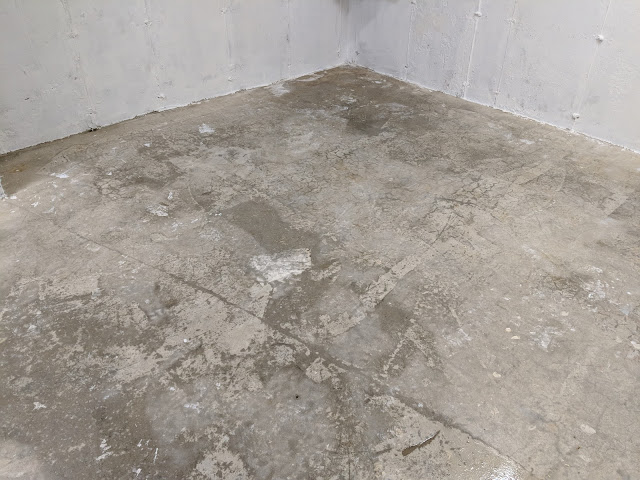
The last time we checked in on my basement workshop was a ll the way back at the beginning of April when I posted about the new wall and sealed, exterior door that were installed , thus, creating the shape of the shop.  Then Spring came and all of my attention and time were focused outside on the garden and yard.  I left the shop empty and forgot all about my plans to finish the floors.   Well, the recent run of super hot weather afforded me the opportunity to get back going on the shop and job #1 was finishing the floors.  I had, on hand, a couple of the Rocksolid Metallic Epoxy floor kits that I bought back in April when I was planning the shop build out.  Inside of each of those kits was a package of 'floor etch', which I got busy with.  Below, in the first photo, is after one round of etching the floor.  I did it 2x - just to be safe.  But, since there isn't a floor drain, I ended up having to saturate the floor (post etch) and then use a scrub brush to pick up mo

Drywall and Door Hung in Basement Workshop

Image
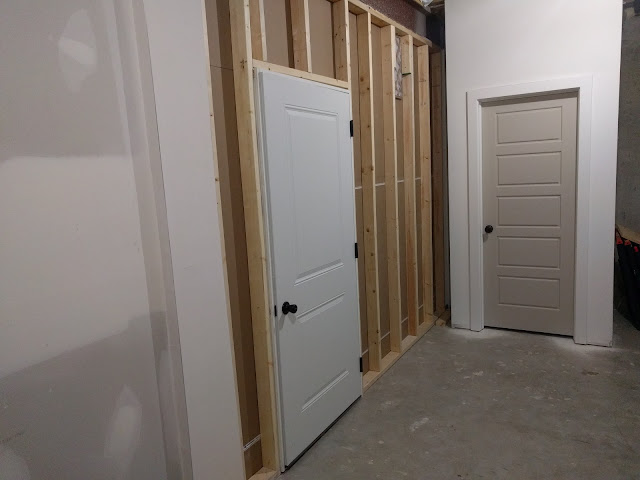
Just a few days ago, I posted about the progress being made in the construction of my #newoldworkshop down in the basement.  I shared a photo of the wall being framed in here .  Today, you can see the door installed and the sheetrock attached to the outside of the framing.  If you look closely, you'll also see the dust vent up near the top of the framing.  The door on the right is the door to our "Christmas Closet" and was already built by our builder's team.  As I mentioned in the post outlining all the 'to do's' for my shop , I used an exterior door with weather seal to keep the dust contained.  I'm also planning on painting the walls in the shop to brighten up the space and lay down some of that epoxy garage floor coating to spif the place up.  And, I've been reading up on dust collection systems including this one from GeekBea t.  I like his ducting/routing/termination system.  But, I'm thinking of going a different route in terms of

Workshop Wall Going In (Basement)

Image
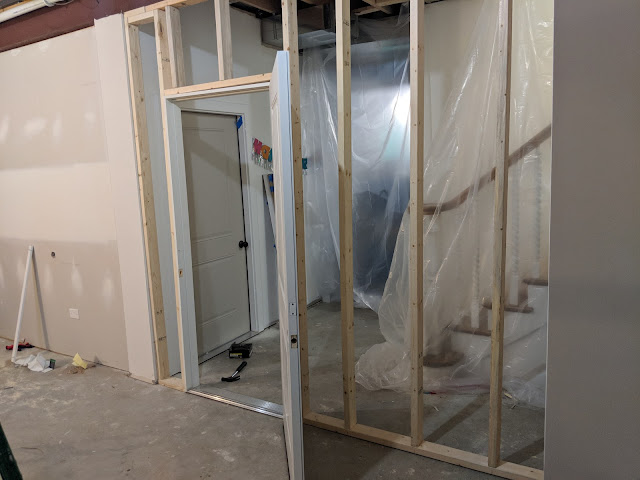
After months of planning and thinking and posting about my eventual workshop, we finally have progress:  the wall that divides the rest of our basement with my shop is getting installed.  In the photo above, you can see the wall being framed and the steel door - an exterior door - installed.  On the right side of the photo - through the framing - you can see the existing stairs and banister coming down from the first floor.  In the middle of the room, you can see an existing door/wall that built out by our builder to contain the mechanical room.  They used a steel, exterior door on the mechanical room, so we replicated that with the door for my shop.  They're going to be so close, so it was important for them to match. Right after the wall framing is done, drywall is going on the outside, but I'm going to leave the inside unfinished.  I'm still planning on cutting in a spot for a vent ( see here for inspiration ) and stuffing the joist cavities with insulation so we ca

Door Acquired for Basement Workshop Project

Image
Some good news here in terms of the basement shop project.  Thanks to the fine folks at Oakley Home Builders ,  I've acquired the door.   The hang up for the entire project was the door and the thing about the door was that I really wanted it to match the existing storage room door that was already in place in the basement.  The storage room door is right at the base of the stairs and my shop is going to be just to the left of it.  The doors to the two rooms are going to be just a few feet apart (but set at 90 degrees), so it seemed important to have the doors match.  I posted back at the end of February about the shop being 'pressurized' and trying to figure out a venting work-around .  And this door is the primary reason.  It is an exterior door that is sealed all the way around.  I wanted to use a sealed door for dust control, but am fearful that if we built the shop too 'tight', it would act like a balloon and make it hard to close the door/blow out part of

Another Wall-Hung Workbench?

Image
Back at the end of January, I posted about this wall-hung workbench and - at the time - commented about how it was quite a 'looker'.  I still like it.  But, somehow, I came across this Instagram post from woodworking_lovers - which I think is a spammy account - that features a twist on the wall-hung workbench.  Spammy post (about starting a business) aside, the bracing that this bench shows off is interesting to me - and maybe just seems a bit stronger/easier to understand how it would work.  The 2x6's that are angled from the top to the wall are notched to rest on the wall cleat.  Visually, it makes sense to me why it would support the weight.  Maybe there's a way to marry the two ideas?  This one for the super-structure.  Then wrapped in the curves from the original to cover up the structure? 

Air Filter and Vent For Home Basement Shop

Image
As I've posted about here on the blog, I'm working on my home shop.  It is going in the basement and may or may not have a window and a wall-hung bench .  I'm planning on closing up all the available space with a wall and door, but also planning on filling the joist space above the wall to ensure that the dust from the shop stays in the shop and doesn't carry out into the rest of the basement space. One concern about that is pressure.  Meaning, if I stuff the joist cavaties and seal the door with an external steel door, it is going to be a pressurized space.  The walls will be like a balloon everytime I close/open the door. When I was on the train home one afternoon recently, I saw this air filter/vent in the stairwell coming down on the Metra cars and it gave me an idea.  What about making something like this on the inside of the wall:  a spot where I can place an air filter.  And on the outside - drywall side - of the new wall, I cut a whole for one of these v

I've Taken the Sortimo Plunge

Image
Thanks to my brother-in-law, I've now stuck my toe into the Sortimo universe with my first T-boxx for storage of fasteners and other small parts.  My interest in them came about due to a confluence of events:  the whole [contractors of instagram] thing that is happening with all those guys in love with their Festool systems and says along with this video showing Adam Savage's shop and the glory of his Sortimo setup. I started with a sorting container, but they make entire systems both for mobile uses (in vans) but also shops and include sorting containers but also tool containers.  I think the next step in my plans for Sortimo is likely the  WorkMo 24-500 T-BOXX Ready rack that holds up to 4 T-BOXXes. Here's the handle on the T-BOXXes with the Sortimo branding: This leads me down a path towards carrying an inventory of fasteners in my shop - now that I have a good place to keep them.  I'll likely start with a screw and bolt/washer/nut inventory and grow

A Multimeter - Workshop Addition

Image
My father-in-law gifted me this Sears Craftsman 8-function Multimeter for Christmas and I've just gotten around to unboxing it and finding it's permanent home in my shop.  I wasn't quite sure what to do with a multimeter (or multi-meter as it is sometimes spelled), but Nat's Dad also sent along with CNET piece that explains all that this tool can do .   Here's the list: 1.  Test batteries 2.  Check extension cords 3.  Determine the life of lightbulbs 4.  Identify the 'hot' wire 5.  Find bad switches So...turns out, it wasn't all bird stuff at Christmas this year, right?!?

Windows into My Shop/Laboratory?

Image
That photo you see above is from the Polite Pig down at Disney Springs .  It is basically a window'd box that has inside a butcher's counter, supplies, and at least one big smoker where they smoke many of their fine meats.  And....let me tell you...they have very fine meats. I had the brisket sandwich that was served with pimento cheese spread and crispy onions.   Anyway, the windows.  Yeah...they've put this window setup right in the queue where patrons line up to order their food.  It is kind of a show kitchen of sorts.  At the time we were there, there wasn't anyone working in there, but I can imagine a cast member/chef cutting up brisket or pulling pork or what-have-you in there.   For a long time, I've been fascinated with these windows into workspaces.  You see them a lot in restaurants, but you also see them on cooking shows or science shows.  Where they have a 'lab' next to/adjacent to the stage that sort of serves as a visual cue that

Wall-Hung Workbench - Quite a Looker!

Image
I came across this wall-hung workbench on the Wood Archivist and it stopped me in my tracks. I posted last week on my link blog the minute I saw it .  I was/am smitten.  I didn't want to lose the link.  Just look at it - she's a beaut, right?  Those curves. The built in lighting.  The fact that it doesn't hog floorspace?  The built-in dust collection system? All of it.  Awesome.  The full plans (or call it an article showing some of the steps and the cutlist) are here .  My shop right now is just a 'space', but that is ending soon.  Have plans to add a wall and a door to define the space.  Then, the first step is to finish my miter saw table.  After that, I'm going to turn my attention to a few benches. I currently have a bench that is satisfactory, but needs an upgrade.    I posted about the first (and existing) bench here on the blog back in 2010 .  Still looks the same.  Functional, but kinda basic.   I also need a secondary table for some other bench

Ready to Cut With The Rockwell Sonicrafter 4.2 Amp F80

Image
I've had one of these Rockwell Sonicrafters for a number of years and I've found it pretty useful from time-to-time.  It isn't something that I pull out every time I tackle a project, but have been a specific set of applications that required *just* this tool.  This year at Christmas, I was upgraded to the new version of the F80 that has 4.2 Amps and comes with this nifty hard-sided case.  My original one came in a cloth carrying bag and I pushed it to it's max, so this upgraded version is a welcome addition to my shop lineup. You might be wondering...what do you do with an oscillating tool?  Welp, the fine folks at Rockwell have created this handy list of 10 things you can do with a Sonicrafter . The F80 comes with a nice light to shine on your project and has two 'degrees' - meaning one setting is a narrow oscillation and the other is a wider oscillation.  Also, note... this is a corded tool.  But, it is a 10 foot cord, so you get some pretty good rea

Miter Saw Table - Progress Step 2

Image
Yesterday, I posted a photo of the set of legs that I had built that were the beginning of my new miter saw station .  Today, you can see the two frames that I built that will go on top/in the middle of those set-ups.  The leaner one on the left is the one that will go on the bottom and be the bottom 'shelf' and the wider one on the right will be the shelf that the bottom of the saw sits on top of.  There's another layer/level of platform that will sit at the very top that will be even with the table that is at the top of the saw.  Each of these were spec'd to be put together with pocket screws, so I went ahead and followed those directions.  You can see the pocket screw holes below: Let's call this step 2:  the bases are built out. 

Miter Saw Table - Progress Step 1

Image
This winter break, I've embarked on a few projects to get my shop up and running in the new house.  The first project is a mitre saw stand.  I figure that if I get my saw up off the floor onto a stand, I can then begin to make a few other tables/benches to host the other tools and what-have-yous that I've collected over the years.  I have two Christmas's worth of tools to unpack and set up and actually use. I'm using this plan from the Home Depot with a few modifications including the addition of this Kreg Precision Trak and Stop Kit , so that will require me to use a thicker fence than what is spec'd in the plans.  I also think I'm going to add a dust shroud and dust collection near the end.  But, the first few steps in the plans - which focus on the legs and the base pieces, I'm going straight by the plans.  In the photo above, you can see the four legs that I put together with 2x4's and a 2x6.  The plans call pocket screws, so that's what I

Boston Pencil Sharpener - Found At Estate Sale

Image
Yesterday, we swung by an Estate Sale near the old hospital in our neighborhood.  After walking around the first floor and nosing around the basement and garage, we didn't find much that we liked.  As we were walking out, I spotted this Boston wall-mounted pencil sharpener.  I asked the homeowner if it was for sale and after considering it, she said it was. After locating a screw driver and giving her a buck, I pryed this thing off the wall and took it home. It really reminds me of my dad.  Growing up, we had one of these things mounted on the wall in his work room in the basement.  Doing math homework always required pencils and we didn't have the luxury of having mechanical pencils back in 1988.  So, everytime I needed a sharp point, down I went to the basement to sharpen up. At some point, when the Babe and the Bird head to school, they'll be using pencils.  Instead of a fancy electric sharpener, they're going to have to do what I did:  go downstairs and grin

Manly Hobbies

Image
While it appears I'm safely in the "manly" category on some of my hobbies like gardening and woodworking, it seems that " collecting Christmas Village buildings " and " baking breads from sourdough starter " both fall somewhere off the "Official Manly Hobbies List" .   

2010 Christmas Haul, Part 2: The JawHorse

Image
It wasn't all fun and trains at Christmas this year, as I was quite the lucky guy!  My in-laws gifted me a JawHorse.   Talk about an awesome gift!   On occasion, I've borrowed my father-in-laws JawHorse to build various things like our deck.  This is a perfect addition to my workshop in the basement.  Don't know what a JawHorse is? Not to make this a total commercial, but.....It is a portable workstation/clamping tool that does just about anything.   It holds boards, doors, projects and with the extension that they got me, even a full 4X8 sheet of plywood.  That's pretty rad. But...the real key is that this thing allows someone to work by themselves.  This thing is basically another "set of hands".  No more relying on others to help hold boards when I'm cutting, the JawHorse does that for me. Those of you who've tried to build something solo, you know how difficult it can be.  Just "holding" the end of a board while you cut is a task th

Penny Hockey Board - Dimensions and Progress

Image
Having been through the prototyping process on Penny Hockey Boards , I made a few modifications.  First, they shrunk in size considerably.  From 12" wide and 16" long down to 12" long and 8.5" wide.  After the side rails are attached, the playing surface will be 12" long, 8" wide.    The name of the game is also being changed from Penny Hockey to Topper Hockey (more on that later....). Also, because the board shrunk, the space behind the goal also was squeezed.  It started at 2.5" from backline to center of the goal and now with the production units, I've cut that distance in half. The final change comes in regards to the pegs - I've changed the configuration a bit and removed some.  The "guard" pegs - which are located just outside the goal mouth were widened, and one of them were removed.   The peg modifications were made to simplify and enhance gameplay.  My intended audience is my nephews who are all under the age of 10.  Scori

36" Black and Decker Accu-Mark Level with Gecko Grip: Perfect for Hanging Pictures

Image
I mentioned earlier in the year that we received a really nice wood carving for our home from my future-brother-in-law Bill as a Christmas/Wedding present.  Since December 25th, it has had a nice home leaning against the wall on top of our piano.  Nat was getting tired of it not being hung.  I was getting tired of not being hung.  The issue was that on the back, Bill had sunk in two fixed heavy-duty hangers.  The type that you have to put two screws in the wall then try to "hit" the hole on the back.  There wasn't a wire to hang this thing from, so I first considered stringing one of those. Nat's folks were over this weekend and I mentioned to them that I thought that's how I was going to hang it.  However, her mother reminded me that they bought me a level for Christmas last year (2008) that was made for this task:  The 36" Black and Decker Accu-Mark Level with Gecko Grip! The level is, indeed, made for hanging things on the wall.  First, it has this gr