Posts

Showing posts with the label diy projects

New Compost Bin Sign: Feed Me - December 2023

Image
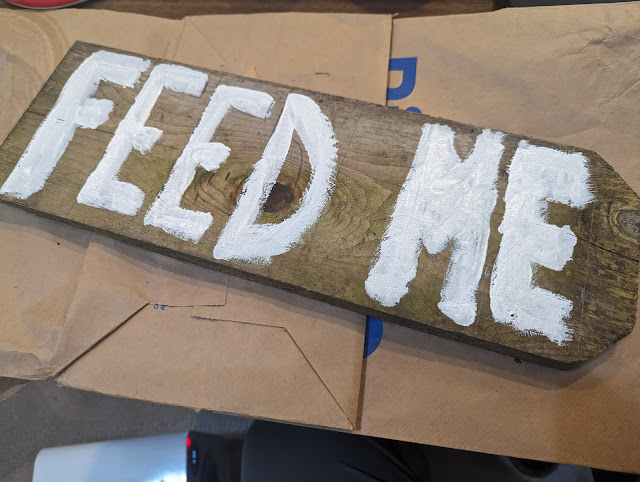
It was just a few days back that I mused about adding a little personality to our garden via the addition of a way-finding sign on our compost bins .  I was seeing that various users from our house (ahem aheam...the kids) were dumping our kitchen waste in the bin that I was viewing as 'cooking' instead of the storage (not properly mixed bin) that I can get to over time.   I posted about the signage because I wanted to remind myself to make one this Spring.  But, I found myself with a tiny bit of time and decided to just jump on it right now.  This *is* 2024, right?  At least in terms of gardening seasons, I'm call it 2024. I had some cut-offs of cedar pickets that I used for a different project laying around, so I grabbed one of them and some paint.  I painted the words "Feed Me" on the board in white.  Outlined in a navy blue.  Then, spray a topcoat (clear) on top of the paint in an attempt at making the sign lasting just.a.little.bit.longer than it would normall

Bleached Pinecones - Winter Arrangements - December 2023

Image
On my winter evergreen arrangement-making journey this year, I also added a new side-project:  bleaching pinecones.  I've shown a few of my arrangements - including the original and some V2's and all of them featured a number of foraged pinecones.  Some of them were on the tips of the pine branches and others were tucked in with a piece of wire.   When we were last up in Wisconsin, I picked up a few pinecones that were on the driveway.  They were dropped by the upright pine trees.  Here's what they look like pre-bleaching: One-way-or-the-other, I came across the idea of bleaching pinecones as a winter project.  There are dozens of how-to articles like this one that show you the very simple process:  find acorns, put them in a bowl that contains a water and bleach mixture, and weigh them down so they don't float.   That's what I did:  I tucked two into a bleach and water bath overnight.  15-or-so hours later, I pulled them out.  They need a half-day or so to dry o

2023 Yard and Garden To-Do List Late-Summer Check-in - September 2023

Image
My 2023 yard and garden to-do list had 25 items on it and with most 1 of the growing season behind us, I thought it would be helpful (for me!) to do a mid-season check-in.  How am I doing against my priorities?  What do I need to do before the season ends?  Let's run through the list and see how we're doing: 1.  Evergreens.  I wanted to plant more evergreens.  I've planted 19 evergreens so far this season:  five Boxwoods in front, a Columnar Scotch Pine tree in back and now 13 more Boxwoods in back.  I also transplanted a large Boxwood from the front-to-back.  So..20 evergreens including one transplant.  I'd say... Done .  2.  IB2DW Extension.   I wanted to extend the bed and add 'clustered evergreens' along with other things like grasses and annuals.  I haven't added anything, but I did amend the soil with biosolids and carved out some turf to extend the bed a little bit.  I'd say this is: Incomplete.   3.  Front porch bed.   I amended the bed with

Teal Oil for Teak Patio Table - Summer 2023

Image
It isn't the patio container box ( which...is #23 on my 2023 to-do list) , but it *is* something:  I applied a coat of Teak Oil to our patio table.  The top is, indeed, teak.  And, after a few passes with a sander, I was able to get down to some nice, clean teak.  And the top soaked the oil right up.   Is it a seasonal project?  Sort-of?  I'm going to count it on my 2023 to-do list check-in, for sure.

Backyard Retractable Hose Reel Mounted to 6x6 Post - May 2023

Image
Beginning in Spring 2022, I have talked about installing a second yard hydrant in our backyard featuring a self-rewinding hose reel.  I included it on my 2022 to-do list and failed to install the post and reel in 2022.   I carried that task over to our 2023 list and put it at #5:  install a second hose reel .  I had the hose reel for more than a year, so it was simply a matter of installing the post to hold the reel. This is the third of these reels that I have at the house - the first one is in the garage .  The second one is about half-way back attached to our fence .  This third one is planned for close to the spigot.  I have historically used a loose hose to water the patio containers.  I thought this upgrade would keep things a bit more tidy.   Ahead of digging the hole, I called J.U.L.I.E. and had them mark any underground utilities.  In the photo below, you can see the red line for electrical underground.  And the orange stake is where I wanted to dig the post.  All clear.  I c

DIY Walnut Stain - Refinement for Next Season - February 2022

Image
Last Fall and this past Winter, I made my first batch of Black Walnut stain using found walnuts in my backyard .  I made a slurry and let it stand for a few months, then bottled it up with a 1:1 ratio of filtered slurry : rubbing alcohol .  I gave away a couple of pints of the stuff to family and one of my brother-in-laws gave me some feedback:  See below. Note to future Jake:  Collect and use more walnuts and reduce the rubbing alcohol by 50%.  Use 2:1 walnut slurry:rubbing alcohol this time. Something else to add to my 2022 to-do-list .

Mounting Another Staghorn Fern - Pine Board and Moss - February 2022

Image
This is now - unofficially - Staghorn Fern Week - on in my garden diary.  This is the third post in as many days about Staghorn Ferns starting with my first post about bringing home a small 4" Staghorn Fern that the kids and I mounted on a pine board .  Then, yesterday I posted a little story about how I found four 6" - and more mature - Staghorn Ferns at Home Depot and decided I was going to make up a few mounted ferns for Valentine's Day this year.  In that first post, I showed a little look into how we (the kids and I) put together the first mounted fern.  Here, below, is a closer look (with more photos) of how I put together one of these larger Staghorn Ferns using the same process.   I started this larger, more mature Staghorn with the same size board, but I used a larger bowl to make a slightly larger circle.  Below, you can see the circle I drew in pencil along with the 1-1/4 narrow-threaded drywall screws that I put around the circumference of the circle.  I used

Black Walnut Stain DIY Finishing Process - January 2022

Image
Back in November, I posted a couple of photos and talked about the process of turning a collection of Black Walnuts into a homemade 1 scratchmade wood stain.  In that post , I laid out the steps from collecting the walnuts to bottling the stain - and about midway is where we pick things up in this post.  Six weeks of macerating in the five gallon bucket with a little bit of evaporation ended up yielding about 3 gallons or so of material.  A quick stir with a stick every once in a while and I had a thick, black syrup.  Along with a mass of walnut hulls and bits. I grabbed a piece of cheesecloth that Nat had on hand and a couple of rubber bands and donned a set of disposable gloves.  Knowing this is, indeed, stain, I opted to deal with the process out in the yard.  You can see the setup below.  The five-gallon bucket on the right, topped with cheesecloth strainer.  A smaller, one gallon finish bucket in the middle and a couple of pints of rubbing alcohol (91%) to thin the syrup out.  I

DIY Black Walnut Stain Process and Timing - November 2021

Image
In our backyard, we have a couple of large, mature Black Walnut trees .  Three large ones inside our property line and a massive one just behind our fence in an easement.  They were here when we arrived and they'll be here after we leave.  Each Fall, they drop walnuts.  A.LOT.OF.WALNUTS.  This presents quite a feast to the critters around our yard as they peel them open, scatter the husks and try to get to the nut.  The squirrels - in particular - seem quite fond of these black walnuts.  They're called Black Walnuts, but when they drop they're actually green . Now, if you go read on the Web, you'll find that many people talk about how Walnut trees produce something called juglone , which *could* cause injury to other plants, vegetables and some trees and shrubs. I say COULD because it seems that it is a commonly accepted notion by many, but there's still some dispute about whether the damage is true . One thing *is* clear: the trees, do, indeed produce juglone. 

Juniper in a Wooden Tree Box - DIY Project Idea

Image
I have an idea for a garden-related project that has been knocking around my head for a number of years.  Well...there are tons of those kind of projects, frankly.  But, for this post, I'm talking about one of them specifically.  This one...involves trees.  And...I haven't moved on it - for a variety of reasons including shifting priorities, lack of need, the right nursery stock and the opportunity.   It starts with this post about Hollywood Junipers in 2018 where I posted a photo of a tree in a wooden box for a container .  And, was likely rekindled during one of my trips to Tokyo where I saw all sorts of container'd conifers.  Like this one from House of Bonsai below: Via House of Bonsai . This is not my photo. And, even more recently, I came across a couple of striking conifer trees by the bus stops down at Disney Springs.  They were relatively new (newly planted) and still had their tags on them. Here's a shot of them below: And, below, is a look at the tag reveali

Another Firewood Rack Built - Firepit Area - Spring 2021

Image
Last Summer, I built a few firewood racks in our yard based on scrap wood that I scavenged from our neighbor's dumpster.  I put two of them next to the house and loaded them with bought firewood .  And, I built an additional one back by where our fire pit is located and loaded it with scavenged Ash firewood .  Last Fall, I also acquired even more firewood from a neighbor and ended up stacking that on a couple of two-by-fours with the hope of being able to process it this Spring.   With my brand new battery-powered chainsaw ( gloves here) , I began to cut down SOME of the larger pieces to get em into a spot where I can process the rounds.  That started, but I didn't get it all done.   As part of my Spring-time " order of operations " list, we're going to be expanding our beds.  In order to do that properly, I needed to move that existing pile of Ash rounds to a new spot.  Hence, the creation of a new firewood rack.  I built this one out of leftover lumber that I

A Staghorn Fern - Our Indoor Container Garden - March 2021

Image
If you ask me what my favorite plant type is, I'll answer by talking about ferns.  They're my favorite plant type to grow.  When I talk about ferns, I mostly talk about my love for outdoor, perennial ferns.  Ostrich Ferns were my gateway drug .  We have others, now.  Like Japanese Painted ferns .  A Lady Fern that I planted last year .  And a big, happy unknown cultivar "teardown" fern deep in the yard .  We plant Foxtail ferns what seems like every year. Nat also keeps a big Boston (I think) fern on our front porch during the Summer and we've tried to overwinter it upstairs.  It has lost a LOT of leaves/fronds, but there's still a lot of green, so maybe it will come thru. I also added an indoor fern this Winter when I bought my first Maidenhair Fern .  What is supposed to be a finicky fern has - so far at least - been ok for me. I keep it pretty well watered and thus far, it hasn't shown much stress.   But, for a few years now, there's been another ty

Outdoor Bonsai Table (DIY Idea)

Image
Back in February, when I was at the end of the line in terms of wanting to deal with snow, I posted something that amounted to a bonsai wish list (or to-do list) for the season.  It was a way to get my brain thinking about what the Spring and Summer will look like and a coping mechanism after all the snow.  (Listen...I'm not normally someone who hates Winter.  But, February...and ALL.THE.SNOW was, umm, a bit much.) So, out of that post , I mentioned that I wanted to do a few things including utilizing the existing nursery stock that I have on hand, acquire more for future use, dig up a 'found' bonsai (American Elm), take a bonsai class and...create a bench or table for the trees.   I've looked around (briefly) on the Web to figure out the right way to display bonsai and it seems like if you are interested in learning more about the topic, stop number one on your journey should be this Bonsai Empire post that talks how to display trees and gives some tips.  They also sh

Cherry Pits - DIY Holiday Projects On The Horizon - 2020

Image
 Nobody:  what are you going to do with all your quarantine time when the weather gets cold? Me:  Have I shown you our forty pound bag of dried cherry pits? Back a few years when it seemed like I had more time, I would often try to DIY some of our holiday gifts.  Seems like we might have more of that, ummm, time this year.  And cherry pits are a key part of our strategy.  More to come when we get things set up and ready.

Pizza Oven Planning - Foundation And Our Drywell

Image
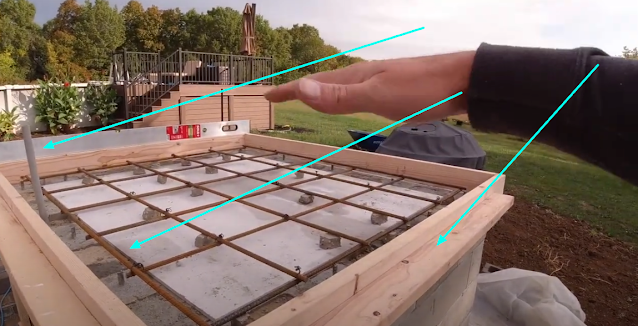
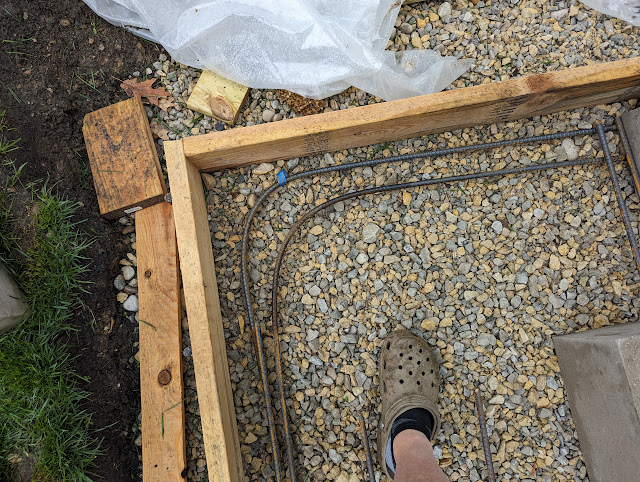
Over the past few years, I've dreamed about building a backyard pizza oven - both in our old house in Elmhurst and here in Downers. I've posted a few times on the potential location(s) on the blog. Here back in 2017 . And, here again earlier this year and most recently just last month when I was talking about a pond. In each of those explorations, I've included a location of the pizza oven that is along the north side of our property, off of our patio, down in a lower level of our patio. As I continue to think about the location - and I'm increasingly thinking that the northside site - that is situated down low - is the right spot.  It is low-lying, so the fireplace won't be sticking up for all of the neighbors to see - and to expose to the elements.   I've read the Forno Bravo DIY installation instructions like six times and lurked all over the forums over the years.  One of the pieces of counsel that they give is that if you live in an area of

DIY Firewood Rack for Backyard - Filled with Ash and Hackberry - August 2020

Image
A few days ago, I showed off some photos of a firewood rack that I built from scrap lumber in anticipation of our annual Fall firewood order .  In that post , I mentioned that I had some additional scrap lumber around (some treated, some not) around to build a few more racks.  This post, shows at the top another rack that I built from the same basic plans.  The photo above, shows this second DIY firewood rack that I built and placed along the fence in the far back part of our yard.  It is holding just about a face cord of mostly Ash and a little bit of Hackberry/Osage Orange firewood that I acquired form next door in December of 2019 .  I started processing the rounds and by March of this year, had the wood stacked on itself along the fence.  You can see that firewood stack in the post here .  It was fine.  But, it was mostly laying on the ground and I thought I could do better.  So, I took the lumber and got started.  The bottom ledge in this version is large - a 2x10 and I had e

New DIY Firewood Rack with Roof - Built August 2020

Image
A couple of years ago, I built a pair of custom-sized firewood racks that I keep in our screened porch .  They're made of Cedar 2x4's (larger than what you find at a Big Box store) and between the two cedar racks, we store a lot of our firewood inside the screened porch during the Winter.  I have another metal rack that I keep outside my office door and between those three racks, I can usually handle the two face cords of firewood that we order each early Fall/Late Summer.  You can see what two face cords of firewood look like in this post from last Fall .  We filled all three racks and had to pile or stack wood up both in the screened porch AND next to the metal rack.  So, we're already in a position to not have enough space for just two face cords. But, there's a theory going around - and seems to be manifesting itself in the southern hemisphere right now - that there will be a firewood shortage this Winter.  With COVID still here (hi there, pandemic), it would