Posts

Showing posts with the label diy

Changing A Capacitor On Our Air Conditioner - Summer 2024

Image
I *constantly* wonder how bad YouTube is for my kids.  All the time.  They watch - who knows what - on there and while we try to limit what they can/should be watching, there's something VERY STRONG about the draw of YouTube.  But...I'm also keenly aware how wonderful it is.  My most recent example:  I researched, learned and then....was able to buy and change the capacitor on one of our air conditioners.  Part cost $20.  Estimate from HVAC guy?  $350.   My time - about an hour on YouTube.  Then, more time assembly the tools to do the job than actually doing the job.  Now that I've done it, I have a (new) skill - understanding how the most-frequently-bad part on an air conditioner can be replaced.  

DIY Pizza Oven Floor Template-Making - July 2024

Image
Last week, I showed the final form of the raised hearth - after I stripped the concrete-pouring forms from the four sides and talked about how I can now move-on to actual oven building.    For me, that started with creating a template out of Masonite.  I bought an 8x4' sheet and created a little circle-drawing jig that I cabbage'd together out of spare parts I had on hand.  The sheet is just 48" wide and after thinking about it, I've decided to make a 40" oven (interior diameter), which means the outside footprint diameter is 49".  That meant that I'm going to be a half-inch shy on either side.  That's ok.   I also needed to figure out where the dome meets the inner arch.  I started by attaching the circle-drawing-jig to the center of the board and drew out a 40" and 49" circle.  Then, I started to think about my arch sizes and how the inner/outer arch differ.  I chose to go with a 20-1/8th" inner arch width.   That meant that I could

Pizza Oven Hearth Concrete Pour - Wood-Fired Oven - June 2024

Image
Yesterday, I showed how I built a platform for the Mudmixer in order to pour the raised hearth in our backyard wood-fired oven stand construction project.  Today, we show the details of the actual pour.  Using the Mudmixer and 35-or-so 60# bags of 4K PSI concrete mix, I was able to complete the job in just about an hour of run-time.  I spent quite a bit of time trying to make sure the forms were level and square and using a mix of sand (to fill cores), caulk and backer rod, I filled as many of the gaps in the forms as I could to keep the slab from leaking too much. The good news - the forms held.  They didn't bow.  And...they didn't leak that much.  Same with the supports under the Densshield boards.  Below are a few photos showing the raised, reinforced hearth pour.  The first one shows the platform and the poured hearth: Below, you can see the drain pipes that were able to sit right at the surface of the hearth: Below are a couple of shots showing how snug the Mudmixer was to

Rebar Installed for Pizza Oven Hearth - June 2024

Image
The last I posted about my DIY backyard wood-fired pizza oven, I shared how I made and mounted the forms for the reinforced hearth on top of my cinder block stand.  With the forms set-up and square (and level), I began to finalize the rebar setup.  I ran a couple of rows around the flow-thru bond beam blocks that made-up the top row of the stand.  Before doing the rest of the rebar, I laid down a couple pieces of vapor barrier on TOP of the tile backer board segments.  Once in place, I ran vertical rebar up the filled cores from the foundation slab, through the block stand and out the top.   I tied a grid of 1/2" rebar together and spanned the hearth with seven pieces each direction.   I used zip ties to tie them together and some block fragments to elevate the center part of the grid.  On the edges, I tied this rebar grid directly to the vertical posts.   Once that was done with the rebar, I cut up some one-foot segments of 1/2" pvc and drilled holes through the tile backer

DIY Pizza Oven Foundation Slab Pour - May 2024

Image
After bending and installing the rebar, reinforcing grid and vapor barrier , it was now time to pour the foundation slab for our diy backyard wood-fired pizza oven.   As I posted about last week, I shrunk the foundation slab down to be 72" wide and 80" front-to-back.  It is 5.5" thick (2x6's for concrete forms).   This is sitting on top of six inches of 1/2" compacted gravel and a 48" deep of large rock drywell.   I used an online concrete estimating calculator tool and when you put those dimensions in, it says that I needed 42 60# bags.    I have to pour two slabs - this foundation slab and then, once I build the stand, an insulated hearth.  Each approximately the same size.   When adding those two up, I ordered 85 60# bags and had them delivered.  I opted for 4000 PSI concrete - as a little bit of an upgrade over the baseline concrete. Knowing that the labor involved in this pour is in two parts, I opted to split them up:  first...hauling the concrete

River Rock Added to Pizza Oven Sub-Surface for Drainage - March 2024

Image
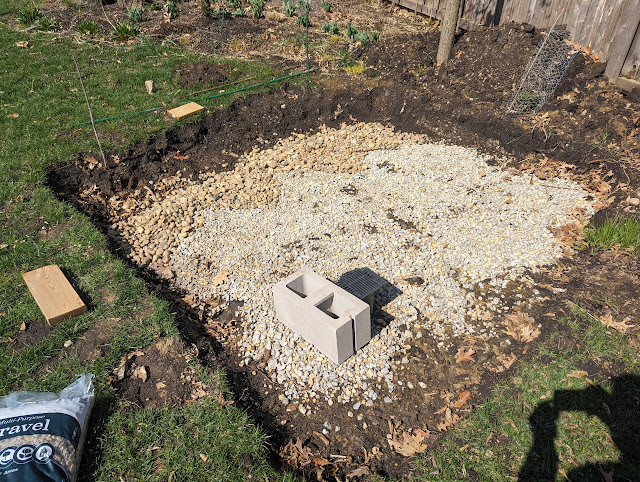
I last added ten (10) bags of gravel to the excavated wood-fired pizza oven construction site to begin to level the area.  As a reminder, this is being built on-top of our drywell, so this gravel layer is an extra insurance policy for drainage below the slab in hopes of avoiding heaving.  When I added the ten bags, I noted that I thought I'd need another round of gravel to finish the project.  Before heading to the store, I eye-balled the site and decided that I needed a bit more material on the western edge of the site.  Thanks to a sale, I decided to add six (6) bags of River Rock to that side.  Thinking that the larger size of the rocks would fill in the deeper portion of the dig - that part is going to *mostly* be outside the footprint of the foundation.   Here's the site after six bags of river rock added to the left side (note the different color): Below is the Menards item # for the River Rock - 180-2006.  Normally priced $3.49 per bag, it was on sale for $2.24.   I'

Adding Gravel to Pizza Oven Foundation Prep - Backyard Wood-Fired Oven - March 2024

Image
The last progress-report on our backyard pizza oven was earlier in March when I showed the cut-down concrete slab framing pieces (2x6's) that I cut to the final dimension s (Slab: 78" wide, 86" deep. 6.5' wide, 7'2" deep. Stand: 72 wide, 80 deep - 4.5 blocks wide, 5 blocks deep).  In that post, I talked about the next step is to fill the excavated cavity with gravel ahead of the rest of the slab prep. I went over to Menards and picked up 10 0.5 cubic foot bags of their multi-purpose gravel.  Each bag is supposed to cover about six square feet.  I wasn't sure how far these ten bags would go, but I figured that was about the limit that I wanted to push my car weight-wise.   I brought the ten bags home and hauled them (one-by-one) to the site and piled them up: Opening each bag and spreading it out, I quickly discovered that I was FAR short of the amount of gravel that I REALLY needed to complete the project.  Below, is what the site looks like after ten ha

Backyard DIY Pizza Oven Construction - Slab Framing - March 2023

Image
Over the weekend, I went out and picked up four 2x6x8 boards and brought them home to begin to figure out if I've done enough excavation for our wood-fired pizza oven project.  I've been using a tape measure to figure out how much I needed to remove and if my dig was large enough to support the slab framing - along with the necessary bracing.  But, that's an imperfect science, so I decided to just go out and cut the lumber down to the final dimensions and place them in the hole to see - without guessing - if I've excavated enough. As a reminder - mostly to myself - my final dimensions are based on 8x8x16 construction blocks:  Slab: 78" wide, 86" deep. 6.5' wide, 7'2" deep). Stand: 72 wide, 80 deep (4.5 blocks wide, 5 blocks deep) Leaving reveal of 6" total both dimensions. 3" all ways. This allows for 2" face brick and a 1" reveal. I cut the two side pieces of the frame to be 86" and the front/back to be 81" (to acco

Harbor Freight Cement Mixer - Pizza Oven Construction - Tools - February 2024

Image
After excavation, the first step of building my backyard pizza oven is framing and pouring a solid foundation for the oven to sit-on.  This foundation is going to be a 5.5" thick, reinforced concrete slab.  I've been probing for the boundaries of the in-ground drywell in our backyard ( post with photos here ) and have to decide on final location in the coming weeks.   Once that location is set, I can begin excavation.  Then, my brain will switch to construction material ordering - starting with bags of concrete/cement and concrete block for the foundation. The first consideration in that process is how I'll go about making/mixing the concrete.  One of the recommendations from the builder community on the Forno Bravo forums is to buy a 3.5 cubic foot cement mixer from Harbor Freight.  I went over to the local HF store this past weekend and sized the machine up.  Here, below is a photo of the cement mixer below: Here's the product page - shows the specs and the price : 

Digging To Find Drywell For Backyard Wood-Fired Oven - January 2024

Image
A few weeks ago, I posted a couple of items related to my 2024 goal of building a wood-fired pizza oven in our backyard including a look at a couple of locations , some brickwork inspiration and how I could build the stand out of cinder blocks - including corners .   With the snow melting away this week, I went out to look at one of the locations and remembered...that ahead of the snow, I was digging around trying to find the 'edges' of the drywell.   Below is a photo showing a number of locations that I dug down to see 'how deep' the drywell is located and how I was probing to find the 'edge' of the well.   The drop from grade to drywell is variable across this six-foot-by-six-foot section.  Surprisingly so.  I also found (I think) two of the 'edges' of the drywell.  Which...if I sited the oven where I *wanted* to, would have a small portion of the foundation OVERHANGING the drywell.  That would mean that I'd have to bring in some gravel - which i

Building a Floating Backyard Boardwalk - July 2023

Image
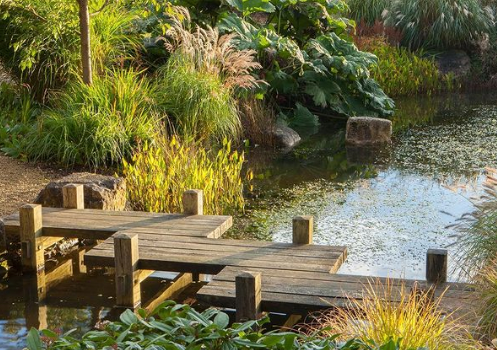
As far back as Summer of 2017 (the Summer we moved into our house), I've been posting, talking, dreaming and planning for the 'entrance' to our backyard along the northside of our house.  This post from July 2017 shows where we started - a small, narrow strip of land between our screened porch and our fence that has a grade down from our house .    In the six (yes...SIX) years since then, I've looked at this problem a ton of ways.  I've had pros come up with designs .  I found inspiration on YouTube that included a waterfall .   And, I began to address some of the issues with this spot.   What were those issues? 1.  Privacy.  We needed to add some screening along this fenceline to make our patio and screened porch usable. 2.  Access.  Getting from our driveway to our patio has been tough - the grade has been the biggest pain. 3.  Size.  It is narrow in there.  4.  Cost.  How can I accomodate the right mix of materials and construction to make the costs work. Now...

Cherry Pits - DIY Holiday Projects On The Horizon - 2020

Image
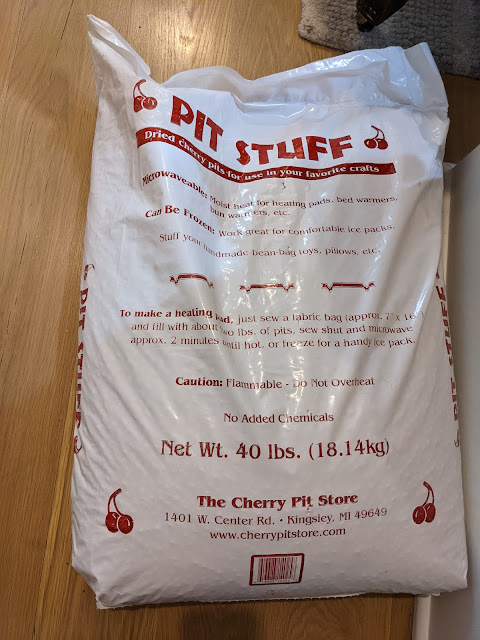
 Nobody:  what are you going to do with all your quarantine time when the weather gets cold? Me:  Have I shown you our forty pound bag of dried cherry pits? Back a few years when it seemed like I had more time, I would often try to DIY some of our holiday gifts.  Seems like we might have more of that, ummm, time this year.  And cherry pits are a key part of our strategy.  More to come when we get things set up and ready.

DIY Beginnings: Disney Parks Tinkerbell Lights via 258 Flasher Bulbs

Image
When we first went to the Magic Kingdom when the Babe was very young, I remember being struck by these twinkling lights that they had in the park.  At one point, they had a bunch of trees in the 'hub' - that have all been removed so people can view the castle/projection show.  On *those* trees were these twinkling lights that they turned on at dusk. I can't find a video of *those* lights, but I do have this one of what I think are the same lights up at Downtown Disney. Those lights give off a little bit of a firefly vibe and are what I remember. And, it isn't just *me* who remembers the lights, as if you put in the phrase [twinkle lights disney trees], you'll see dozens of forum posts all about buying or replicating those lights.  I've spent the past few months wading through them and I think I've come up with an approach that I'm going to attempt to DIY here at home. First, the bulbs and the fixtures. Again...based on wading through the

Summer Project: Outdoor Chair "Desk" Build

Image
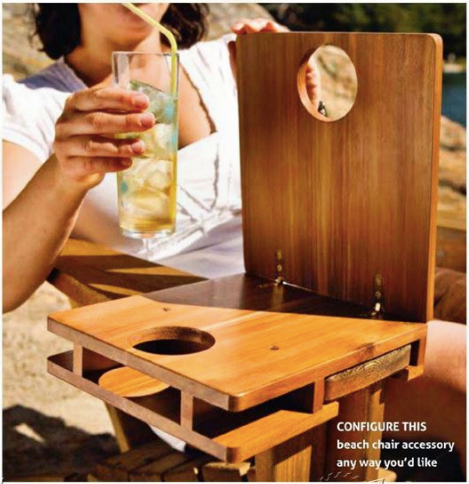
Right at the end of last year, I posted a photo of a Wave Hill Garden chair and talked about how I was struck by the design of the chair - and the fact that it wasn't a traditional adirondack chair that you see everywhere.  We had spent some time in Luxembourg Gardens in Paris last year and fell in love with lots of things - including their chairs - and have been thinking about how I bring a chair or two to our backyard and garden.  The Wave Hill chair seemed to scratch me right where I itch. A gardener named Dan Benarcik has developed plans for the chair and is selling them for $35 (the updated plan version) on his site . I put the idea of creating a chair like this on my 2020 Gardening To-Do List .  #11 on the list is to 'build something' like these chairs (or a raised bed).  I haven't sprung for the plans (yet), but I've been nosing around the Web for some additional inspiration.  I came across this post on Reddit that featured a photo of a modified Wave