Posts

Showing posts with the label edging

Front Porch Bed - Drainage and Turf Issues - March 2024

Image
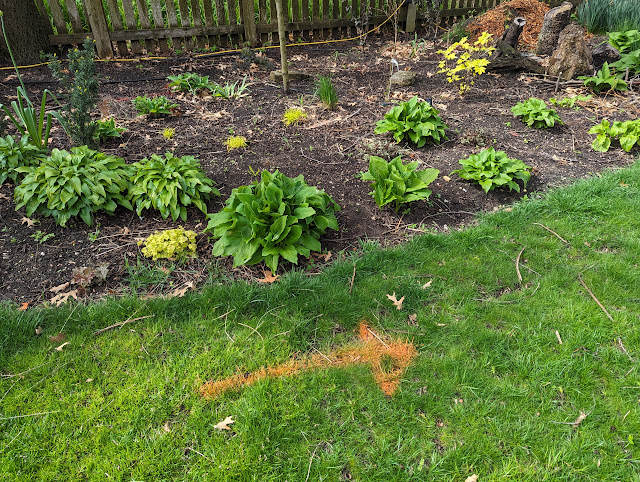
Last Summer (June), I extended and (attempted) to clean up the front edge of our 'front porch bed' along the south property line .  The edge had been creeping 'inward' over the years, so I decided to use a shovel to remove as much of the grass as I could, carve off a clean edge and sort-of 'extend' the swoop of that bed a little bit into the lawn.    If you look back at the photos in this post , you'll see a nice, grass-free edge that I planted with bedding plants ( dwarf, French Marigolds ) and Dusty Millers .   By September, the dwarf (French) Marigolds took off and filled in the new border.  They looked great and were thick/full of oranges, reds and yellows .  Behind those annuals went a colony of Summer Beauty Alliums .  Backed by some small Green Velvet Boxwoods to extend the existing short hedge of boxwoods.   All was good last year.   This year, I've already started to clean up this bed - cutting down grasses and raking out some of the season

Natural Edge Dug For Front Porch Bed - June 2023

Image
On Monday, I posted about adding a series of perennials to our front porch beds - including Autumn Moor Grasses and eight Summer Beauty Alliums that are in front of some small Green Velvet Boxwoods (that I planted last month).   As I was planting those, I realized that the edge of the bed has crept-in and I needed to cut the grass that had been growing in there - out.   I've been thinking about the extension of the curved portion of the bed (where the Norway Maple tree *was* and have been musing about how to use some dry-stacked stone there and/or how the bed can be extended down the property line to (eventually) connect with the small, circular bed around the Saucer Magnolia.   But, for now....I decided to just simply clean the bed edge up and extend it out - just a little bit.  Here, below, is the 'after' - a natural edge like this makes the bed look that much more polished.  That (above) is the after.  Here, below is the 'before'.  Quite a change, right?  The Fr

Garden Bed Edging Inspiration: Boulders To Divide Bed From Neighbor

Image
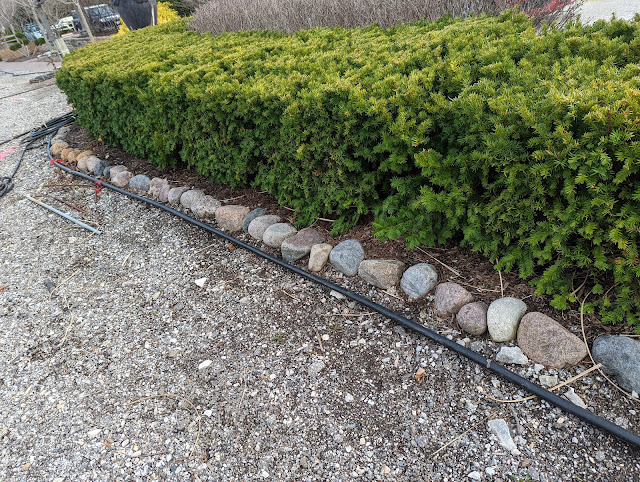
We have a bed that lives *right* on the property line in the IB2DWs area that has never had a real, proper edge other than the one that we dug with a spade.  The issue is that there's a little bit of elevation change - by design - between the two properties.  My plan for this season is to make that bed feel a little bit MORE finished by removing some sod, shaping the bed a little bit and edging it along the property line in some way.  This bed runs up against a tiny strip of grass next to my neighbor's driveway, so I'd like SOMETHING to keep the mulch from running/floating over onto their driveway. I've thought about using the green metal edging that I used for our gravel paths.  But, Nat doesn't love it.  She wants something that works with the existing gravel, so I decided to start to keep my eyes open for edging that works to divide mulch beds from gravel and hard surfaces.  It wasn't long until I saw something like this below: And, then...something similar l

Backyard Curvilinear Landscape Beds - Cut into Final Form - April 2021

Image
Here I was...thinking I'm writing a post that is going to knock a HUGE item off my 2021 to-do list in the yard.  But, when I went to go look up what number "cutting new, larger curvilinear beds" was on the list...imagine my disappointment that it isn't one of the 25 things.  Womp, womp.   But, it is still a big deal for me and a big milestone for the yard.   First, a review of a few things:  Starting with curvilinear bed design .  I covered where I wanted to go with our bed layout and how we had a bunch of "little" curves/bumps in our current beds - while the ideal state is very few, larger, swooping edges.  As Sue from Not Another Gardening Blog pointed out, these big, swooping curves are hard to pull off . I went through three colors of spray paint trying to get the curves right.  And, I think I got them like 90% there - with just a little bit of cleanup having to come in the next few seasons.   Second:  a note about the "order of operations" I

Order of Operations - Spring Beds, Transplants, Locations and Mulch

Image
Yesterday, I shared a post talking about the concept of creating curvilinear flower beds in landscape design and how one of my initial backyard projects is to move towards a final shape with our beds.  That requires us to carve up a bunch of the current lawn and creating new beds that jut out into the grass.  But, before I can even begin to think about how to make those swoop'ing, curved beds, there is some thinking that I have to do in in order to get both ready for the days of sod removal AND what has to happen AFTER the creation of the new beds to get them ready and dressed for the season.   To arrange my thinking - and to pressure test on what I want to do - I thought I'd create an individual (for me) order of operations document that details the steps in the order I need to take in order to make this all work.  So, let's go. 1.  Remove our Automower wire.   Around the entire perimeter of our backyard, we have a low-voltage green wire buried about 3" or so from th

Found Paver Walkway - Behind Yew Hedge - July 2020

Image
We have an easement behind our property that buffers us from the neighbors to the West.  In that easement we keep our 3-bin compost setup and left most of the rest of it to 'go natural'.  The easement runs the entire block and connects the big pond on the south of our neighborhood to territories to the north, so we've seen critters of all types using the easement to navigate. Recently, our neighbors to the West decided to clean up the easement - and it seems that the folks that they hired to clean the place up also worked our side.  They removed a lot of Buckthorn, trimmed up some of the more valuable trees (think Maples and Walnuts) and picked up a bunch of debris that has appeared over the years. They also uncovered a bunch of stones and pavers.  And, (lucky for us) stacked a whole bunch of them up right outside our fence gate.  There are flagstones of various sizes, but also five round pavers and eight square pavers.  These have 'pebbles' embedded in the

Edging for Backyard Path - Brick or Metal or Natural

Image
Post where I initially pondered walking path edging On my post yesterday where I scored my yard/garden activity for the year , I included some initial thoughts about what I am thinking about doing next year.  On that list was to build the first section of the backyard 'path'.  I mentioned that I also need to figure out the edging - because what I start with is what I'll end up using going forward. I recently saw this photo from Laura at Garden Answer where she was sharing the beds out front of her chicken coop and was drawn to the brick edging that she's using. View this post on Instagram Chicken coop area is all cleaned up! Next thing to do is add some greenhouse plastic to the top and sides of their run to give them a warmer, dry place to move around for the winter! It’s going to look so classy... 😆🤦‍♀️ Oh well, happy chickens are more important! A post shared by Garden Answer (@gardenanswer) on Oct