Posts

Showing posts with the label 2024 priority

2024 Yard and Garden To-Do List

Image
  The season is here. The Yard and Garden Season, that is. Each Spring arrives and I’m OVERWHELMED by what I need to do, should do, have to do, might do in and around our garden. The arrival of trees, shrubs, perennials and annuals at the big box stores and nurseries just add to the strong urge to GET GOING out there. But, over the years, I’ve learned that I need to prioritize. And plan. And give myself something to measure-up against, so I know that I’ve accomplished what I thought I needed to focus on each season. The first year I did one was 2019 and I've done one every year. Here is 2020 .  2021 .  2022 .  And last year - 2023 .  Each year, I score myself against the 25 items that I picked out.  Last year, in addition to scoring (22 out of 25 marked 'complete' ), I also wrote up a list of 10 takeaways/lessons learned that have become important in thinking about my path forward.  In that list of 10 takeaways, I included things like:  no...
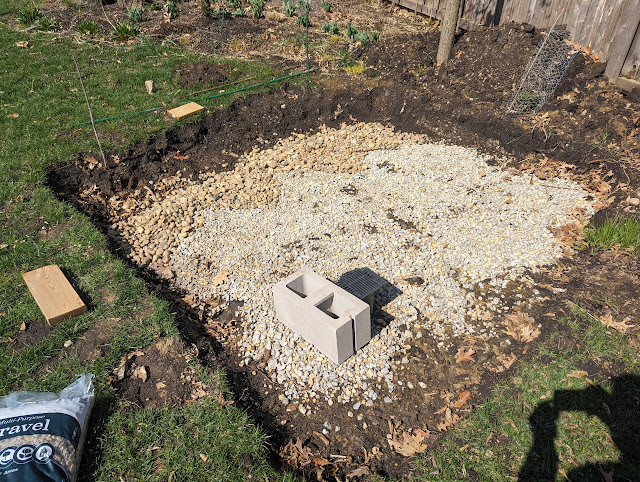
River Rock Added to Pizza Oven Sub-Surface for Drainage - March 2024

Image
I last added ten (10) bags of gravel to the excavated wood-fired pizza oven construction site to begin to level the area.  As a reminder, this is being built on-top of our drywell, so this gravel layer is an extra insurance policy for drainage below the slab in hopes of avoiding heaving.  When I added the ten bags, I noted that I thought I'd need another round of gravel to finish the project.  Before heading to the store, I eye-balled the site and decided that I needed a bit more material on the western edge of the site.  Thanks to a sale, I decided to add six (6) bags of River Rock to that side.  Thinking that the larger size of the rocks would fill in the deeper portion of the dig - that part is going to *mostly* be outside the footprint of the foundation.   Here's the site after six bags of river rock added to the left side (note the different color): Below is the Menards item # for the River Rock - 180-2006.  Normally priced $3.49 per bag, it ...

Ground Prep For Sinking Gravel Walkway - March 2024

Image
This past Winter, I identified that we were experiencing some 'sinking' in the gravel walkway on the side of our house .  I put it together using Bluestone Chips and some metal edging, but starting last year, I noticed that the 'level' of gravel seemed to be going DOWN with time.  Looking back, when I installed the path in 2021, I went pretty 'thin' with the Bluestone chips on the path - because I used MOST of them back by the firepit.   Last Summer, I made a couple of trips to the landscape supply yard and brought home 50 gallons of stone that I applied to the firepit area and the side path.  I thought that'd be enough to raise the level of the stone.  But, alas...it still felt like it was sinking. So, fixing this 'sinking' gravel on the path is something I want to take-on in 2024.  I even included it in my 'early look' at 2024 projects .    There are a number of (potential) methods that one could use to try to keep the gravel from sinking ...

Orange Nugget Dahlia Tubers - March 2024

Image
2024 is the year when I need to continue to remind myself to get more comfortable with flowers.  By that, I mean...I'm a gardener.  But, I'm a foliage gardener.  Because of my full-shade backyard, I've opted for focusing on foliage gardens - ferns, astilbes, shrubs, trees.   Last Fall, I bought a couple of late-season flowering perennials and decided that I needed to do more - specifically in the new IB2DWs (extended) bed that is a conifer garden.  At the end of last growing season (2023), I ran through my normal 'to-do list' grades, but I also wrote up some 'lessons learned' that included 10 things that I wanted to keep in mind including #6 :   6. Flowers continue to be a little bit outside my comfort zone. Change that. I started this Fall, but plenty more room to grow/go. Countertop arrangements need flowers. Try some dahlias, too. I've started down that path - at least in theory.   Back in December, I ordered some Dahlia tubers ...

Adding Gravel to Pizza Oven Foundation Prep - Backyard Wood-Fired Oven - March 2024

Image
The last progress-report on our backyard pizza oven was earlier in March when I showed the cut-down concrete slab framing pieces (2x6's) that I cut to the final dimension s (Slab: 78" wide, 86" deep. 6.5' wide, 7'2" deep. Stand: 72 wide, 80 deep - 4.5 blocks wide, 5 blocks deep).  In that post, I talked about the next step is to fill the excavated cavity with gravel ahead of the rest of the slab prep. I went over to Menards and picked up 10 0.5 cubic foot bags of their multi-purpose gravel.  Each bag is supposed to cover about six square feet.  I wasn't sure how far these ten bags would go, but I figured that was about the limit that I wanted to push my car weight-wise.   I brought the ten bags home and hauled them (one-by-one) to the site and piled them up: Opening each bag and spreading it out, I quickly discovered that I was FAR short of the amount of gravel that I REALLY needed to complete the project.  Below, is what the site looks like after ten ha...

Front Porch Bed - Cardboard to Smother Grass + Top Soil + Biosolids - March 2024

Image
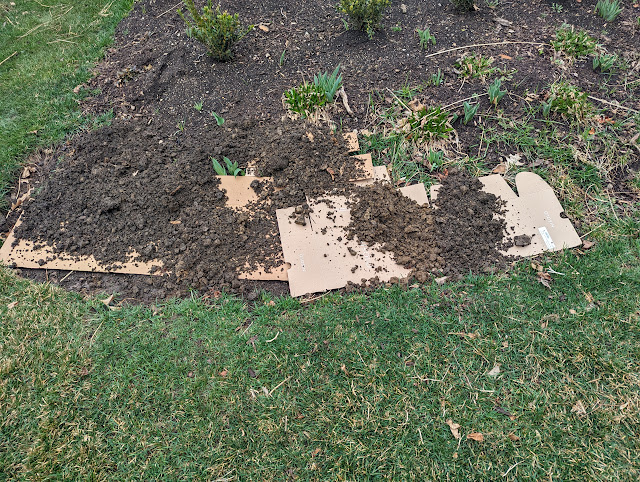
Just a week ago, I spotted some issues in the corner of our front porch bed .  It is a low-spot and because of that was taking on some water from the downspouts.  But, the front part of that bed was also showing some signs of turf coming back.  This was a small extension that I carved out of the lawn last year.  And...it turns out...I must not have pulled out/dug out all of the turf.   I decided to kill-two-birds in this project.  (Well...half of a project since I didn't have enough materials to finish it.) First, I laid down some cardboard to smother the grass.  I cut holes for the handful of tulips in the area, then spread out some thick, unpainted cardboard on top of the turf.  I then went back to the pile of topsoil and clay that I excavated from the Pizza Oven foundation and spread that on top of the cardboard.   I started by the property-line edge and went north.  Below are a few photos showing the progress - first with ...

Front Porch Bed - Drainage and Turf Issues - March 2024

Image
Last Summer (June), I extended and (attempted) to clean up the front edge of our 'front porch bed' along the south property line .  The edge had been creeping 'inward' over the years, so I decided to use a shovel to remove as much of the grass as I could, carve off a clean edge and sort-of 'extend' the swoop of that bed a little bit into the lawn.    If you look back at the photos in this post , you'll see a nice, grass-free edge that I planted with bedding plants ( dwarf, French Marigolds ) and Dusty Millers .   By September, the dwarf (French) Marigolds took off and filled in the new border.  They looked great and were thick/full of oranges, reds and yellows .  Behind those annuals went a colony of Summer Beauty Alliums .  Backed by some small Green Velvet Boxwoods to extend the existing short hedge of boxwoods.   All was good last year.   This year, I've already started to clean up this bed - cutting down grasses and rakin...

Backyard DIY Pizza Oven Construction - Slab Framing - March 2023

Image
Over the weekend, I went out and picked up four 2x6x8 boards and brought them home to begin to figure out if I've done enough excavation for our wood-fired pizza oven project.  I've been using a tape measure to figure out how much I needed to remove and if my dig was large enough to support the slab framing - along with the necessary bracing.  But, that's an imperfect science, so I decided to just go out and cut the lumber down to the final dimensions and place them in the hole to see - without guessing - if I've excavated enough. As a reminder - mostly to myself - my final dimensions are based on 8x8x16 construction blocks:  Slab: 78" wide, 86" deep. 6.5' wide, 7'2" deep). Stand: 72 wide, 80 deep (4.5 blocks wide, 5 blocks deep) Leaving reveal of 6" total both dimensions. 3" all ways. This allows for 2" face brick and a 1" reveal. I cut the two side pieces of the frame to be 86" and the front/back to be 81" (to acco...

Dahlia Tubers @ Home Depot - February 2024

Image
Last year, I started to learn how to put together cuttings from our garden into countertop arrangements .  I made a number of them from late Summer to Fall that were primarily anchored by the Disneyland Floribunda roses.   By the end of the season, I came the conclusion that I needed to get outside of my foliage-gardening 'comfort zone' and start to add some flowers.    On a late-season whim (sale), I planted a few new (to me) flowering perennials including May Night salvia , coneflowers and some Agastache 'Blue Fortune' to the front IB2DWs beds.   I also pulled the trigger on a small dahlia tuber order from Longfield - where I pre-ordered some Melina Fleur (Decorative) and Cornel Bronze (Pompon) tubers .  My (current) plan is to put those in by the Disneyland Roses on the side of the house.    I also bought some Cut-and-Come-Again Zinnia seeds that I'd like to start inside and move to my containers in the back  - to replicate the...

Piling Excavated Dirt In Garden Beds For Berm - Smothered by Wood Chips - February 2024

Image
This past week saw the start of the excavation for my backyard wood-fired pizza oven .  After going back-and-forth with various versions of math...I settled on some dimensions.  The hole needs to be 90" wide and 98" deep.  That allows for a slab to be poured that is 78" wide and 86" deep.  12" each way to allow for framing, supports and what I'm calling 'wiggle room'.   I opted for the 'on top of the drywell' location ; which means that the excavation is going to be light in some parts (6 inches) and deeper in others (10-12 inches).   That means that I'm going to be removing A LOT of material.  Soil.  Clay.  Probably some rocks.   What do I do with it? What I'd *LIKE* to do with it is to either build a berm in our front yard .  Or...use it to build a waterfall for a backyard pond.   But, I'm not ready for the pond.  And, I'm too chicken to do the berm in front.   Will it look silly?  Will...

DIY Wood-Fired Pizza Oven Construction - Initial Excavation For Foundation - February 2024

Image
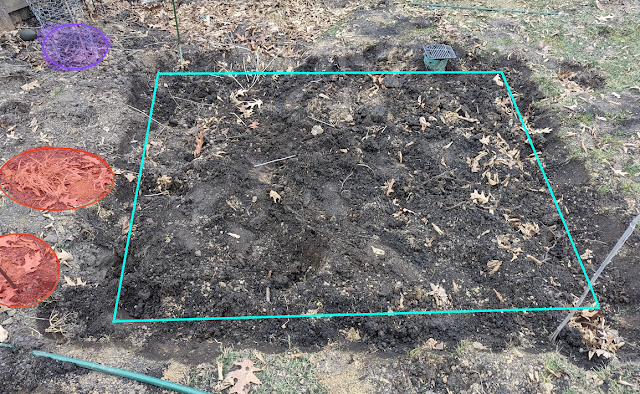
This past weekend, I posted a list of 'early potential priorities' out in the yard and garden for the upcoming 2024 growing season .  That list featured a number of projects/ideas/areas that *could* be something that I'm going to prioritize in 2024.  But, it also featured one item that has certainty when it comes to being a priority:  the backyard wood-fired pizza oven construction. The location/site of the oven has been an open question for me ever since we moved in back in 2017.  I wrote about a couple of final options in the backyard in early January where I narrowed it down to two locations :  built into the berm/closer to the patio vs. down on the drywell, lower-elevation. With the run of warmer temperatures this week, I got out one night after work and just got busy:  digging the foundation.   I went with the drywell location.  Further from the house, but anchoring a secondary, lower-tiered patio.  Below is a look at the site - ann...

Harbor Freight Cement Mixer - Pizza Oven Construction - Tools - February 2024

Image
After excavation, the first step of building my backyard pizza oven is framing and pouring a solid foundation for the oven to sit-on.  This foundation is going to be a 5.5" thick, reinforced concrete slab.  I've been probing for the boundaries of the in-ground drywell in our backyard ( post with photos here ) and have to decide on final location in the coming weeks.   Once that location is set, I can begin excavation.  Then, my brain will switch to construction material ordering - starting with bags of concrete/cement and concrete block for the foundation. The first consideration in that process is how I'll go about making/mixing the concrete.  One of the recommendations from the builder community on the Forno Bravo forums is to buy a 3.5 cubic foot cement mixer from Harbor Freight.  I went over to the local HF store this past weekend and sized the machine up.  Here, below is a photo of the cement mixer below: Here's the product page - shows the s...

An Early Look At Some Potential 2024 Priorities - February 2024

Image
I've organized my approach to the yard and garden season a few ways the past couple of years.  First, I think about some of the potential options for where/how I want to prioritize.  In terms of effort, budget, time and thinking.   Then, I narrow those down to create some focus.  What falls out of those initial priorities is my annual to-do list that helps keep me honest in terms of what I am trying to accomplish.  Last year - I did an early look at some priorities as a way to organize my thoughts .  A few days ago, I marked 20 years of Blogging and in that post, I referenced Paul Graham; and how he has said the act of writing generates ideas.  That's what is at play here.  I need to sketch out an approach and with it, will come some clarity. This is different than my annual to-do list.  Here's last year's scorecard - which is informative in terms of what worked/what didn't work/what's left remaining.  But, this is more about sketc...