Posts

Showing posts with the label basement

Potting Up Melina Fleur Dahlia Tubers - May 2024

Image
Back in December, I ordered some Dahlia Tubers from Longfield Gardens and planned to try to both grow them this year AND (importantly) treat them as something that I'll pull out of the ground before the season ends and attempt to over-Winter in my garage.  I bought two varieties - Melina Fleur and Cornel Bronze Dahlias .  They recently arrived and I decided to start some of them indoors.  The Melina Fleur tubers come two-to-a-pack, so I grabbed six one-gallon nursery containers that I had laying around and filled them with a sandy homebrewed potting mix.  It is a mix of sand + potting mix that I normally use for succulents.  Here, below, is a photo of the Longfield Gardens dahlia tuber packaging that lists some specs (18" apart, 32" tall). After potting them up, I brought them down to the basement in the window well.  This is south-facing and while it *is* the basement, they get good light down there.  I put them on some trays that I had laying around ...

Basement Storage Rack Custom Design System

Image
I mentioned back in September that I had come across a product that could make it easy to create storage racks that I wanted to build in custom sizes for our firewood storage.  I then posted a WiP photo of one of the racks with the black brackets and cedar supports .  One of the projects that I'm trying to tackle this Winter is to figure out our basement storage setup. We currently have a series of different sized/shaped racks holding a wide variety of storage tubs, containers and boxes.  I'm talking about our holiday/seasonal decorations, the Mantleburg Line Christmas Train, tons and tons of kids clothes (that we're holding on to for SOME reason???), our personal effects from childhood (mostly mine) that is totally random and completely un-optimized space-wise. I mean...the racks we have are set to standard heights.  Meaning they have a vertical set of stands and then come with a certain number of shelves.  So, if our tubs are say 15" tall and the space...

Drywall and Door Hung in Basement Workshop

Image
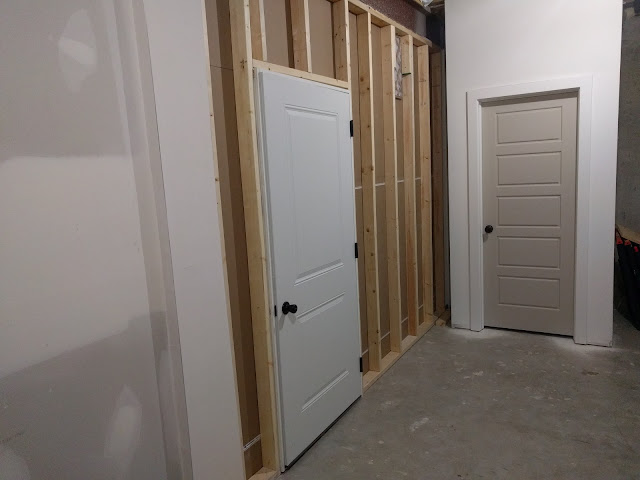
Just a few days ago, I posted about the progress being made in the construction of my #newoldworkshop down in the basement.  I shared a photo of the wall being framed in here .  Today, you can see the door installed and the sheetrock attached to the outside of the framing.  If you look closely, you'll also see the dust vent up near the top of the framing.  The door on the right is the door to our "Christmas Closet" and was already built by our builder's team.  As I mentioned in the post outlining all the 'to do's' for my shop , I used an exterior door with weather seal to keep the dust contained.  I'm also planning on painting the walls in the shop to brighten up the space and lay down some of that epoxy garage floor coating to spif the place up.  And, I've been reading up on dust collection systems including this one from GeekBea t.  I like his ducting/routing/termination system.  But, I'm thinking of going a different route in terms o...

Workshop Wall Going In (Basement)

Image
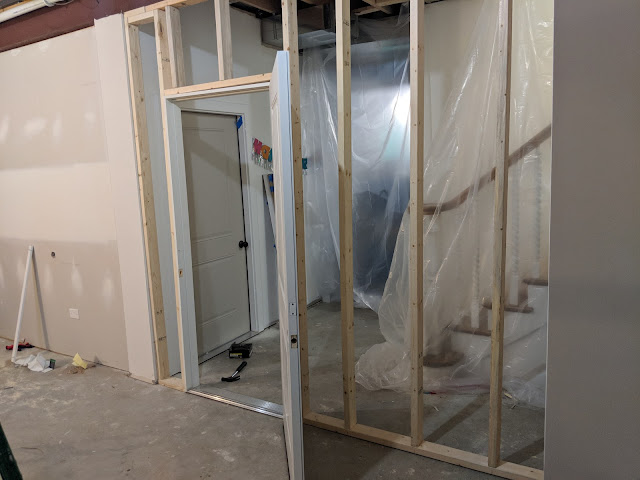
After months of planning and thinking and posting about my eventual workshop, we finally have progress:  the wall that divides the rest of our basement with my shop is getting installed.  In the photo above, you can see the wall being framed and the steel door - an exterior door - installed.  On the right side of the photo - through the framing - you can see the existing stairs and banister coming down from the first floor.  In the middle of the room, you can see an existing door/wall that built out by our builder to contain the mechanical room.  They used a steel, exterior door on the mechanical room, so we replicated that with the door for my shop.  They're going to be so close, so it was important for them to match. Right after the wall framing is done, drywall is going on the outside, but I'm going to leave the inside unfinished.  I'm still planning on cutting in a spot for a vent ( see here for inspiration ) and stuffing the joist cavities wi...

Door Acquired for Basement Workshop Project

Image
Some good news here in terms of the basement shop project.  Thanks to the fine folks at Oakley Home Builders ,  I've acquired the door.   The hang up for the entire project was the door and the thing about the door was that I really wanted it to match the existing storage room door that was already in place in the basement.  The storage room door is right at the base of the stairs and my shop is going to be just to the left of it.  The doors to the two rooms are going to be just a few feet apart (but set at 90 degrees), so it seemed important to have the doors match.  I posted back at the end of February about the shop being 'pressurized' and trying to figure out a venting work-around .  And this door is the primary reason.  It is an exterior door that is sealed all the way around.  I wanted to use a sealed door for dust control, but am fearful that if we built the shop too 'tight', it would act like a balloon and make it hard to cl...

Air Filter and Vent For Home Basement Shop

Image
As I've posted about here on the blog, I'm working on my home shop.  It is going in the basement and may or may not have a window and a wall-hung bench .  I'm planning on closing up all the available space with a wall and door, but also planning on filling the joist space above the wall to ensure that the dust from the shop stays in the shop and doesn't carry out into the rest of the basement space. One concern about that is pressure.  Meaning, if I stuff the joist cavaties and seal the door with an external steel door, it is going to be a pressurized space.  The walls will be like a balloon everytime I close/open the door. When I was on the train home one afternoon recently, I saw this air filter/vent in the stairwell coming down on the Metra cars and it gave me an idea.  What about making something like this on the inside of the wall:  a spot where I can place an air filter.  And on the outside - drywall side - of the new wall, I cut a whole ...

Windows into My Shop/Laboratory?

Image
That photo you see above is from the Polite Pig down at Disney Springs .  It is basically a window'd box that has inside a butcher's counter, supplies, and at least one big smoker where they smoke many of their fine meats.  And....let me tell you...they have very fine meats. I had the brisket sandwich that was served with pimento cheese spread and crispy onions.   Anyway, the windows.  Yeah...they've put this window setup right in the queue where patrons line up to order their food.  It is kind of a show kitchen of sorts.  At the time we were there, there wasn't anyone working in there, but I can imagine a cast member/chef cutting up brisket or pulling pork or what-have-you in there.   For a long time, I've been fascinated with these windows into workspaces.  You see them a lot in restaurants, but you also see them on cooking shows or science shows.  Where they have a 'lab' next to/adjacent to the stage that sort of se...

Wall-Hung Workbench - Quite a Looker!

Image
I came across this wall-hung workbench on the Wood Archivist and it stopped me in my tracks. I posted last week on my link blog the minute I saw it .  I was/am smitten.  I didn't want to lose the link.  Just look at it - she's a beaut, right?  Those curves. The built in lighting.  The fact that it doesn't hog floorspace?  The built-in dust collection system? All of it.  Awesome.  The full plans (or call it an article showing some of the steps and the cutlist) are here .  My shop right now is just a 'space', but that is ending soon.  Have plans to add a wall and a door to define the space.  Then, the first step is to finish my miter saw table.  After that, I'm going to turn my attention to a few benches. I currently have a bench that is satisfactory, but needs an upgrade.    I posted about the first (and existing) bench here on the blog back in 2010 .  Still looks the same.  Functional, but kinda basic...

"The Basement"

Image
This whole thing is pretty interesting of a listen (I think it must be from his audio book, right?), but if you tune in right here, at the 1:19 mark , the way Bob Dylan says "The Basement" is so interesting to me.

Basement Design Idea: Clubhouse Under The Stairs

Image
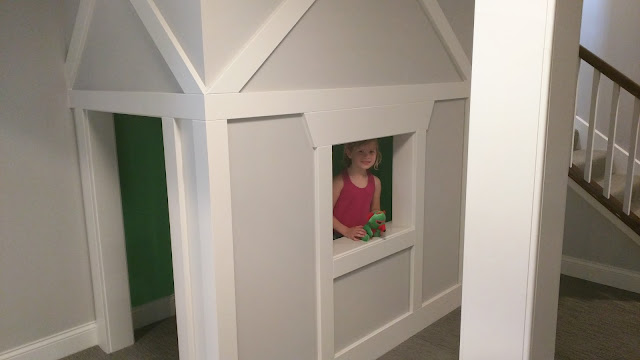
We saw this little 'nook' built into a model home last weekend and everyone who was down there with us coo'd over it and thought it was 'sooo cute' or 'soooo darling'. It is a really nice touch and one that just takes a little bit of drywall, framing and trim.  Have to think it could be replicated in anyone's house as they're thinking about a basement redesign or basement rehab/construction.

Upgrading Our Lionel Train Layout This Year?

Image
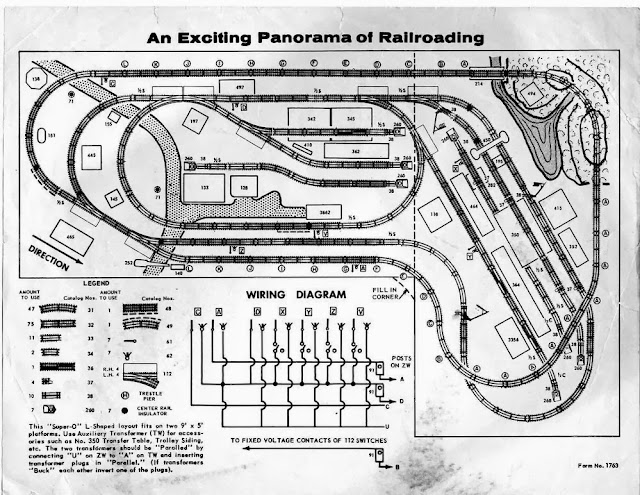
Last year, we put up our first Lionel layout in the basement.   You can see it here in this photo .  It was nice sized and fit into the corner of our basement.  Nat hated it.  She thought it was way, way, way too big.  The Babe, and I, however loved it. With Halloween just a day away, my attention is turning to Christmas. Putting up the train isn't so much about the actual train as it is about having a memory of my childhood with my Dad.  In looking around the web for inspiration, I came across this massive layout that was (apparently) on the back cover of the 1957 Lionel catalog.  From the looks of it, this appears to be a 2X size of our current layout, which means we're going to have to find a new home for the train.  With all the little kids at our house all the time, moving it into a different room isn't the worst idea ever.  I'm thinking that it can fit neatly into either the spare bedroom down there or perhaps even into the crawls...

One Year Later: Sink Cabinet is Finished

Image
We 'finished' up the basement project last year before Christmas, but it took until today for me to finish painting the cabinet and re-attaching the cabinet front for the cabinet on the right.  That side has a little bar sink in the cabinet, so I cut the front off of the drawer and had a big hole on that side for 12 months. I was using trim paint to cover the dollhouse, so while I had the brush out, I figured I'd paint the cabinets.  Then, the compressor was down in the basement for the dollhouse project, too, so...what the heck.  Let's finish this thing.

Train Table Set up in Basement - 2012

Image
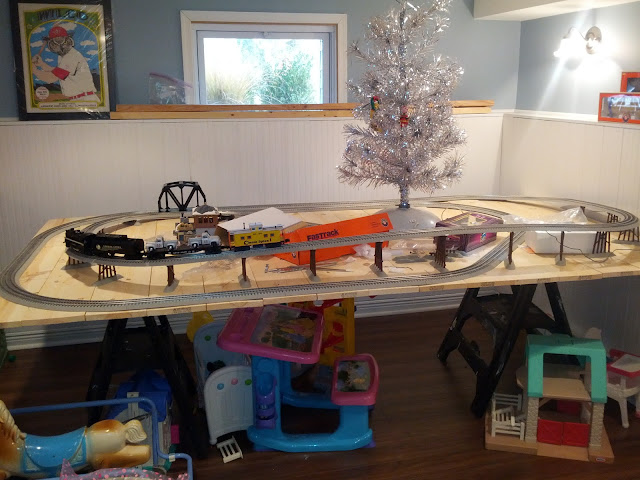
With the help of my brother-in-law Bill, I got my train table up and running last week.  It is 5' X 9' and has a layout that is called "Round-n-Round the X-mas Tree".  The Babe has had quite a lot of fun running the train around the track most days. My dad always put out his Lionel train during Christmastime when I was a kid and he gave me this set a few years back when the Babe was born.  Although it takes up a lot of space, I really like having it set up for the holidays and will (hopefully) be putting it back up in the years to come.

This Would Look Good in Our Basement...

Image
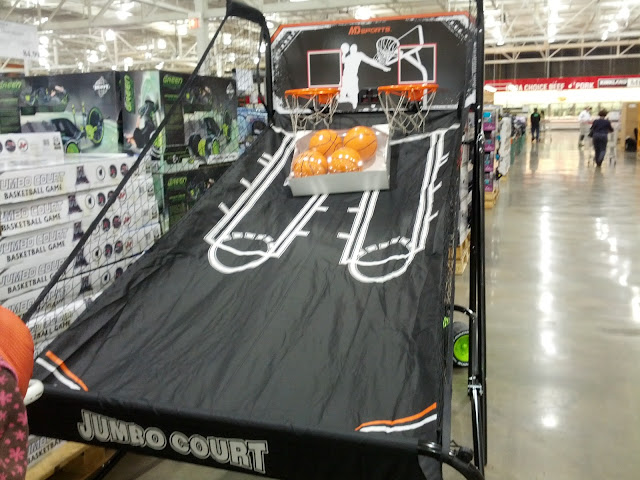
Wouldn't it? Maybe the Babe can go pro in pop-a-shot?

One Year Ago Today: Basement Junk Cleanout

Image
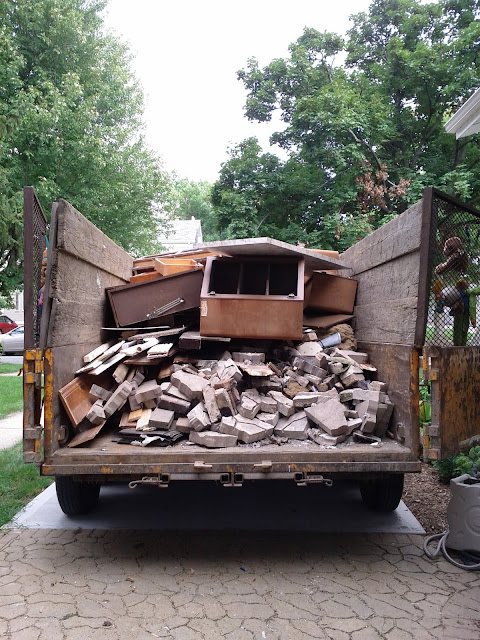
One year ago today, we got on our way with our basement renovation .  Is it done yet?  Not really.  Lots of painting and some trim carpentry left.  Not to mention the entertainment center!

Couch Too Big....Again

Image
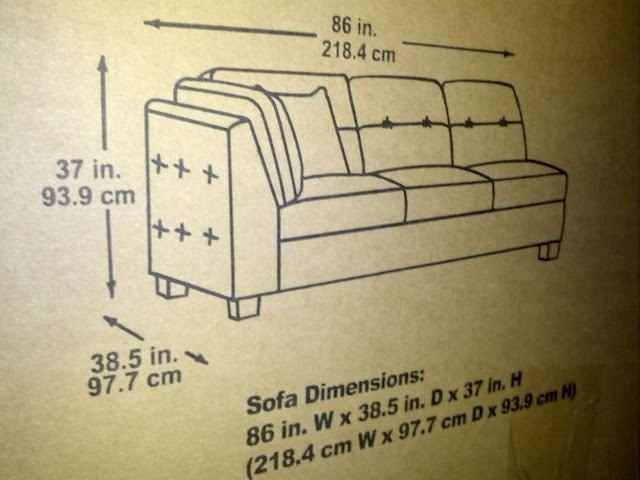
One of the problems with rehabbing an old house is that doorway to the basement is tiny.  Really tiny.  And the hallway (if you'd call it that) leading to the basement is really tight.  That makes for getting a couch down there all but impossible it is turning out.  See that drawing above?  That's of one piece of a couch that Nat really liked.  We were going to get it for our basement.  But....guess what?  It won't fit.  Bummer.

Shopping for a Fish Tank

Image
A 55 gallon tank is perfect for a suburban dad with a finished basement, right?  I'm in the market to start up an aquarium for both me and the Babe.  Nat isn't that thrilled with the idea, but she has given me her blessing to go ahead.  As long as she doesn't have to clean the tank.  Ever.

1968 Rowe AMI MusicMaster Jukebox

Image
On Saturday afternoon, we stopped at a garage sale near the old hospital in our neighborhood in Elmhurst.  Nat was after some baby stuff, I think.  All the way in the back of the garage was this thing:  a 1968 Rowe/AMI Jukebox that is chocked full of disco 45s. After a little bit of haggling, I was rolling this thing down her driveway, across the 10 blocks it took to get to our house, down our alley and into our garage.  Yep.  We're now the proud owners of a (mostly working) late-60's jukebox!  We already had - with the Babe - our first dance party in the garage on Saturday night. The amazing thing is that it works and it works well.  The action on both the flywheel and the record arm are amazingly smooth for having sat in this garage for the better part of 30 years.  Sure, there are a few quirks, but I'd expect that for something that is more than 40 years old.  I've already scouted out a bunch of classic 45's that I can pick up on Cra...

Bigger Bin for Roomba

Image
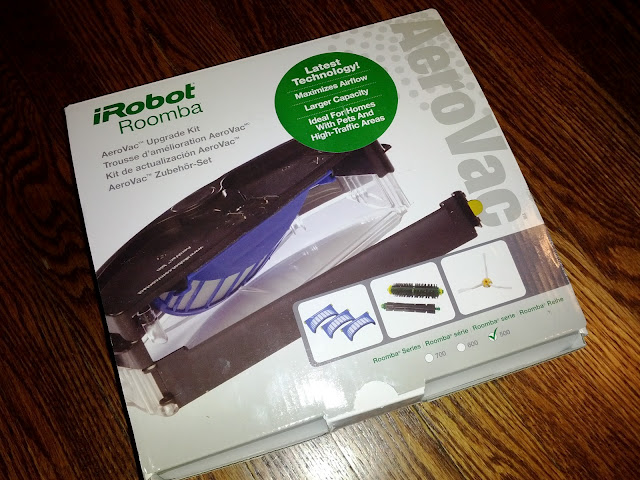
With all those new floors in the basement, it was time to upgrade the collection bin for our Roomba.  We have a 500-series model that allows for programable use.  That means that we can tell it to go out and work at a set time each day and then come back to it's base to recharge.  The only issue is that with the normal-sized bin, the robot would fill up in a week(ish).  Cheerios, goldfish crackers, dust, dog hair and the like all add up fast. With this new "AeroVac Upgrade Kit", not only do we get a much larger bin, I've seen some improvement in performance.  The rollers are new and there's (apparently) better air-flow due to the new shaped/sized filters.  I haven't figured out exactly how long the new bin can go (because I check it too often and thus empty it before it gets full), but in time we'll know the full results.

Basement Trim Finished. Finally

Image
We finally finished installing all of the trim in the basement - including these baseboards in the bathroom.  Still plenty of work to do including most of the caulking and painting, but at least the construction phase of the space has concluded. There are (obviously) a few more touches like shower doors to finalize, so we'll get those things sorted soon.  Funny how projects like this go like nuts for weeks/months, but as soon as it is "good enough" to occupy, everything slows down.  Once we moved in and unpacked the toys it seems like I forgot that I had all this extra work to do.  At least with caulk and paint, I can do it in batches with one section at a time.   With Spring right around the corner, I have just a few months to get this done or else my attention will wander to the garden and backyard.  Time to focus.