Posts

Showing posts with the label soil amendments

Spreading Wood Ash On Garden Beds - January 2024

Image
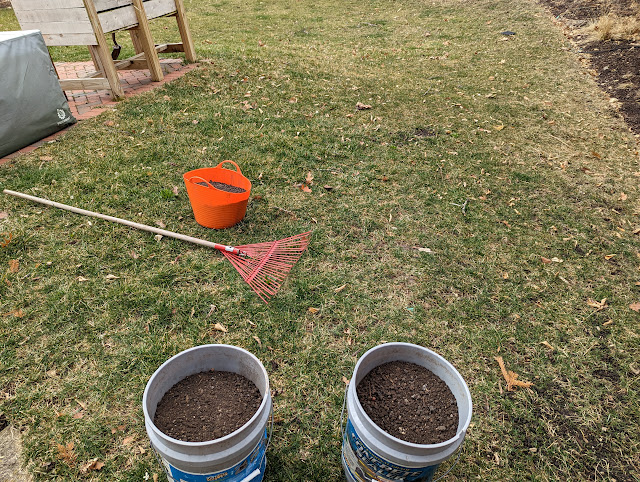
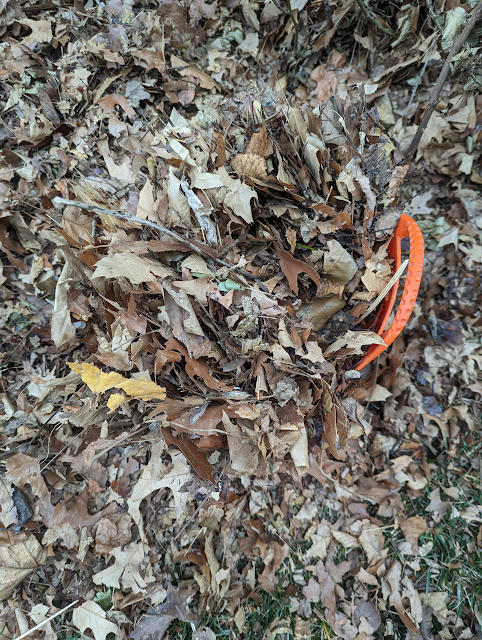
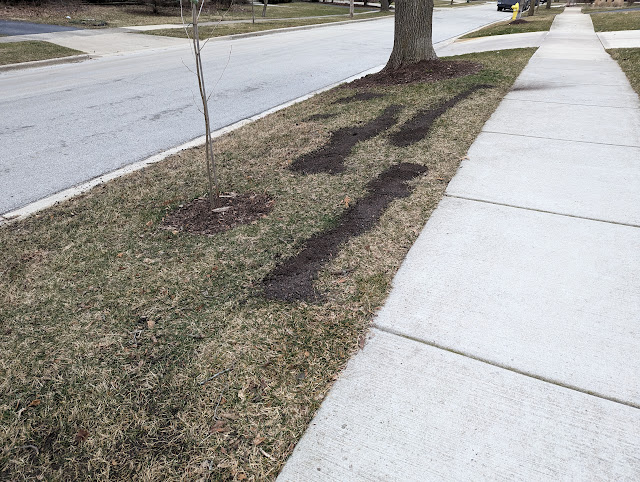
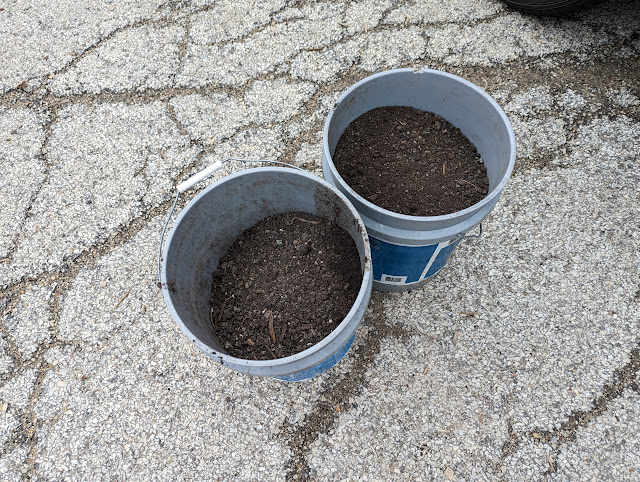
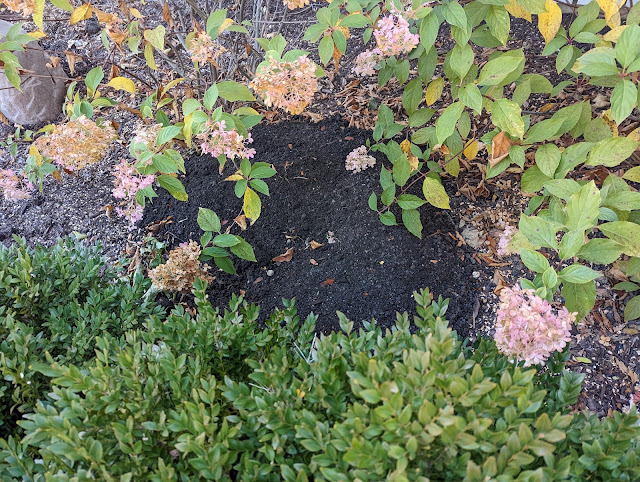
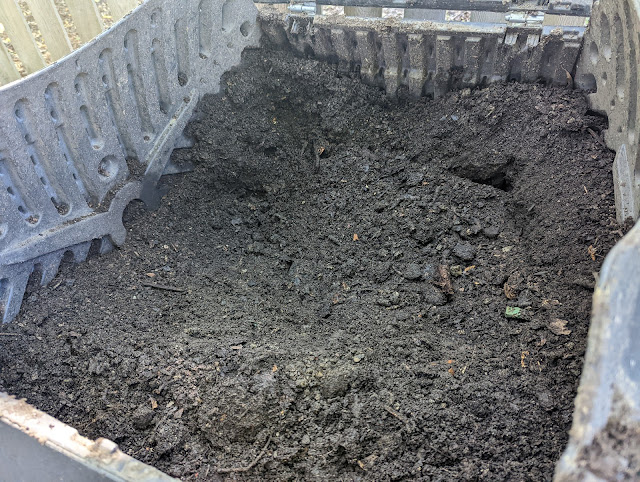
Last week, I read this post from Lee Reich where Lee compares spreading their hardwood ashes to conjuring the dark arts and had a little laugh.  I also...quickly learned a bunch - including how wood ash is a good source of Potassium (the "P" in N-P-K) and how a garden amendment that I've heard about/read about - Potash - is (obviously) the root word from Potassium, but is made up (mostly) of Ash.  Hence the name.   Lee talks about how the spreading of wood ash isn't a precise project; rather just a thin 'tossing' of the ash on the beds does the job.   Because we burn a lot of fires during the Winter, we end up with a surplus of ash that I collect at a couple of intervals when I clean out the fireplace and ash bucket.  Over the years, I've posted about how I've spread this ash - around trees in 2019 and on top of some snow in the perennial beds in 2022 .   I ended up with a bit more than five gallons of ash from Cherry, Birch, Oak, Hickory and....well

Feeding Ginkgo Trees With Lime - November 2023

Image
Posting this a little bit late, but I checked-off a new (to me) seasonal activity:  feeding our ginkgos with lime.   I had a bag of Organic Garden Lime from Espoma that (on the bag) bills itself as being able to change color of Hydrangea blooms - "Turns Hydrangeas Pink".    I took the bag and sprinkled a heavy hand at the base of the Spring Grove Ginkgos on either side of our stoop.  I also fed the Saratoga Ginkgo in the front yard , the Ginkgo tree that arrived cracked-in-half that I planted in the backyard and the same variety that the online nursery sent as a replacement that is IB2DWs extended (now in the conifer garden).   5 Ginkgo trees, two of which are dwarfs - all (according to this post from Mr. Maple) want alkaline soil : One great tip with Ginkgo that is different from a lot of other trees is that Ginkgo love a more alkaline soil, so by giving them lime when you're planting them and lime throughout the season, you help this plant get established and take up

Biosolids (MORE!) In The Front Bed And Lawn - March 2023

Image
Another day, another post showing some of the use of biosolids in the yard and garden.  This time....it was a couple of half-full trugs of the organic material in the front of the front porch bed and a little bit scattered in the lawn.    I last showed using it in the backyard .  But, I've put the bulk of biosolids down this late Winter/early Spring in the front.  Parkway and main lawn.  Bu, also in the front porch beds. Below are a couple of photos showing a bit of biosolids scattered in the front of the bed (first photo) and the two trugs that I used.   The reason for applying it to the bed was because I had a bunch of clay that I had dug up that was on the top of the soil.  When those clay clumps dried, I kicked them to break them up and then mixed in this organic material.  You can also see a little bit in the lawn, too. What is my plan for the next batch of biosolids?  I was thinking of running them straight-down my property line in front - to sort of....boost up that 'dom

Topdressing Backyard Lawn With Biosolids - March 2023

Image
Having used biosolids to topdress the front parkway and a little bit of my lawn out front, I have now moved on to adding a bit of this organic material to our backyard.  This comes after I used the Downers Grove municipal biosolids in vertical mulching and by adding a little bit to our compost bin.   I've gone back-and-forth on whether (or not) to order a 3 yard delivery of biosolids, but in the meantime I've been going over to the pick-up station and filling 12 gallons-or-so of the material to use a little bit at a time.   As for the backyard, here's a few photos showing how I started with 10 gallons of biosolids as a soil amendment.   Below, you can see the 2 buckets and the trug - as well as the rake I use to spread it around.  I take each bucket and walk around and sort-of 'drizzle' the biosolids out.  You can see how that gets applied in the second photo below.  This is when I use that metal rake to pull it out of the piles and spread it a bit more to help it b

Vertical Mulching With Leaf Litter And Biosolids: March 2023

Image
On Monday, I posted a series of photos showing how I had used my post-hole digger to excavate holes - getting into the clay layer below my topsoil - in our front porch bed.  I ended up with more than a dozen of them in various spots around the bed including up front.  My goal was to help improve the soil conditions, break up that bathtub effect and try to make the area a little bit more hospitable to plants and roots .   I called it 'vertical mulching' in Monday's post, but today is a little bit more about that process and how I filled the holes. I recently removed the chicken-wire rings around our Disneyland Roses to prepare them for Spring.  In each of those three rings was a heavy bed of mulched-up leaves that I collected last year.  Since Fall, there had been a tiny bit of decomposition, but A LOT of the leaves that I used to protect the roses were Oak leaves and those are VERY.SLOW to decompose.  So, I went over to the roses and filled up my trug with some leaf litter

Even More Biosolids On Parkway - March 2023

Image
I've put down (right around) 36 gallons of biosolids on the two sections of our parkway to date - using 5 gallon buckets and spreading it with a rake to top-dress the turf.  This past weekend, I grabbed twelve more gallons (making it 48 total gallons of the stuff) across both sections.  First (below) is the little parkway island that sits IB2DWs.  Then, I went on the other side of the Norway Maple tree in the parkway and dumped some biosolids in between the tree ring and the property line (below): And, I also went back and filled in some of the spots that looked like they could se some help (below): And...finally, below you can see that I also introduced a little bit to the main lawn - right along the sidewalk.  There is a slight void - a few inches in from the sidewalk - that has settled.   I'm going to keep trying to go - and get 12 gallons at a time - to continue to top dress the lawn this Spring - even bringing some of it to the backyard to help in that part of the lawn tha

Vertical Mulching With Biosolids To Improve Clay Soil Conditions - March 2023

Image
Over the past week or so, I've been working on - and posting about - the front yard beds.  Mostly, I've been working on - and thinking about the soil conditions.  Since we moved in - Summer of 2017 - I haven't had much luck at all up there.  That's six growing seasons (well...five full ones at least) and I've lost things, have had other things not grow so well and removed the biggest plant in this bed last Fall:  the large Norway Maple tree.   I started last week doing some vertical boring of holes using my post hole digger .  Both, to get a real look at the soil conditions, understand how deep the clay lies under the topsoil and to (maybe?) help improve the conditions by cutting through some of that bathtub effect that takes place in clay soils.  After I dug a hole about 12" around and 24-or-so-inches deep, I proceeded to fill it up with some leaves and a big helping of biosolids to top it off.  My thought is that this 'vertical mulching' will improve

Amending Stump Grindings With Biosolids - March 2023

Image
Spring seems like the season of biosolids-application posts and today is no different.  Last week, I posted a series of photos showing my use of biosolids in the parkway.  And, then I talked about how I was going to use biosolids in a vertical-mulching application to try to help remedy by clay soil problem by our front porch.  In that post, I referenced how I added organic material to the stump grindings to help the Triumph Elm tree thrive.   As another step towards helping these stump grindings  breakdown, I threw five gallons of biosolids on top of them - right next to the new tree - where some tulips are coming up.  You can see that in the photo below.  I didn't work them in the ground, but, as I keep up with the 'vertical mulching', I'll likely add even more surface biosolids like this batch below. The combination of organic material (and nitrogen) are going to be critical to making this bed a desirable place for plants and shrubs in 2023.  At least....that's w

Front Porch Bed - A Look At Soil Conditions - March 2023

Image
The planting bed that is out front of our porch has been something that has been on my mind for years.  Specifically...the growing conditions.  Between a few things going on out there, I think it might be time (this year) to take an even more aggressive stance at improving the soil across this foundation planting bed.  Last year (2022), one of the items on my annual to-do list was to think about how we improve the conditions up there and I suppose that I did that (a little) and gave myself a partial grade of complete.   The way I was thinking about this problem was across a couple of fronts:  hydrophobic mulch and the root mat from the Norway Maple .   Starting last Spring, I went about trying to fix the hydrophobic mulch issue - including the addition of some nitrogen in the form of alfalfa cubes and raked it in .  Then, in the Fall, I attempted to do even more.  First...with the removal and grinding of the Norway Maple tree, I'm hoping that the root mat issue continues to recede

Day 3 - Parkway Biosolids TopDressing - March 2023

Image
This is day three and post number three of spreading municipal biosolids on our parkway turf in early March - as both a slow-release fertilizer and a soil amendment.    Over the weekend, I started by picking up and dumping about 12 gallons of granular (or close to granular) biosolids from the Downers Grove Sanitary District on our parkway .  They have a station across town where you can scoop-up and take-home your own batches of biosolids.  I say (close to granular) because it has more of a topsoil consistency than a true granular fertilizer or commercial biosolids product like Milorganite.   Yesterday, I posted a photo showing the application of even more biosolids to the parkway section across our driveway .   Today is showing the addition of 12-or-so more gallons to the main parkway.  My first application went down by the street.  This one was dumped closer to the sidewalk.  See below for photos showing the material dumped out followed by photos showing it after being raked in.  Pos

Other Side of Parkway - Biosolids Applied - March 2023

Image
A few days ago, I shared some photos of the initial application of municipal biosolids to our parkway - the part of the parkway that is closest to the driveway.  I mentioned that I would need a few more trips of 10-12 gallons of material to finish the parkway.  This past weekend, I made a stop at the biosolids station and filled up my 2+ buckets.  I brought the material home and spread it on the smaller section of parkway that is on the other side of the driveway.  This is the IB2DWs parkway area.  See below for a look at the material after I raked it in: This section of grass is particularly rough to deal with and be successful with grass.  It is not-so-great soil that also sees A LOT of road debris and gets filled up with those tiny Locust leaves each Fall.  My neighbor's section is irrigated (I think), so his does better than mine.   Looking at these photos - including another one below - I'm thinking that I could put a second application on top of this one to try to help i

Spreading Biosolids On Our Parkway - March 2023

Image
Yesterday, I posted an update showing that I had spread 120 pounds of pelletized lawn lime on the back yard and gardens and mentioned that I was going to next turn to the application of pre-emergent.  But, I failed to even reference MY OWN PLAN .  In that plan - which I also published last week - I talked about how I wanted to add some biosolids to the parkway.  Just like with the Lime, I wanted to try to beat a storm that was coming.  So, I went out and picked up two five gallon buckets full of the stuff from the Village.  See below - the buckets are NOT QUITE FULL, as I didn't want to risk them tipping over/spilling and getting the smelly stuff all over my car.   I intend to try to spread a layer of these biosolids all across the parkway.  Why?  A couple of reasons.  First....I've never had a lot of luck with the grass down here.  I'm not sure if it is road salt-related.  Or, the soil conditions?  Or both?  So, I figure I'll begin to amend the soil and see if I can

Lawn Lime - Pelletized - February 2023

Image
Yesterday, I posted some photos of a new organic (biosolid) lawn fertilizer from Menards that is a Milorganite replacement that comes in $10 cheaper per bag.  I mentioned that I was getting started on my 2023 lawn care program and bought a few products to get started.  Before I talk about the first application of lawn food I'm going to put down, I intend to start with a soil amendment.  Over the years, I've applied pelletized lime to our backyard in an attempt to change the makeup of the soil.  Why?  To help make the lawn a less-hospitable place for Wild Onions to grow .  I've fought those jerks every Spring - with both removal and lime application. Does lime do anything?  I'm not sure.  But, it isn't expensive, so my not throw the stuff down - if it can help, right? It seems that I haven't put Lime down since 2021 - skipping last year.  Or...I didn't post about it, at least. Here's what I'm putting down this year in the backyard:  three 40 pound b

Adding Composted Manure to Stump Grindings - October 2022

Image
This is the third in a series of posts related to the removal of our large, 70-year-old (but in decline) Norway Maple tree in our front yard.  First, I shared photos of the tree being removed .  Then yesterday, I showed photos and a video of the stump being ground out .  Today, I wanted to talk a little bit about what comes next.  After doing a little bit of digging on the Web about what to do after you grind a stump, I've come to the conclusion that I needed to think about both amending the soil with organic material AND....being deliberate about adding nitrogen.   The stump grinding left behind A LOT of small pieces of wood.  A mulch of sorts.  But, about two-feet-deep. I knew that we're going to plant a new three here, so I wanted to be proactive with the soil.  I also knew that I'm dealing with a LOT of hydrophobic mulch in this area, so anything I do here will likely help.  In fact...I'm pretty sure the act of grinding the stump - AND all the soil and mulch in th

Spreading Compost (Black Gold) on Front Porch Beds - Amending the Soil - September 2022

Image
On my 2022 to-do list were a few items related to compost that I've begun to address in the past week or so since the weather has started to cool down.  If you go back and look at this year's list , you'll see that #13 focused on MAKING compost and using what I have while #19 talked about improving the soil conditions in the front of our house.  This post is about how I've combined those two things by using the compost - or Black Gold - that is in our compost tumbler and applied it to our font porch beds.  First, have a look (below) at the makeup of the compost that is currently in our tumbler.  Do I turn this thing regularly?  No.  Is it in the sun?  No.  Do we still get a pot of black gold compost at the end of the Summer?  Yes.  Here's proof: I wanted to take it a little bit at a time (to start), so I began to fill a couple of five-gallon buckets with the compost.  See below: And, brought it up front to the beds where I'm dealing with a mix of hydrophobic mu

My 2022 Lawn Schedule And Plan

Image
One of the many things that I've found a little bit of joy with in the yard and garden over the years is in doing my lawn upkeep myself.  By 'upkeep', I mean both treating, feeding and mowing the front and back with both my push mower and the Automower.  When we first moved in, I had 'a guy', but I wasn't that happy with how they were cutting it (when, how often, height, etc), so I transitioned back to doing it myself and bought myself my own push/self-propelled lawn mower. Just like with planting, laying out the beds and other yard/garden projects, I've found it most helpful to put down a schedule here as a way of guiding my decision-making over the coming months.  I first did this in 2020 and it was a helpful steer .  Last year?  I kinda 'wing'd it' and I'm pretty sure I need to get back to the schedule this year.   Why?  Because, last year I saw the MOST weeds, the most significant damage and the worst-looking lawn (parts) since we moved i

Hydrophobic Mulch - Alfalfa Cubes To Amend and Add Nitrogen - March 2022

Image
While I can't get started with Spring clean-up just yet, the warm(er) temperatures have me wanting to be outside in the garden working on things that I'd like to get done this season.  One of the projects that has been on my mind since last Summer is thinking about a plan to address the hydrophobic mulch that is present in a few spots - but specifically under the Norway Maple outside of our Front Porch.   I don't think (I can't find) that I've posted specifically about hydrophobic mulch.  And the problem that it creates.  It is something that I'm dealing with in a couple of spots, but as I've gotten to learn more about it, I'm still trying to figure out both what CAUSED it and how to address it.   One of the VERY COMMON reasons for hydrophobic mulch is that it was applied too thickly.  That's true for me.  Especially under the Norway Maple.  I've had a lot of trouble growing under that tree - h ere's a whole post on the topic - so I'm no