Posts

Showing posts with the label epoxy floor

Basement Workshop Epoxy Floor Installation - Rocksolid Metallic

Image
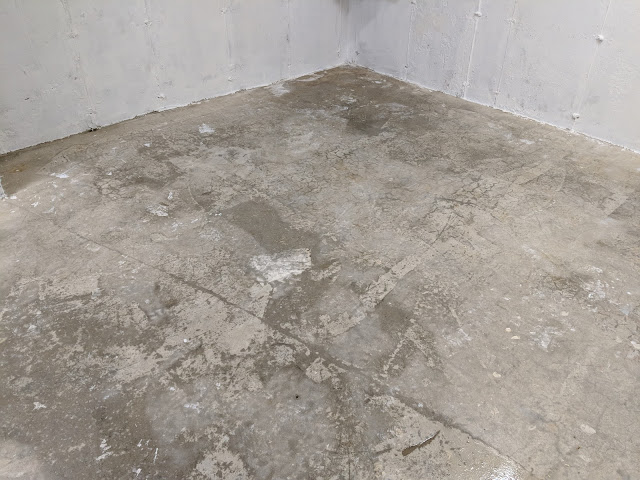
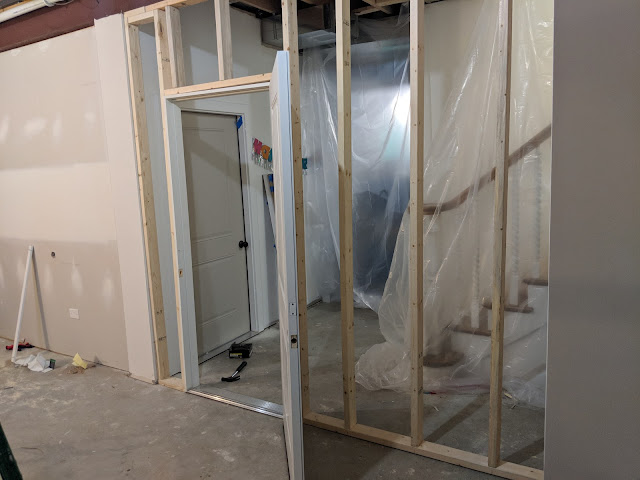
The last time we checked in on my basement workshop was a ll the way back at the beginning of April when I posted about the new wall and sealed, exterior door that were installed , thus, creating the shape of the shop.  Then Spring came and all of my attention and time were focused outside on the garden and yard.  I left the shop empty and forgot all about my plans to finish the floors.   Well, the recent run of super hot weather afforded me the opportunity to get back going on the shop and job #1 was finishing the floors.  I had, on hand, a couple of the Rocksolid Metallic Epoxy floor kits that I bought back in April when I was planning the shop build out.  Inside of each of those kits was a package of 'floor etch', which I got busy with.  Below, in the first photo, is after one round of etching the floor.  I did it 2x - just to be safe.  But, since there isn't a floor drain, I ended up having to saturate the floor (post etch) and then use a scrub brush to pick up mo

Workshop Wall Going In (Basement)

Image
After months of planning and thinking and posting about my eventual workshop, we finally have progress:  the wall that divides the rest of our basement with my shop is getting installed.  In the photo above, you can see the wall being framed and the steel door - an exterior door - installed.  On the right side of the photo - through the framing - you can see the existing stairs and banister coming down from the first floor.  In the middle of the room, you can see an existing door/wall that built out by our builder to contain the mechanical room.  They used a steel, exterior door on the mechanical room, so we replicated that with the door for my shop.  They're going to be so close, so it was important for them to match. Right after the wall framing is done, drywall is going on the outside, but I'm going to leave the inside unfinished.  I'm still planning on cutting in a spot for a vent ( see here for inspiration ) and stuffing the joist cavities with insulation so we ca