Posts

Showing posts with the label fireplaces

Firewood Delivery 2018 - Cherry and Birch Face Cords

Image
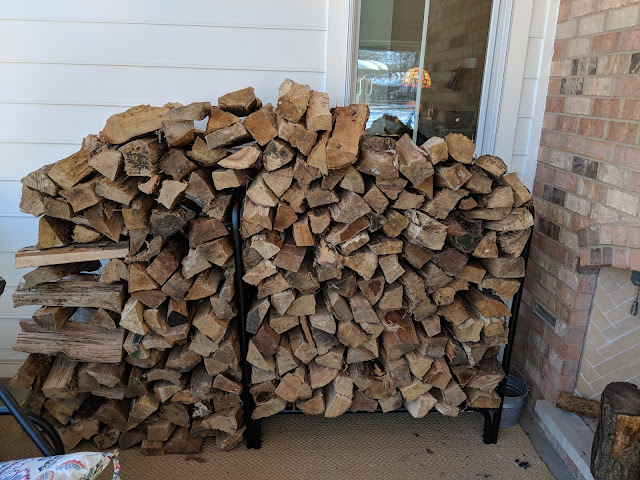
Last year, I shared a couple of photos and tracked the progress of our firewood consumption during the Winter.  We started with a rack of wood I scavenged from our yard and split myself .  Having burned through that quickly, I ended up ordering a face cord of wood that arrived in early January .  By February of this year, we had burned through half of the Face Cord .  By March it was gone.   We ordered a mix of hardwoods last year and I think we got a bunch of Ash along with some Oak.   This year, I wanted to get ahead of things and decided to order in September.  And I wanted to order some specific woods:  Cherry and Birch.   Like last year, I used the same provider (Best Firewood and Mulch) but I ordered a full face cord of Birch.  And a full Face Cord of Cherry.  The Cherry for long-burning nature and, of course, the smell it puts off and the birch for the heat output and the bright and lively flames...

Firewood Consumption Check-in (February 2018)

Image
Here's a little update on our firewood situation.  I'm posting this mostly for my own historical marker of what we consumed so far this winter, both for planning for next year and to document where we are in early February.  Back in early January, I posted a photo of our Face Cord (or Rick) of firewood that we had delivered and stacked in our screened porch .  Thanks to Google Photos, I made this little top/bottom comparison of the current situation (top) to where we started when the Face Cord was delivered .   For full historical accuracy here on the blog, I suppose I should mention/link to the origins of this series.  There's one more before/after photo in my firewood series, but it is from November when I started to chop my own wood from logs that were left behind on our lot when we cut down some trees pre-build.   But back to the current state in the top photo.  Based on my eye, we've used about half of our Face Cord?  Se...

Face Cord of Firewood Ordered For the Season - Winter 2017/2018

Image
Back in November, I posted a before/after set of photos of the pile of wood that I had partially chopped and stacked near our back door ahead of the winter season.  That pile of wood was made up of a series of logs that had been left behind by our tree guys when they cleared out a bunch of dying/scrub trees.  Think it was a blend of Walnut, Ash and Maple trees. As the weather turned, we started to use the fireplace in our family room.  And use it.  And use it.   We went through the entire stack of firewood by Christmas.  So, I had to order some. It is funny, the whole idea of ordering firewood make me felt pretty manly.  You know who else is a man?  I'm a man . I hunted around for providers and settled on one that had a good mix of wood, plus they delivered and stacked.  Yeah...stacked. I have fond memories of going over to my friend Matt's house on Saturdays during the fall when his Dad would be receiving his wood delivery....

First Firing: New Fireplace

Image
We marked the evening fall temperatures lately with the maiden fire in our new fireplace recently.  I posted photos of this fireplace being built earlier on the blog back in March of this year, so you can see the location of this fireplace in that post.  I've posted a bunch of pieces on our various fireplaces over time that you can check out here .   We loved our outdoor fireplace back in Elmhurst - especially during the fall - when we broke out the s'mores, so I'm thinking we'll get a lot of use out of this new one.  Here's a photo from seven years ago showing the kid's cousins toasting their marshmallows .  We didn't do any toasting this time, but there's still plenty of fall left, right?  And in this one?  We have a gas burner, so I don't have to round up kindling and work to get it started each time. 

Masonry Work and Fireplace: Done

Image
A few weeks back, I posted an update about our new place showing the installation of the windows in most* spots (The asterisk is because not all the windows are in...as we're still waiting on a few of the more 'fancy' ones...) and how that felt like real progress.  And there's been even more progress lately including the installation (do you call it that?) of the fireplace and chimney.  This one you see above is in what I think is going to be my favorite spot in the house: our screened porch. You'll note the the cables come out of the center of the masonry work above the fireplace, so one of the first jobs is going to be finding a tv that will work out there and getting it hung.   The room isn't huge, but I'm thinking Nat will do a great job finding the right seating mix where we can hang as a family out there and also where we can entertain folks.  And, frankly, something that I can take a Saturday afternoon nap on while watching some sports... The ...

Blazin Buddy Firewood

Image
I came across these big wooden blocks called "Blazin' Buddy" at the Delta Sonic in Melrose and thought it was an interesting idea.  With the kids back in school, 'tis the season for snuggle wood, right?  You know...the bundles of wood that you pick up from the front display of the Jewel or out on the pallet of your local gas station? Well, they now have a competitor.  And it is this thing. It is like a 12" x 12" x 12" (I am guessing) block of wood with a hole drilled in the side and a big one on top under the label.  If you look closely, you'll see a little piece of kindling in the hole below.  You fish that thing out, light it on fire and stick it in the side hole to get the fire going. They claim you'll get 3 hours of burn time out of one of these and have posted a YouTube video that compares it to three packs of snuggle wood .  The fire out of the regular wood is clearly better/brighter/more desirable, but there's no doubt ...

Basement Fireplace Framed In

Image
The Direct Vent firebox is framed in.  We left the 2X4's in the center laying behind it so we can do the connections of gas/electric and also the duct work.  I decided against the raised hearth because of the safety issues and will just figure out what the extra pipe might look like.

Basement Fireplace Inspiration

Image
Arriving in the mail recently is the November edition of This Old House magazine.  On the cover was this very pretty fireplace.  It is a good inspiration for what we're going to do in the basement.  Aside from a different color tile and a raised hearth, I like the white trim and mirror detail above the mantel.

First Fire of 2011

Image
We had the first fire in our backyard this past weekend - not out of a need to sit out there and relax, but because I have a HUGE stack of wood that is a mess and I wanted to bring some order to the area.  It is still a work in progress, but after burning through the material that was in the box over the winter (Christmas tree branches, yard waste, etc), things are looking better. We have a weird, evasive animal that is making a home in our yard these past few weeks.  And by "making a home", I mean taking HUGE smelly dumps in weird spots.  I have Animal Control coming over today to set a trap so hopefully we'll be free of whatever it is soon and can go back to enjoying more fires like these!

Easter Egg Garland - How To

Image
Over on Martha Stewart's site, you can see her instructions and how-to, but I made a few modifications to the products and tools so I'll walk you through this easy project.  This could be something fun to do with kids, but it isn't a one-day project because of the painting and the multiple colors involved. Things you'll need for the Easter Egg Garland: 5 dozen (more or less if you want) paper mache eggs spring color paint (I chose 5 different pastel colors) paint brush (I used a foam brush) 5 or 6 feet of ribbon - pretty thin ribbon A drill and a 11/16th inch bit (you can use any size bit that will allow your ribbon to pass through wooden skewer (or beading needle) to push ribbon through holes Martha calls for real eggs.  Yup.  Like blown out eggs that you would have on hand around Easter-time.  In fact, she calls for you to dye the eggs just like you would normally.  I figured there had to be a better way not just due to the fact that blowing out eggs, wel...

Living Room Fireplace Mantel: DONE

Image
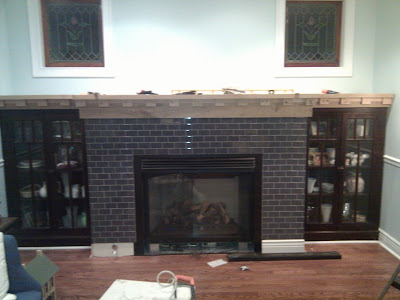
I'm really pleased how the front fireplace turned out!  The color came really close to matching the bookcases and they look like the whole thing could have been here for 100 years.  And...that was the over-arching goal! This room has come a long way.  Here's the "before" shot.  Since then, we tiled and put on the top.   And....the "After".

Mantel Update: Stain Started

Image
I put 2 coats of stain on (and wiped them off!) yesterday and the color still isn't as DARK as we'd like it.  We're awfully close to matching the bookcases, so I think one more coat will do the trick. I'd like to be putting the first coat of polyurethane on tonight in order to meet the strict deadlines Nat has imposed.  After all, we still have the family room mantel to get done before Thursday!  Yikes!

Living Room Mantel Progress: Day 2

Image
We installed the dentil and I think it turned out great.  Used our front door as a template and at first I wasn't sure the scale would translate.  But stepping back and peeking at it, I'm pleased with the look.   Tonight, I started to fill the holes and think about stain/coloring - going to try to match it up to the bookcases as best as I can.  Couldn't have done ANY of this with Nat's Dad both in terms of his skill set and tools!

Living Room Fireplace Mantel Progress

Image
Thanks to Nat's Dad, we made A LOT of progress on the front living room mantel.  Charlie found some old oak boards at an estate sale and after a bit of sawing and planing we managed to make something pretty neat. It isn't done, but the Thanksgiving deadline is fast approaching.

Bungalow Fireplace Front - Wood Dentil Planning

Image
The day has finally come:  we're going to finish off our fireplaces.  Nat has given me a Thanksgiving Day deadline.  Fortunately, I'm taking some time off which allowed me to get to the store to buy some wood to begin the project.  We're going to simulate the look of our front door with a pretty large dentil design. 3.5" blocks with 6" spacers is what I've laid out in the photo above.  I'm *hoping* that the scale will work once they go up on the wall.