Posts

Showing posts with the label flower beds

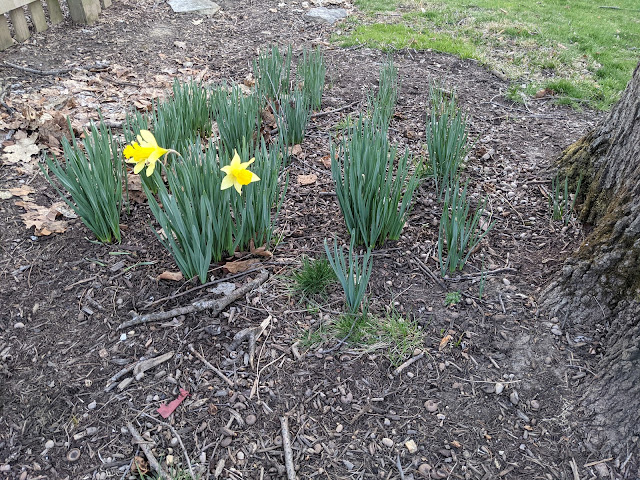
15 Lancifolia Hostas Transplanted - South Bed Border - April 2021

Image
Yesterday, I posted a photo showing the new location of the dozen Fanal Astilbes that I transplanted out to the edge of their new bed and commented that that was the FIRST of a few posts showing the transplanting that I have been doing this Spring.   Today, the photo below shows the new location of 15 teardown hostas that I planted on the southside of the yard in the curved border of this new bed.  You can see the first three on the left taking the 'second row' spot and if you look closely, there are two more in the 'second row' under the Oak tree at the top of the photo: Here's an annotated version of that photo showing the 15 hostas: A few important notes: 1. These hostas are (I'm pretty sure) Lanifolia Hostas .  Based on this "What hosta do I have?" page , I found this Lancifolia page in the Hosta Library.  Things check out.  I inherited them when we moved in.  They're plain green with glossy leaves.  2.  They get to a nice size - if left alone

Inherited Daffodils - Finally Bloomed - April 2021

Image
I've written about a patch of volunteer (I should have called them "inherited") Daffodils that live under the Northern Red Oak tree back in 2018 when I speculated that they were (indeed) daffodils .  But, that they never actually flowered for me since we lived here.  This patch of green shoots comes up every Spring.  There are like 16 distinct patches that sit in between the fence and the large Northern Red Oak tree that have put green shoots up that have an onion-like look and smell.   I've wondered WHY they haven't bloomed - could it be that they are too old? Or not enough light?  I haven't removed the foliage of these in previous Spring seasons in the hope that they'll collect enough energy to put off blooms the following year.   But this year?  We have *some* flowers.  Have a look at the photo below showing off some yellow flowers.  Pretty great!  Not all of them are even showing buds, but we'll get a few more this season, I think: This spot is a

Order of Operations - Spring Beds, Transplants, Locations and Mulch

Image
Yesterday, I shared a post talking about the concept of creating curvilinear flower beds in landscape design and how one of my initial backyard projects is to move towards a final shape with our beds.  That requires us to carve up a bunch of the current lawn and creating new beds that jut out into the grass.  But, before I can even begin to think about how to make those swoop'ing, curved beds, there is some thinking that I have to do in in order to get both ready for the days of sod removal AND what has to happen AFTER the creation of the new beds to get them ready and dressed for the season.   To arrange my thinking - and to pressure test on what I want to do - I thought I'd create an individual (for me) order of operations document that details the steps in the order I need to take in order to make this all work.  So, let's go. 1.  Remove our Automower wire.   Around the entire perimeter of our backyard, we have a low-voltage green wire buried about 3" or so from th

Purple Astilbe - Gloria Purpurea - For Backyard Bed

Image
This is the third in a series of four posts based on the garden things that Nat brought home from Costco recently. The first one was a set of Frances Williams hosts for the backyard .  The second was two packs of Bressingham Blue hostas that are destined, too, for the backyard.   3rd post.  first two hostas.  Today is another shade-loving perennial that pairs well with hostas that we got started with last season.     And that would be astilbes.  Here's the bag of six Gloria Purpurea Astilbes (below): And, here's the back of the package showing a 20" spacing requirement and saying they get about 24" tall.   As I mentioned earlier, we started with Astilbes last year - buying 12 of them and planting them in June .  Timing was off and some of them suffered some transplant and drought stress, so I'm not certain how many made it, but it isn't all twelve. The area where we planted them - on the southside in front of some new Oak Leaf Hydrangeas - calls for 15 of t

Sally's Shell Lenten Rose - Back for 2nd Season - March 2021

Image
Last year, I planted one (yes, I know, I know...it was a mistake to buy *just* one) Lenten Rose (or Hellebores) in our backyard that we picked up at The Growing Place .  It is a cultivar called Sally's Shell and it was in flower when we bought it , but quickly planted it in the backyard right where the plan called for a series of them in what I've called the 2021 Priority Area #2 .  That area calls for ten (10) of them, so I have some more to buy to get close to that coverage this year.   But, before I turn to adding MORE this year, I wanted to figure out how it weathered the Winter.  And, it didn't take me long to identify this beauty as you an see a purple-ish ball of foliage that has emerged from the mulch/wood chips - that you can see below: Stepping back a little bit, you can see (below) how it sort of just fades into the wood chips, but there are some of the stems and leaves that survived the Winter associated with the little purple package in the middle.   This is in

24 Divine Lavender Impatiens Planted - Front Yard Bed

Image
Over the years, we've tried different annuals in front of our boxwoods in our front yard bed.  Our first full year - in 2018 - we planted some Ranunculuses - about eight of them.  Last year - in 2019 - we planted 16 orange marigolds.  Neither set of those did very well.  The marigolds were better than the Ranunculuses, but they didn't spread and some did better than others.  When we started with this bed, it was about 2" of mulch and then backfilled clay.  Not a ton of organic material to deal with beyond the mulch.  Over the years, I dug up spots and added pelletized gypsum a few inches down in an attempt to loosen up the clay soils.  (speaking of which...I should probably add some gypsum to my lawn this Summer) and tried to amend the soil to improve the conditions. Last year, I used a bulb auger to dig out the holes for marigolds, planted them and covered with cocoa bean mulch.  I read somewhere that the BEST way to loosen up clay soils is to actually plant in them

Sally's Shell Hellebores - Planted May 2020

Image
Back in March, I posted about Lenten Roses (or..Hellebores / Helleborus) and how our plan called for a few of them in parts of the yard.  On the same trip that we bought the Summer Beauty Allium, we also bought ONE (1) Hellebores (or...I think Helleborus).  It is called "Sally's Shell" and you can see it below:  I planted it in the bed on the northside of our backyard - and since there is just one, it is standing alone.  For now.    Here's a little bit wider of a shot - that shows the larger tree trunk that is set a little bit 'in' the yard that shows this is planted about six feet to the West of that tree.  (also note...that at the time of this photo, I had pulled up our Automower boundary wire and spooled it here while I remade some of the contours of the beds.   The plan calls for ten (10) of these - from this one and to the left - that I'll add over time.   But, since this area falls just outside of Priority Area #2 , this

Floating Mulch Flagstone Retaining Ledge Installation

Image
A couple of days ago, I posted a photo of some of our orange tulips blooming in the front yard and mentioned that in that photo there was a detail of a small (potentially partial) project that I had knocked off my list.  In the photo at the top you can see that project: a little buried flagstone retaining 'ledge'.   In mid-April, I posted about my 'floating mulch' problem in this area due to the grade (it is on a slope) and water run-off (some gutter downspouts come out in this area).   In that post, I speculated that if I dug-in some retaining blocks that I could keep the cocoa bean hull mulch from migrating too far into the lawn.  But, at the same time, I didn't want to make it super visible from down near the sidewalk.  What you see at the top of this post is my compromise.  I dug in the blocks a few inches and left them proud of the mulch by about 1/2" or so.   If you look at the photo below, you can get a better sense for how they look from a

New Mulch Beds - Northside Behind Oak Tree Swing

Image
Yesterday, I shared a video of our twelve yard mulch delivery and my plans to spread it around our property as part of my (new) social distancing project plans.  One of the areas that I mentioned in that post as a 'net new' bed was in the area by our tree swing - what I've billed as " Priority Area 2 " earlier this Spring.  Here's a new look at that area from our bedroom (zoomed in) that shows how I've take what was once a mulch island (just a ring of mulch around that big Oak) to more of a continuous bed. I took the tree ring - that you can mostly still see and extended the bed all the way to the right where one of our large Chanticleer Pear trees is located.  And to the left, I created a whole new bed that was a mix of thin grass, weeds and, frankly...leaf mulch.  Have a look at this post - featuring that River Birch behind the Oak tree - to see what I'm talking about.  This area was some grass, some weeds and never really defined in any way

12 Steaming Yards of Hardwood Fine Mulch Delivered - Spring 2020

Image
Recently, we had twelve steaming yards of hardwood fines mulch delivered to our driveway from Best Firewood and Mulch - the same folks who deliver our firewood.  That's the delivery in the video at the top of this post showing the driver doing a little bit of 'jiggling' with his lifted bed to get all of the mulch to drop.  Nine years ago, I posted a similar video of ten yards of mulch that was dropped on our old driveway.  You can watch that video here .  This new mulch is destined for the beds that I pointed out in my recent garden tour post  and will fill in the spots between the front (where we're doing the cocoa bean hull mulch) and the far back (where I've been doing the wood chips from the Villag e). I have a seven cubic yard cart (wheelbarrow...but not a traditional wheelbarrow).  There are 27 cubic feet in a yard.  Let's figure that it takes four carts to get that yard.  Twelve x four per yard = 48 carts lugged into the back and side yard.  Ther

Teardown Hydrangea - September 2019 Update (Blooming)

Image
Above you can see what I've been calling our "Teardown Hydrangea" in its current state in the Fall of 2019.  I've documented this over time here on the blog since "acquisition" to today.  Starting with the beginning, in October of 2017, I dug some plants out of a yard down the street before they were tearing down a house to build .  In that bucket of plants was a hydrangea that looked really ratty.  Dry and unhealthy.  I didn't have much faith that it was going to make it.  And...frankly, I wasn't really certain that it even *was* a hydrangea!  Surprisingly enough, it survived the Winter and came back in Spring of 2018.  By last August, it has grown a bit and even flowered with a handful of blooms .  If you look then, this was the first time that it was showing off any lime-color in the flowers - which helps point me in the direction of the variety.  They're not (at least now) cone-shaped, but more ball-shaped.  I think that might mean that t

Sarah Bernhardt Peony Emerging - 2019

Image
Last May, I planted the first peony tuber in our backyard after having quite a few varieties in our old backyard in Elmhurst.  This first plant was a Sarah Bernhardt variety and is supposed to have big, beautiful pink blooms.  Here's the post showing how I planted it in May of 2018 .   It seemed to establish itself in the Spring because in June of last Summer it showed some signs of life with little purple shoots coming up for the first time .   But, that's about all the 'action' we saw out of this plant during the Summer.  But, I'm thinking that it was busy establishing itself under the mulch because if you peek at the photo at the top of this post, you'll see that we now have a strong leader popping up this Spring.   This is still an immature peony and I'm hoping that we get one flower out of it this year, but we might not get any.  If you want to see what a very mature (7 year established) peony plant looks like at this time of year, have a lo

Triumph and Darwin Tulips Up - April 2019

Image
Back in the Fall of 2017 (our first fall), I planted 30 tulip bulbs along the fenceline in our backyard in between the section where our espalier system is set up and where we are growing a series of hydrangeas.  They popped up for the first time in March of 2018 and I documented that here .  And by Mid-May they had bloomed in a beautiful combination of orange and yellow .  I mentioned last year that I thought it was going to be best to relocate these bulbs, but guess what?  I never got around to moving them.  This post claims that the *best* time to transplant tulip bulbs is the late Fall - about the same time that I put these in the ground.  From the post : The best time to transplant tulips is in the late fall, according to Ron Smith, Horticulturist at the North Dakota State University Extension Service. In the fall, bulbs have completed their growing cycle and lie dormant. Moving dormant tulips doesn't interrupt the growing cycle and makes the bulbs less susceptible to

Front Yard Tulips Emerge For First Spring - 2019

Image
Seems like this is the week for (finally) some action in our garden/yard that indicates Spring is actually arriving.  Yesterday, I posted a photo of what I think is a 'clump' 1 of Ostrich Ferns.  Today, let's talk about bulbs.   Last October, I planted 50 Tulip bulbs in one of our beds out in front of the porch, just underneath a giant Norway Maple .  At the time, I did my best to protect them from various critters, but as time went on, I noticed some digging in the area.  Between the skunks looking for grubs and perhaps squirrels with their eyes on the actual bulbs, somebody was pretty active shortly after I planted these bulbs.   And the soil?  I've talked about the soil we have close to our foundation.  It is terrible right now.  All clay.  If you read my Top 10 2019 Spring/Summer Gardening To-Do List , you'll remember that #1 on my list was to continue to improve the soil .  But, I've only have had one full garden season to work the soil and the

Putting Down Some Pelletized Gypsum - Beds and Lawn

Image
Posting this mostly as a reminder to myself here in the [ garden diary ] that I recently put down 80 lbs of pelletized gypsum.  Both on the front lawn and in the beds that I've planted around the foundation.  The instructions recommend applying this stuff at the rate of 40 lbs per 1,000 square feet, but I didn't do that.  I have about 15,000 square feet of landscape and that would require 15 bags.  I bought two and decided to concentrate on the beds and the front sod.  I didn't do the parkway area, but I intend to go back to Menards later this Fall to pick up a few more bags so I can do the parkway and driveway areas. Why? Because of the product benefits that the bag lists is the neutralization of roadway salt. But, why did I put this stuff down in the first place?  Well, the actual science is marginal.  I've read things on the Web that both say:  it helps and it doesn't help any.  But, see the first bullet point on the front of the bag in the photo up top? &

Karl Rosenfield Peony Tuber Planted - Sideyard 2018

Image
Back one month ago, I shared a photo of the Sarah Berhhardt peony tuber that I planted in our backyard and talked about how peonies are Nat's favorite flowers.  Unfortunately, before that one, we didn't have any peonies in our entire yard.  But, we *are* fostering one at Nat's mom's house out in Naperville and I plan on bringing that over to Hornbeam Hill early this Summer.  For Mother's Day this year, the kids all decided to buy a few bulbs/tubers for Nat and one of them is this Karl Rosenfield Peony  - which is a double bloom variety.  Around the side of our front porch, we have a couple of hydrangeas, but then a lot of blank, naked beds.  There is literally NOTHING in this spot on our landscape plan, so I decided to wing it.  It is south-facing, so peonies planted here would be getting some good sun and due to the downspouts and grading, this area gets a good amount of water.  So, just in front of the downspout off the porch is a spot that I stuck these