Posts

Showing posts with the label wall-hanging

Hang Up on the Wall-Hung Workbench - Notched Cuts Template

Image
Back at the end of July, I posted a photo of the wall-hung workbench that I had selected to build first in the garage (garden bench) and then down in my shop (once I got the hang of it!).  I pulled down some plans from WoodSmith Plans and got started ripping down the lumber to make all the pieces.  But there was a part that I got hung up on - these angled brackets with notched cuts at the bottom that I've circled above.  The plan calls for these supports to be notched and attached to a ledger board (that gets attached to the wall).  But, my little, amateur woodworking brain couldn't quite figure out how to make those cuts.  I took a sacrificial board and drew all over it to get the angles right.  I even took it over to Nat's Dad's house and had him mark it up so I could figure out the best way to make the cuts.  He showed me how to use my table saw to get most of the wood out, then a saber saw to make the final cuts.  But then I got home and had to actually do it

Decision Time: Final Wall-Hung Work Bench Design

Image
Bench via WoodsmithPlans.com In March of this year, I posted a photo of a wall-hung workbench that I came across on Instagram .  The photo above is of that same bench, but comes from the source of the plans:  Woodsmith Plans .  They're offering a plan for sale for the bench plus the tool holder above and the little shelf for hand tools on the very top for $10 .  I think I've settled on going with this direction for both a bench in my shop in the basement, but also for a garden bench that I'm now planning in the garage. This whole thing started with this initial wall-hung workbench with curves that I found online at the WoodArchivis t.  But, in looking at the space constraints that I have in my shop, coupled with some concerns about the rigidity of the curved superstructure, I've kind of drifted away from my initial plan.  In the shop, my plan calls for hanging the bench on concrete walls, which requires cleats or ledgers (as in this design above).  For the othe

Disney Pin Board #2 Hung in Garage

Image
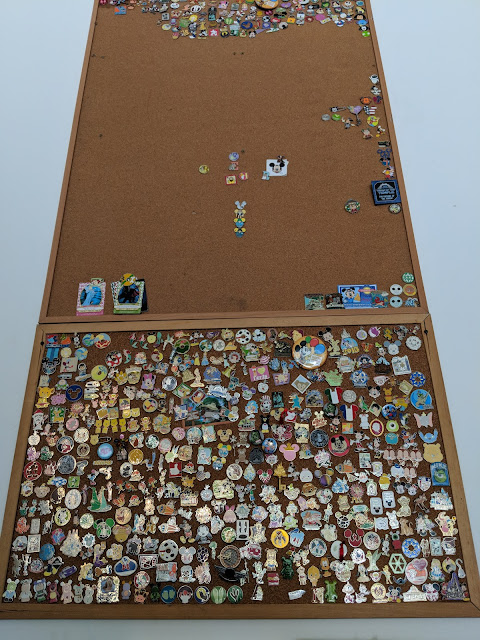
Yesterday, I posted a photo of the first Disney Pin Board that I hung in the garage .  Today, you can see the larger pin board that I hung above it in vertical orientation.  This one is about 2.5x the size of the original board and can hold A LOT of pins.  Two weeks ago, I picked up a couple of these large-scale cork boards at a garage sale for $0.50 a piece.  And they threw in another smaller one that I might or might not use (depends on how far we get with our current volume of pins).  I decided to put this one *above* the first pin board mostly because it is out of reach of the kids.  I contemplated putting it right next to the first, full board, but because of where our stairs are located, that would have put this second board right within reach of the kids.  The downside is that I hung this with screws.  I learned from hanging the first one that once full of pins, these boards get really heavy.  And that means that there's no way of hanging these things that will work -