Posts

Showing posts from May, 2024

Feeding Disneyland Roses + First Flush of Blooms - May 2024

Image
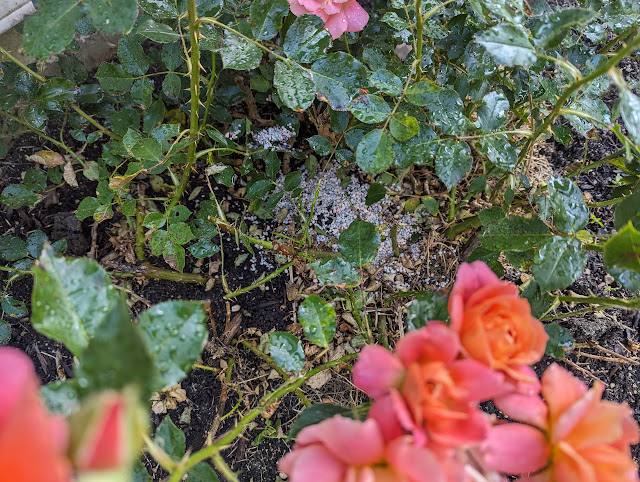
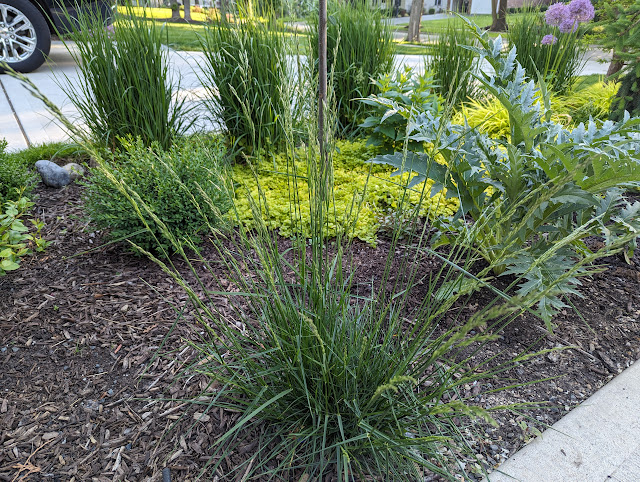
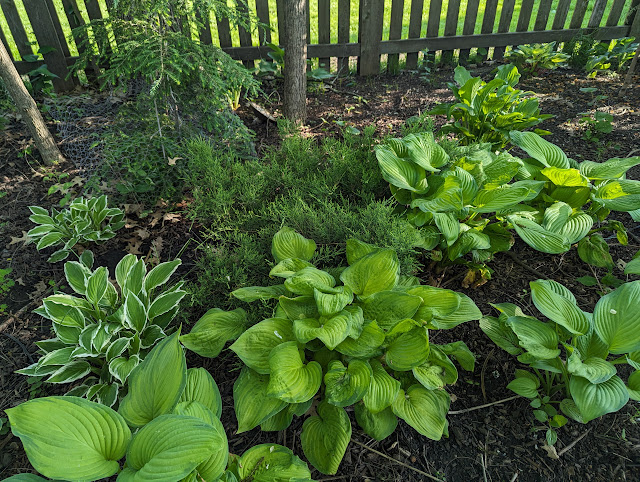
This is the second granular feeding of the season for our Disneyland Roses that I've been trying to put down right around the first of the month - so this one is a day early.  See below for a few photos - showing the fertilizer application as well as the state of the three remaining rose bushes with blooms.  The one closest to the fence is having some trouble, so I've been spraying them every week with a Neem Oil brew to help kill whatever pests and/or fungus that is taking over. 

DIY Pizza Oven Build - 10" Wet Saw - Tools Needed - May 2024

Image
So far in my diy backyard wood-fired pizza oven build, all that I've talked about/posted about is what I'll call infrastructure.  That's the foundation slab (reinforced), the block stand (cores filled) and the suspended hearth (reinforced).  But, once all that is out of the way, it quickly becomes a brick-cutting exercise.  Medium-duty firebricks are 2.5" thick, 4.5" wide and 9" long.  They're beefy.   Each of those bricks require 4 (or so) cuts to make them useable in the dome.  In order to cut those big firebricks, one needs a saw that is both ready to cut brick (wet saw) and has a big throat (cut depth), so you don't have to cut one-side, then flip, and cut the other. After bouncing around Facebook Marketplace and Craigslist for months, I decided to take the plunge with a new saw from Harbor Freight.  Between their Memorial Day sale, another discount (membership) and a gift card that I was given for my birthday earlier this year, the new 10" D

Couple of Wood-Fired Pizza Oven Hearth Construction Tips Via YouTube - May 2024

Image
Last week, I posted my latest update on our backyard pizza oven build where I mortared in the first course of the cinderblock stand .  I'm on my way this week to swap out some of the blocks and to pick up the rest of the angle iron so I can drystack the rest of the stand.  At risk of getting things out of order, I'm going to talk a little bit about the suspended hearth.  That hearth sits ON TOP of the stand.  It is reinforced concrete that is framed up with a 2x6.  That means - at the VERY MOST, the hearth is 5.5" thick.  But, because you overlap the forms with the block stand, you lose about an inch - so it becomes something like 4.5" thick.   I'm thinking about the hearth and the materials required as I run to the hardware store and I found a bunch tips that I'm going to use in my hearth build via the  Blood Sweat and Beers YouTube channel  -  this video where he walks through his reinforced hearth forms and setup .   I thought it was worth documenting here

What Prairie Dropseed Looks Like After Two Years - May 2024

Image
I bought and planted a couple of Prairie Dropseeds ( Sporobolus heterolepis ) in the Spring of 2022.  They're highly sought-after from all kinds of gardeners - native folks, new perennial movement people, even more formal gardeners.   And they did...nothing.  Like..nothing. They looked like a short clump of Kentucky Blue Grass that was out of place in a garden bed.  That's how they looked in their first year (2022) and their second year (2023).   This Spring, I cut everything back to the ground and suddenly...the Prairie Dropseed is showing itself with a lot more growth and a bunch of seed heads.  Here, below is the one that I can identify - IB2DWs.  Looks lovely: I can see the appeal in these now.  Can they be divided?  I hope so.

A Look At Some Backyard Conifers - Junipers, Hemlocks and Mugo Pine

Image
Conifers should come first.  That's advice that I've (now) adopted.  But, I'm seven-years down the gardening path and it is too late.  But...looking around, I *did* get it right - somewhat.  I planted some tiny Canadian Hemlocks, some creeping Junipers and a tiny Mugo Pine in the 'understory bed' over the years.   Below are a few photos that show how they're doing.  First, is a Youngstown Juniper amongst some hostas and a look at the bottom of one of the Hemlocks.  The juniper was planted in Fall 2019. These Hemlocks started out as 12" tall trees.  Now they're six-feet tall and growing.  Pretty great to see: Below is another creeping Juniper - that's smaller than the first.   And here, below, is the Mugo Pine.  Planted as a tiny one-gallon evergreen shrub in the Fall of 2021 .  It was ravaged by the dang rabbits, but has since rebounded - thanks to some wintertime chicken wire.  This is its third growing season in the garden and is now about 12&quo

A Few Autumn Ferns - Backyard Shade Garden - May 2024

Image
First came the Ostrich Fern.  Then, I realized there were BETTER ferns that I could grow in my garden.  The one that I seem to be drawn to most?  The Autumn Brilliance Fern .  I planted three to start and then each Fall, I've added more small ones.  Unfortunately...most of them don't over winter that first year, so I end up having far fewer than I start the Fall with in the backyard. But, where do we stand today - late Spring - in terms of Autumn Ferns? First...the three originals - they're all here today.  And looking mighty fine in their Springtime splendor: In the Fall of 2022, I planted 12 (yes...twelve) small Autumn Ferns.  I thought ALL of them died, but turns out that four remain - all in front of the Hicks Yew Hedge in the back.  Two photos below show two apiece.  These are, well....small.  But they get very little supplemental water back there. That makes seven so far.   Last Fall, I planted five more quart-sized Autumn Ferns .  I dug up four this year and it seems

Firefly Japanese Maple - Winter Dieback - Spring Color - May 2024

Image
Last year (2023), I bought three one-gallon Japanese Maples from Mr. Maple and planted them in mostly-shade spots in our backyard .  Of the three, two of them died back almost all the way to the graft.  One of them had a lot of die-back at the top, but re-emerged this Spring with enough foliage to consider it 'alive'.  That one - that survived the best - is the Firefly Japanese Maple.  Acer plamatum 'Firefly' .   Firefly has what is known as 'reticulated variegation' and that's showing this Spring. See below for a couple of photos: In that second photo, you can see the dead stems that rise above the foliage.  I'd say that more than HALF of the tree died-back, but based on the foliage, this CERTAINLY is NOT the grafted rootstock producing leaves.  This *is* Firefly.   I can't say the same thing for the Seriyu and First Ghost Japanese Maples from Mr. Maple dot com .  Despite giving them 'Five dollar holes', baby'ing them with water and see

Mortaring In First Course - DIY Pizza Oven Construction - May 2024

Image
Last I posted about my backyard DIY pizza oven construction project, I was showing the foundation slab after I had stripped the forms .  The pour went well - thanks to the MudMixer.  Now that the reinforced slab was done, I can move on to building the stand.  That stand is made out of 8x8x16 cinder blocks.  If you go back and look in the archives, you'll see that I went back-and-forth about the dimensions of the slab and stand and after a bunch of thinking/tinker'ing, I ended up deciding on these dimensions : Slab: 72" wide x 80" deep. Stand: 4 blocks wide x 4.5 blocks deep - 62.5" wide x 70.312" deep. Hearth: Same as stand. Oven: 39" interior, 51" exterior side-to-side x 64" front-to-back. That's the slab that I poured: 72" wide (6 feet) by 80" deep (6 feet, 8 inches).  And, so I could go about building the stand with four blocks wide and four-and-a-half blocks deep.   Setting these blocks square is important and I had to pl

Sarah Bernhardt Peonies - Cut Flowers - May 2024

Image
It is peony season around here.   When we were first dating, Nat was a blogger.  Her url was iheartpeonies dot com.  The very first thing that we planted in our first garden was a Sarah Bernhardt peony that was a division from Nat's mom's garden.  The story goes that the peony was her great aunt's peony that had been divided a number of times to be planted in various family member's gardens.   That peony ended up back in Nat's Mom's garden when we moved out.  I said - back in 2017 - that it was being 'fostered' .  But, it has stayed there these seven-plus years.   Our new garden didn't have any peonies.  Until 2018 when I bought a couple of tubers.  The first one was Sarah Bernhardt .  The pink peony that you think of when you think of peonies.  It has moved around a few times, but ended up IB2DWS and has grown quite a bit up there.  Last year (2023), I declared was our first REAL 'Peony Season' .  It was the first time that we had blooms; or

Planting Six Melina Fleur Dahlia Tubers In the Beds - May 2024

Image
I'm moving onto the 'in ground' phase of my 2024 dahlia journey.    Three weeks ago, I potted-up my six Melina Fleur dahlia tubers into one-gallon nursery pots and started them indoors .  After they sprouted, I began to move them outside and did a little bit of hardening-off by putting them out in the shade for a few hours during the days and bringing them in at night.  Eventually....I just started leaving them outside overnight and they all seemed to be fine.  Here, below, is what they look like now:  about six-inches of foliage on each one: I put three of them on the southside of the house - where I get full sun.  Tucked in/out of the Disneyland Roses along the foundation bed.    Below is one in front of the gas meter, one in front of the power meter and one tucked close to the gate, between a Karl Foerster Grass and the last Disneyland Rose.   Speaking of Disneyland Roses...I now can (sadly) say that the three from 2023 all died.  Didn't come back this Spring.  Bumme

Wiring Up Weeping Norway Spruce Leader - IB2DWs - May 2024

Image
Both of the small, weeping Norway Spruce trees that we planted last Fall have put on spring growth.  New, bright-green needles and weeping limbs have appeared.  That includes the leaders - especially on the tree closer to the house.  It has seen a bunch of top growth - see below.  I trained these small trees up on poles last Fall and from what I've read, you have to keep training the leader up, or else...it will become a 'spreader' vs a more upright tree.   This leader needed a taller pole, so I grabbed one and wired it up to get the leader more vertical and upright.  See below for the 'after' of this Weeping Norway Spruce: I'll watch the top of this spruce and think about pruning back some of the lateral branches to reduce competition for the top.  

Transplanted Cat's Pajamas Nepeta - from Back to Sideyard - May 2024

Image
As part of a larger " Garden Edit " to the "kitchen curved bed" in the backyard, I needed to move a few things OUT to make room for what I'd like to install.  Hence the notion of an 'edit'.    One of those edits is a Cat's Pajamas Nepeta that needs to get out of there.  I moved it here last Fall when I noticed it wasn't thriving in the shade .  Little did I know that I'd move it twice in six months.   The good news is that the Nepeta 'came back' this Spring.  Here, below is what the young plant looked like before I dug it up: Below is a little bit more context - showing the Nepeta vs some of the peonies: A few years ago, I posted about how Nepeta is listed as one of the Disneyland Rose 'companion plants', so it was a natural move to trasnplant it right in that long, foundation bed.  Below, you can see the tiny plant tucked in next to a Summer Beauty Allium:

New Bed for Cut Flowers - South Sideyard - May 2024

Image
The southside sideyard of our property is like most suburban sideyards.  Long and narrow.  It is also one of the very few areas outside of our front yard where we get A LOT of sun.  Over the years, I've planted some things over there including three Disneyland Roses , a pair of espaliered Sugar Tyme Crabapple trees , some Summer Beauty Allium, Karl Foerster Grasses, a few various allium bulbs, our Indiana Street Iris  and last Fall I added a small Blue Star Juniper .  Closer to the front of the house, we have a pair of Limelight Hydrangeas that are adjacent to the porch. The bed along this side of the house has been the same size since we moved in:  long and thin and hugging the foundation.  Something about 18" wide.  Below is a photo showing the bed as it looked before I started this new bed project.  One other note (to future Jake) - the orange spray paint shows where the cable line is buried.   I've been talking about growing flowers since last Fall - and pushed myself

Stripping Concrete Slab Forms - DIY Pizza Oven - May 2024

Image
Just 48 hours ago, I shared the details and photos of how I poured our backyard wood-fired pizza oven reinforced foundation slab using 46 sixty-pound bags of 4000 PSI concrete and a MudMixer.  I've kept the slab (mostly) wet using a garden hose and covered it in plastic.  48-or-so hours after the pour, I knocked down the supports and began to remove the forms.  Here's what was left:  an almost (for a first timer with a non-super-discerning eye) perfect 5.5" thick reinforced concrete slab: The light color (and discoloration) is from the plastic sheet touching the concrete as it cured.  I'm not the least bit worried about that as I know the slab will continue to change color.  I'm happy with the straight lines and the lack of air pockets around the edge.  I used a heavy hammer to vibrate the forms in an attempt to get the concrete mix down along the edge/face of the forms.  It seemed to have worked.   After a few more days, I'll get out there and snap some chalk