Posts

Showing posts with the label soil

Second Load of Biosolids Applied - Perennial Garden Topdressing - February 2024

Image
Last week, I posted the details and photos of the first late-winter application of municipal biosolids in our garden and talked about how I was going to try to find some time to head to the mulch pit to get a few loads before gardening season heats up.  I applied that initial load to some areas that needed the soil amendment including the Spring Grove Ginkgos, the epimedium colony and my Hellebores.   I mentioned (in that post) that for every spot that I dumped a bucket of biosolids, I spotted 2x more spots that could use a top-dressing.  Not to mention the lawn, the parkway and the compost bins.   Over the weekend, I ran out and picked up another load.   About 8 five-gallon buckets filled up 2/3rds-of-the way.  And dumped and spread out around the backyard.   I added another partial-bucket under the Linden trees: And, right at the base of my bird feeder pole: At regular intervals along the front of the south border: Around the tru...

Piling Excavated Dirt In Garden Beds For Berm - Smothered by Wood Chips - February 2024

Image
This past week saw the start of the excavation for my backyard wood-fired pizza oven .  After going back-and-forth with various versions of math...I settled on some dimensions.  The hole needs to be 90" wide and 98" deep.  That allows for a slab to be poured that is 78" wide and 86" deep.  12" each way to allow for framing, supports and what I'm calling 'wiggle room'.   I opted for the 'on top of the drywell' location ; which means that the excavation is going to be light in some parts (6 inches) and deeper in others (10-12 inches).   That means that I'm going to be removing A LOT of material.  Soil.  Clay.  Probably some rocks.   What do I do with it? What I'd *LIKE* to do with it is to either build a berm in our front yard .  Or...use it to build a waterfall for a backyard pond.   But, I'm not ready for the pond.  And, I'm too chicken to do the berm in front.   Will it look silly?  Will...

Maidenhair Fern Repotting - January 2022

Image
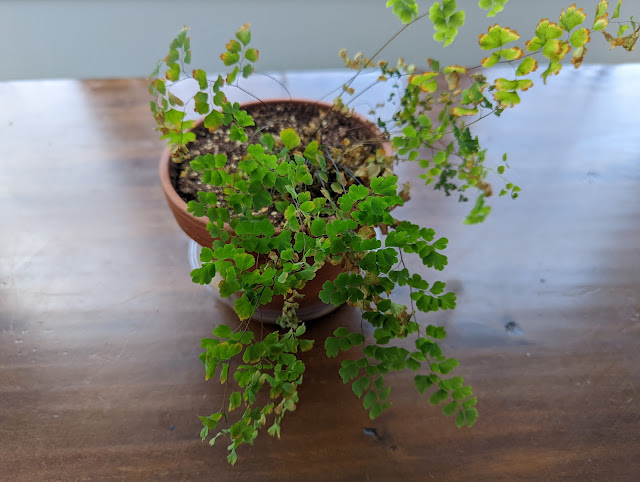
We're coming up on my one-year anniversary of living with a Maidenhair Fern in our house.  I picked up a tiny one at Wannemaker's in February of 2021 and re-potted it into a larger clay pot .  If you go back and look at that original post , you can see that the fern was quite happy.  Feather-light and green.  A month later (March of 2021), it was thriving .  I seemed to have figured out how to keep it happy in terms of light and moisture and feeding.  After that post, I don't seem to have shared any further updates on the fern.  But, it has *been* a journey.  When people talk about Maidenhair Ferns being finicky, they're not lying.   During the life of this potted fern, I've kept it inside.  Either in our family room or screened porch.  And, it has been a series of ups and downs.  After that March post, I think I saw some decline.  Followed by me tending to it, watering it and feeding it.  Which lead to a period ...

Tree Science in Action - Morton Arboretum Collection Nets - December 2020

Image
We were out on a walk in the Morton Arboretum when we noticed a basket far off the path.  We wandered over to see what was doing with it and saw this tag that had the title:  Tree Science in Action!  And included a reference to a soil scientist at the Morton Arboretum:  Dr. Meghan Midgley . Here's a closeup (albeit blurry) of the tag: It reads: Tree Science in Action! We're collecting leaf litter to study the effects of trees on soil. DO NOT DISTURB Questions? Contact Dr. Meghan Midgley, Soil Ecologist The baskets appear to be collecting material as it falls from the trees.  This one was in/near the Spruce Plot on the main loop .    What is Dr. Midgley working on?  From her bio : As the Soil Ecologist at The Morton Arboretum, Meghan Midgley studies plant-soil interactions in a changing world. Specifically, she aims to understand how interactions among plants, microbes, and soil mediate ecosystem-specific responses to environmental changes. Her re...

Soil Savvy Soil Test Returned - September 2020

Image
A little over a month ago, I posted a photo of the pair of soil tests that I was planning on conducting for my lawn - both front and back - from SoilSavvy.  These tests require you to take a composite set of soil plugs and combine them into a little tray that you ship off.  When SoilSavvy's lab receives the samples, they run them through their system and then send you off this analysis.   I ended up doing one test for my front yard and one for the backyard.  This is a little different in approach than I did last year, but I'm thinking this is the best way forward.  First, a quick review of where things were last year .  This year, the results show higher levels of just about everything aside from Boron.   First up, the front yard.  The N-P-K analysis shows that the Potassium is below the target area.  Surprised?  Not really.  Milorganite's N-P-K is 6-4-0 - so I haven't added any Potassium to the yard this year. ...

Year Two - Soil Savvy Soil Test Kits Arrived - 2020

Image
I recently ordered the pair of Soil Savvy test kits that you see above and am going to turn around the soil samples to get my results right away.  I did the same thing last year - ordered two kits in June .  And, in July, I had the results - for both the front and backyard(s).  You can buy the kits directly from Soil Savvy and they give you a little break if you order two of them.  I'm interested to see what has changed in my soil over the past year - and to see how much impact that I have had with my soil amendments and fertilizers.  For those keeping track at home, #4 on my 2020 to-do list this Summer was to test the soil again .  So, I'm on my way to crossing that one off. Below, is a look at what is in the package.  You get a little soil scoop, a screw-top container that you deposit the soil sample, a registration card and a padded envelope with pre-paid postage to send the sample in.  In the little container, there's a little bit of...

My Lawn Enemy Is Back: Wild Onions 2020

Image
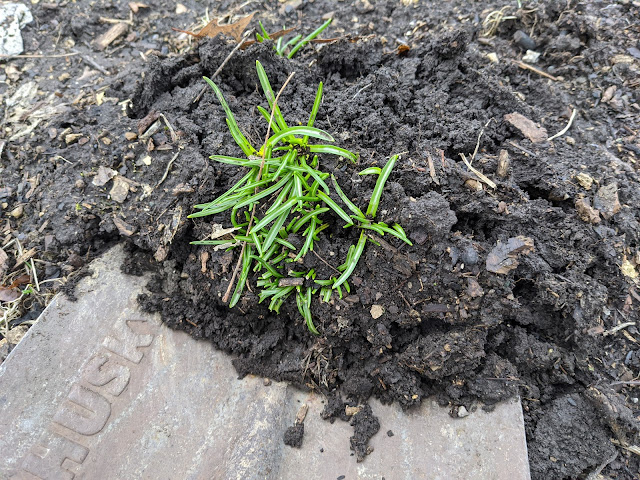
I was out in the far back of our yard yesterday and I saw some brand new, bright green growth.  I knew immediately what I was looking at:  the first instance of Wild Onions for the year.  I know it won't be the last.  If you've followed along, you know that Wild Onions in my yard are public enemy #1.  They've achieved that status due to their prolific nature (they are EVERYWHERE), the fact that I can combat them in early Spring when there isn't much else going on in the yard and they are a DIY project that doesn't involve herbicides (you have to dig them out). I've chronicled my Wild Onion journey here on the blog starting with last Spring when I started to dig the clumps of Wild Onion bulbs out of the turf everywhere I could .  Once their season passed, I tried my best to make the soil less hospitable for them by applying Lime a few times.  I posted about them earlier this year when I saw this story about a potential spray (Bonide Burnout) tha...

Spreading Hardwood Ash As Tree Fertilizer

Image
'Tis the season for fireplace burning in our house - and likely in yours.  That means that you'll have to deal with the ash that gets left behind after the wood burns.  We burn hardwoods exclusively (so far this year, we've burned Cherry and Birch) and that means we end up with hardwood ash.  Turns out, it has value in the garden as a soil conditioner and fertilizer.    According to the Oregon State University (Notice...I did include *the* for those other OSU lunatics) Extension office , hardwood ash can aid in making the soil an environment that supports plant and tree growth.  From the OSU Extension article : Because wood ash is derived from plant material, it contains most of the 13 essential nutrients the soil supplies for plant growth, according to Dan Sullivan, OSU Extension soil scientist.  "When wood burns, nitrogen and sulfur are lost as gas," Sullivan said, "but calcium, potassium, magnesium and other trace elements remain. The carbo...

Feeding Our Lawn With Mag-I-Cal Plus - September 2019

Image
Starting this Spring and continuing this Summer, I've chronicled my experiences with our lawn and the process, materials and thinking that have gone into it.  This is the first time that I've spent anything more than a passing thought about the turf, the soil and how to best tend to it as the seasons change. Started in Spring with a Wild Onion removal - digging them out. Used a calculator to time my application of pre-emergent Crabgrass preventer (without food!) Started to use an organic fertilizer - Milorganite on the yard - instead of synthetics.  Got serious about my weed spraying with a blue pattern indicator . Then I tested my soil and got a baseline on the front and back .   I added some Ironite (2x) this Summer to keep the lawn green . Cut the front yard higher than I've ever cut in the past.   Earlier this Summer, I bought and spread a big bag of granular Humic Acid . And most recently, I put down a second application of pelletized...

Late Summer Pelletized Lime Treatment Added To Lawn (Treating Wild Onions)

Image
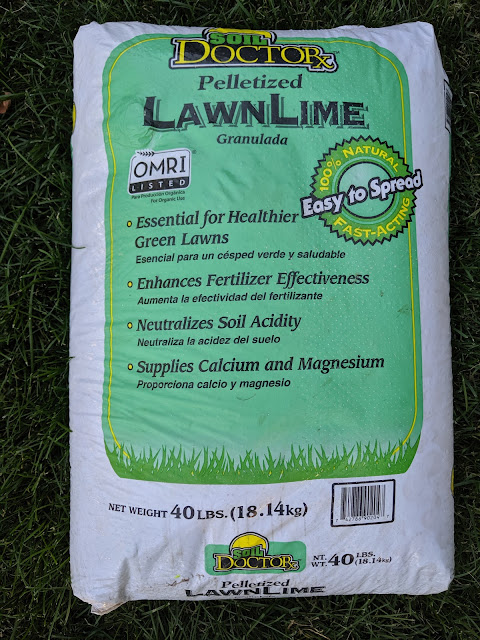
If you've been reading along on the blog this gardening season, you might remember that I chronicled how I was attacking the scourge of wild onions that were taking over my backyard .  Once I figured out what they were, I went about trying to remove them by digging them out.  I also mentioned in that post that some folks were recommending to add lime to make the environment a little bit less hospitable to the onions by increasing the pH of the soil.  As part of my late-Summer turf work, I decided to apply another four bags of Pelletized Lawn Lime to the back 2/3rds of the yard.  How I arrived at an August application was looking at the soil tests that I did earlier this Summer.  This section of yard has a pH in the ideal range, but I think I want it a bit more alkaline range - perhaps even higher than the ideal range - to help ward off the onion blossoms that will be trying to make a home next Spring.  That's 160 lbs in August on top of the 160 lbs ...

Lawn Soil Tests Are In - July 2019

Image
Back in June, I posted a photo of a couple of soil tests from Soil Savvy that I had purchased to try to ascertain the exact details of our soil in the lawn.  I thought it would be a good chance to get a baseline and to understand if we had differences in the soil that was left undisturbed in the far back of our lot and the more clay-like soil that is lying underneath the sod closer to our house. I did exactly as the instructions said to do:  pulled up small samples from various parts of the lawn and mixed them together.  For each of the two samples.  Mailed them away and then waited a little bit.  A few days later,  received a couple of emails with links to the results.  At the top of this post, you'll see the results from what I call the "far backyard".  This is soil that is totally undisturbed and grass that we inherited.  Based on my experience, it is softer, not as hard to pull a plug out of and A LOT less clay when I turn a...

Soil Savvy Soil Test Kits - Two Tests

Image
Last week in the post about how I had bought my first run of Humic Acid (granular), I mentioned that I was going to test my soil before applying.  Welp, today is that day.  I bought two Soil Savvy Soil Test Kits after watching Ryan Knorr on YouTube talk about how to collect a sample .   There are a variety of ways you can test your soil including a few that you can buy at Menards and mix up on the spot, but this test is priced a bit higher, requires you to send away a sample and the posts some online results for you.  So, why two?  You can probably imagine that I'd want to get a test from my front yard and my back.  But, you'd be wrong.  When we built our house, the entire front yard was a massive mud pit.  And so was the back.  For about the first 100 feet.  And that's where we laid sod.  Based on the soil type in our landscape beds, I'm pretty sure that everywhere there is sod, there's a lot of terrible clay soil.  ...

Putting Down Some Pelletized Gypsum - Beds and Lawn

Image
Posting this mostly as a reminder to myself here in the [ garden diary ] that I recently put down 80 lbs of pelletized gypsum.  Both on the front lawn and in the beds that I've planted around the foundation.  The instructions recommend applying this stuff at the rate of 40 lbs per 1,000 square feet, but I didn't do that.  I have about 15,000 square feet of landscape and that would require 15 bags.  I bought two and decided to concentrate on the beds and the front sod.  I didn't do the parkway area, but I intend to go back to Menards later this Fall to pick up a few more bags so I can do the parkway and driveway areas. Why? Because of the product benefits that the bag lists is the neutralization of roadway salt. But, why did I put this stuff down in the first place?  Well, the actual science is marginal.  I've read things on the Web that both say:  it helps and it doesn't help any.  But, see the first bullet point on the front of the bag ...

10 Bare Root Strawberry Plants: A Soil Experiment

Image
In our old garden back in Elmhurst, we had a couple of strawberry plants.  I put them in a giant pot (that came with our Ginko tree) and they came back year-after-year we lived there and bore fruit that we (sometimes) ate and other times were enjoyed by various critters.  Here's a photo showing one of the big fruits from 2013 .  Here's a look at one of that plants just about six years ago and  here's a sample harvest from 2012 .   Also, in 2015, I came across this Hula Berry plant which features strawberries that taste like pineapple.  I planted it, but then before we were able to harvest, we sold our house and moved out.   Fast forward to this year: I found this package of 10 bare root "June Bearing All Star" strawberry plants from M&G Holland.  They sat on my desk for a few weeks until recently when I had the two containers left over from planting the kids Earth Day trees .   I wanted to run a little b...

Tuff Stuff Red Hydrangea: Planted Fall 2017

Image
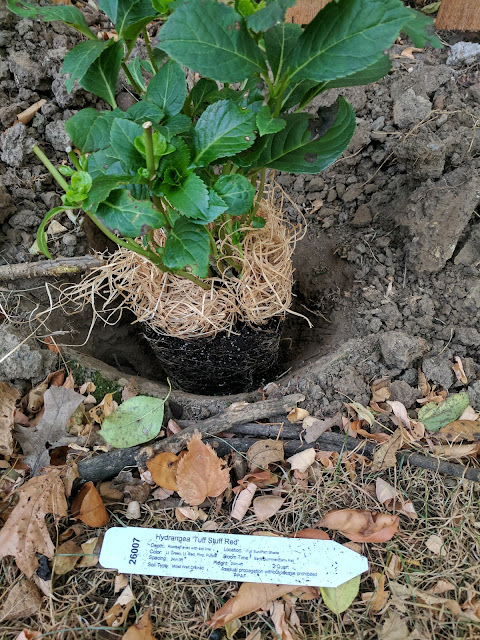
This fall is the first fall in our #newoldbackyard, so I've been busy with various fall plantings.  Starting with the tulip and allium bulbs, the harvested hostas, ferns and hydrangea from our neighbor's yard and most recently with a Disneyland Rose plant and a Everlasting Revolution Hydrangea - both from Jackson and Perkins.  This one above, the Tuff Stuff Red Hydrangea, is the last in the series of plants that we were given by Nat's mom as an anniversary gift.   I put it in a spot adjacent to the Everlasting Revolution variety (the multi-colored one) as outlined in the most recent landscape plan documents .    If you look closely at the photo above, you can get a sense for the soil we're dealing with in the #newoldbackyard.  It isn't great.  In the Spring, I have plans to amend the soil with some organic material and till it in where the beds are located.  That might require me pulling some of these plants out and replanting...

Fall Bulb Planting 2017 - Tulips

Image
A few days ago, I posted some photos of a handful of Purple Sensation Allium bulbs that we did a fall bulb planting with around one of the big oak trees in our #newoldbackyard.  Photos here .  I mentioned that we also planted some tulips on that same day.   Today's post shows off the bulbs of the two varieties that we put down.  I picked up 2 15 packs of tulip bulbs at Menards that were on sale (they also had the 11% rebate thing going on...which....seems right now to be an almost constant thing??).  The first set was 15 Darwin Hybrid Tulips in orange.  You can see the packaging below: According to Longfield Gardens , Darwin Tulips have some special characteristics:  Darwin hybrids produce big, showy flowers with a classic tulip shape: broad at the base and slightly narrower at the top. They come in a rainbow of rich, saturated colors that range from white through yellow, orange, red and pink, including several lovely bi-colors. ...