Posts

Our Christmas Tree V2 - 2017 Edition

Image
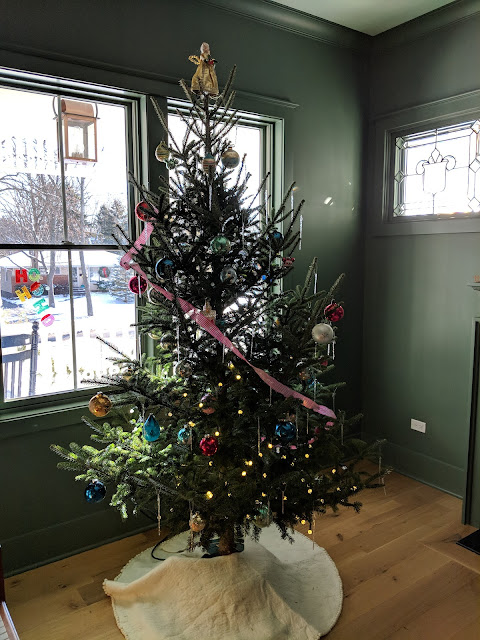
Last week, I posted a photo of one of Christmas trees that we had up in our green room .  As I mentioned in that post, this year we had two inside Christmas trees.  Both bought from the Tammen Treeberry Farm down in Braidwood . This tree wasn't a great looking tree, but it survived remarkably well in terms of staying green and alive.  You can kind of tell it is a bit off center and maybe not super symmetrical, but that's because we couldn't settle on a tree out in the tree farm.  We've historically preferred Fraser Firs - and that's what we had in the Green Room this year - but we've also had Douglas Firs in the past too.  In 2015, our first Christmas not in our own house, we had a Douglas .  This tree, is a Douglas.  And it was not a great tree for lights and ornaments.  The needles were consolidated towards the very extremities.  That made it tricky and also made the tree look sparse at times.   We ended up with a Douglas because everyone else in our p

Bucky Badger Club Cheese - A King of Clubs Rival?

Image
Those of you who have been following along on the blog know a few things about me:  I'm pretty passionate about pizza and gardening.  But also about Club Cheese.  Yeah...Club Cheese.  You might call it Cold Pack Cheese.  Or Cheese spread.  Or a 'tub of cheese'.  Here in Illinois, Merkt's rules the grocery store, but Trader Joe's sells something that is a bit more whipped than Club Cheese that they market under the label "Pub Cheese".  It is all good stuff.  And I'll eat a lot of any variety of the stuff that I come across at parties and social gatherings.  Also, I'll eat a lot of the stuff inside my very own house. Pretzels, tortilla chips, pita chips.  I'm pretty agnostic when it comes to the vessel that I use to scoop up the club cheese and deliver it to my mouth. But, I've had a few Club Cheese experiences that have allowed me to demonstrate a strong preference for a particular variety. Sure, I still stay true to Merkts.  It *is

Face Cord of Firewood Ordered For the Season - Winter 2017/2018

Image
Back in November, I posted a before/after set of photos of the pile of wood that I had partially chopped and stacked near our back door ahead of the winter season.  That pile of wood was made up of a series of logs that had been left behind by our tree guys when they cleared out a bunch of dying/scrub trees.  Think it was a blend of Walnut, Ash and Maple trees. As the weather turned, we started to use the fireplace in our family room.  And use it.  And use it.   We went through the entire stack of firewood by Christmas.  So, I had to order some. It is funny, the whole idea of ordering firewood make me felt pretty manly.  You know who else is a man?  I'm a man . I hunted around for providers and settled on one that had a good mix of wood, plus they delivered and stacked.  Yeah...stacked. I have fond memories of going over to my friend Matt's house on Saturdays during the fall when his Dad would be receiving his wood delivery.  We hauled and stacked it in their garage

Update on our Christmas Amaryllis

Image
About 10 days before Christmas, our amaryllis looked like this .  But on Christmas day?  It had bloomed!  All four ways.  It was a spectacular flower and as luck would have it, the final of the four buds opened on Christmas day.   That's a shot of the white/red beauty above.  There were four of these double petal stars for us to enjoy for a few weeks.   You'll recall that this is the bulb that we picked up at Wannemakers and it was far outperforming the cheap one from Menards .  I'm really so pleased with how this - the $14 version one - worked out for us.  The Menards one ($3 one!), is still chugging along, but it is all green shoots and no stem so far. Next year, the Babe already has plans to get after these things at scale.  And by 'scale', we're talking about 4 or 5 of them.  She's thinking that in addition to us trying a couple different ones, we can work on a project together and be in a position of gifting them already planted around St. Ni

Our Christmas Tree - V1 - 2017 Edition

Image
Every year for the past eight years, I've been documenting our Christmas trees here on the blog and it has been fun to look back.  I'm not talking about the front yard trees , however.  Sure, I've been doing that , too, but this post is about the trees we're had in our house.    Here's the post showing our tree in 2016 - our last one in Equation Boy/Man's house .  Above you see something that I've labeled V1 of our tree, because this year, we had two trees.  This one, in the green room, is a Fraser Fir and is adorned with vintage glass ornaments that we've acquired over the years at garage sales and estate sales.  Also has an angel that we scored at a yard sale up in Michigan.  I'll post a photo of the other tree from our Family Room later this week. Here's our 2016 tree - our last one in Elmhurst . Here's our tiny tree from 2015 at Equation Boy/Man and Vic's house . Here's the tree in 2014 at our old house . Here's the post

Miter Saw Table - Progress Step 2

Image
Yesterday, I posted a photo of the set of legs that I had built that were the beginning of my new miter saw station .  Today, you can see the two frames that I built that will go on top/in the middle of those set-ups.  The leaner one on the left is the one that will go on the bottom and be the bottom 'shelf' and the wider one on the right will be the shelf that the bottom of the saw sits on top of.  There's another layer/level of platform that will sit at the very top that will be even with the table that is at the top of the saw.  Each of these were spec'd to be put together with pocket screws, so I went ahead and followed those directions.  You can see the pocket screw holes below: Let's call this step 2:  the bases are built out. 

Miter Saw Table - Progress Step 1

Image
This winter break, I've embarked on a few projects to get my shop up and running in the new house.  The first project is a mitre saw stand.  I figure that if I get my saw up off the floor onto a stand, I can then begin to make a few other tables/benches to host the other tools and what-have-yous that I've collected over the years.  I have two Christmas's worth of tools to unpack and set up and actually use. I'm using this plan from the Home Depot with a few modifications including the addition of this Kreg Precision Trak and Stop Kit , so that will require me to use a thicker fence than what is spec'd in the plans.  I also think I'm going to add a dust shroud and dust collection near the end.  But, the first few steps in the plans - which focus on the legs and the base pieces, I'm going straight by the plans.  In the photo above, you can see the four legs that I put together with 2x4's and a 2x6.  The plans call pocket screws, so that's what I