Posts

Showing posts with the label front porch beds

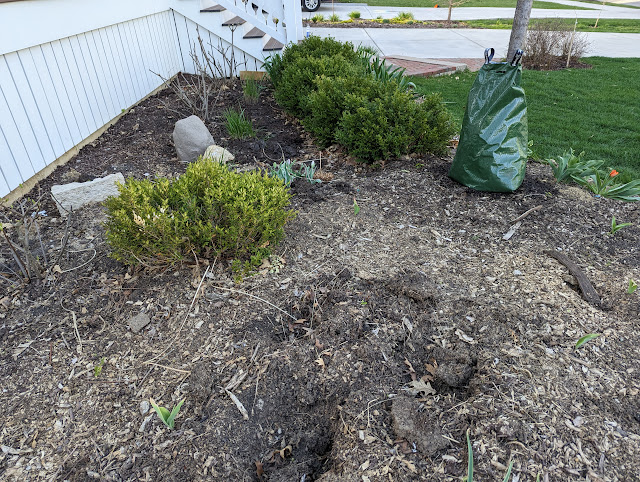
3 New Disneyland Roses - Front Porch Bed - May 2023

Image
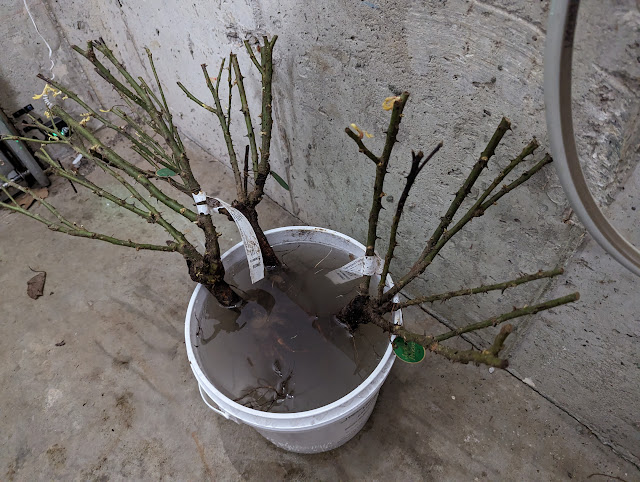
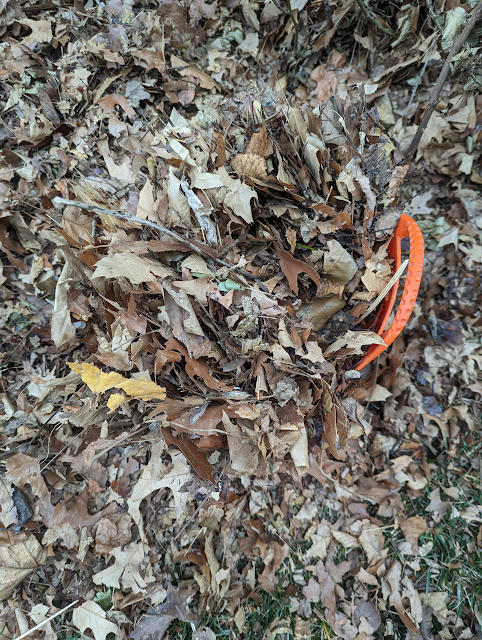
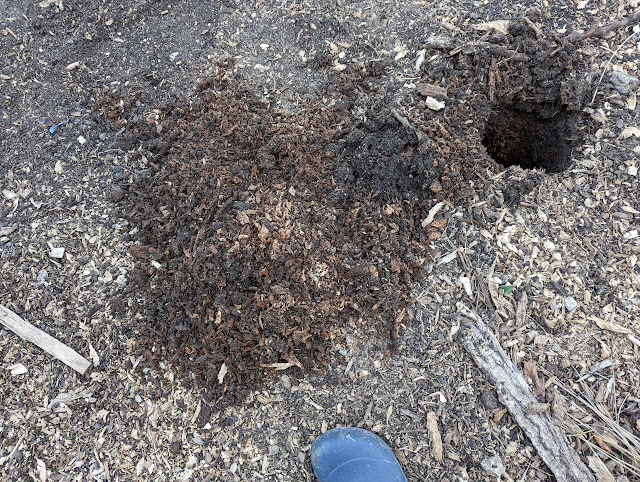
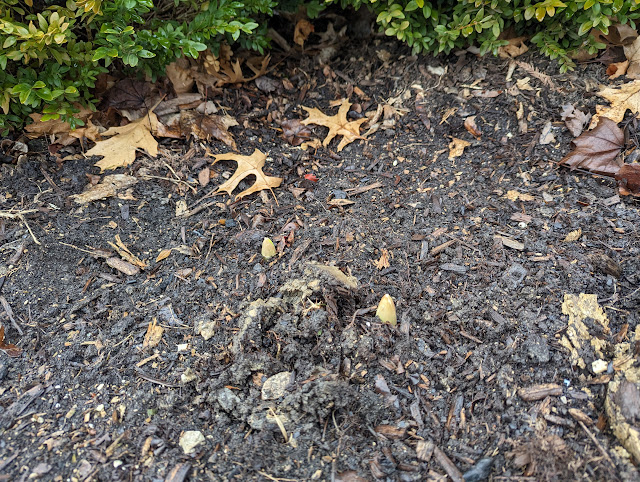
Number 3 on my 2023 to-do list is to plant out the front porch bed .  In that listing, I talked about planting some color in the form of Disneyland Roses that I received as a Christmas present from Nat's mom.  She ordered us three bareroot roses from Jackson and Perkins - which is where she had purchased our three previous floribunda roses.   These three arrived in a cardboard box with instructions to first re-hydrate the roots by soaking them in a bucket of water for anywhere from two hours to a full day.  I opted for what I'd call 'most' of a day.  I put them in the bucket one evening, then planted them the next afternoon in the bed. Below is a look at these as they are soaking in water to rehydrate. They came with these little metal tags: As they were soaking, I dug out the three holes.   And watered the holes in to get them wet.   Then I placed each of the bareroot roses in their hole - see below. And applied a little bit of Rooting Powder to the bases of each of t

Transplanted Boxwood From Front To Back - May 2023

Image
When we planted the new Triumph Elm tree last Fall , I had to relocate one of the original boxwoods that were planted in that bed.  As a temporary measure, I had the guys who planted the Elm dig up the boxwood and just put it further back in the bed.  If you look at the photos here and here , you can see the lone boxwood that was moved out from the front line to the back of the bed.   As part of the shaping-up of the front porch bed, it was time to move that boxwood out of there and find it a new home.  With it being mature and larger than anything I can buy at the store, I decided to plant it as a stand alone in the back beds vs....say...the IB2DWs area (where I want to plant boxwoods this year).   Here, below, is a photo showing the front porch bed.  On the right is the Triumph Elm that was planted last Fall.  On the left is the dug-up and moved Boxwood in question.    It is a big, heavy clump, so I dug it out and used my wheelbarrow to load it up for the backyard. I opted for a mid

Biosolids (MORE!) In The Front Bed And Lawn - March 2023

Image
Another day, another post showing some of the use of biosolids in the yard and garden.  This time....it was a couple of half-full trugs of the organic material in the front of the front porch bed and a little bit scattered in the lawn.    I last showed using it in the backyard .  But, I've put the bulk of biosolids down this late Winter/early Spring in the front.  Parkway and main lawn.  Bu, also in the front porch beds. Below are a couple of photos showing a bit of biosolids scattered in the front of the bed (first photo) and the two trugs that I used.   The reason for applying it to the bed was because I had a bunch of clay that I had dug up that was on the top of the soil.  When those clay clumps dried, I kicked them to break them up and then mixed in this organic material.  You can also see a little bit in the lawn, too. What is my plan for the next batch of biosolids?  I was thinking of running them straight-down my property line in front - to sort of....boost up that 'dom

Vertical Mulching With Leaf Litter And Biosolids: March 2023

Image
On Monday, I posted a series of photos showing how I had used my post-hole digger to excavate holes - getting into the clay layer below my topsoil - in our front porch bed.  I ended up with more than a dozen of them in various spots around the bed including up front.  My goal was to help improve the soil conditions, break up that bathtub effect and try to make the area a little bit more hospitable to plants and roots .   I called it 'vertical mulching' in Monday's post, but today is a little bit more about that process and how I filled the holes. I recently removed the chicken-wire rings around our Disneyland Roses to prepare them for Spring.  In each of those three rings was a heavy bed of mulched-up leaves that I collected last year.  Since Fall, there had been a tiny bit of decomposition, but A LOT of the leaves that I used to protect the roses were Oak leaves and those are VERY.SLOW to decompose.  So, I went over to the roses and filled up my trug with some leaf litter

Vertical Mulching With Biosolids To Improve Clay Soil Conditions - March 2023

Image
Over the past week or so, I've been working on - and posting about - the front yard beds.  Mostly, I've been working on - and thinking about the soil conditions.  Since we moved in - Summer of 2017 - I haven't had much luck at all up there.  That's six growing seasons (well...five full ones at least) and I've lost things, have had other things not grow so well and removed the biggest plant in this bed last Fall:  the large Norway Maple tree.   I started last week doing some vertical boring of holes using my post hole digger .  Both, to get a real look at the soil conditions, understand how deep the clay lies under the topsoil and to (maybe?) help improve the conditions by cutting through some of that bathtub effect that takes place in clay soils.  After I dug a hole about 12" around and 24-or-so-inches deep, I proceeded to fill it up with some leaves and a big helping of biosolids to top it off.  My thought is that this 'vertical mulching' will improve

Gladiator Alliums Emerge - First Season - March 2023

Image
Last Fall, I didn't plant as many Fall bulbs as I have planted in previous seasons.  But, I did plant some:  12 Gladiator Allium bulbs were added to the front porch bed.  Right in front of the existing boxwoods in the front porch bed .  In terms of layers, this means that we're looking at (from back to front currently):  porch, hydrangea, boxwood, mid-size allium bulbs. These get anywhere from 36" to 60" tall (depending on the info source).   I planted all twelve of these in mid-October.  And, just like some of the other Allium bulbs - including these Christophii which are showing early foliage emergence this year - these Gladiators are starting to peek through for the first time.   Looking back at this post showing where I planted the Gladiators , it appears that I dug six holes and tucked two bulbs in per hole.   Here are a few photos showing the tips peeking through the mulch this week (below):  Right now, I don't count twelve plants, but I *am* seeing that p

Amending Stump Grindings With Biosolids - March 2023

Image
Spring seems like the season of biosolids-application posts and today is no different.  Last week, I posted a series of photos showing my use of biosolids in the parkway.  And, then I talked about how I was going to use biosolids in a vertical-mulching application to try to help remedy by clay soil problem by our front porch.  In that post, I referenced how I added organic material to the stump grindings to help the Triumph Elm tree thrive.   As another step towards helping these stump grindings  breakdown, I threw five gallons of biosolids on top of them - right next to the new tree - where some tulips are coming up.  You can see that in the photo below.  I didn't work them in the ground, but, as I keep up with the 'vertical mulching', I'll likely add even more surface biosolids like this batch below. The combination of organic material (and nitrogen) are going to be critical to making this bed a desirable place for plants and shrubs in 2023.  At least....that's w

Front Porch Bed - A Look At Soil Conditions - March 2023

Image
The planting bed that is out front of our porch has been something that has been on my mind for years.  Specifically...the growing conditions.  Between a few things going on out there, I think it might be time (this year) to take an even more aggressive stance at improving the soil across this foundation planting bed.  Last year (2022), one of the items on my annual to-do list was to think about how we improve the conditions up there and I suppose that I did that (a little) and gave myself a partial grade of complete.   The way I was thinking about this problem was across a couple of fronts:  hydrophobic mulch and the root mat from the Norway Maple .   Starting last Spring, I went about trying to fix the hydrophobic mulch issue - including the addition of some nitrogen in the form of alfalfa cubes and raked it in .  Then, in the Fall, I attempted to do even more.  First...with the removal and grinding of the Norway Maple tree, I'm hoping that the root mat issue continues to recede

More Tulips in Front Yard - February 2023

Image
Just yesterday, I posted some photos of the first tulips that I was able to spot in our front yard beds (in between two driveways down by the sidewalk) and mentioned that I wasn't sure if there were going to be more up by the house.  We took down the large Norway Maple tree and replaced it with a Triumph Elm last Fall .  As part of that process, the crew ground out the stump and with it (I presume) a bunch of the bulbs that I planted around the base on the tree.   But, life finds a way.  See the photo below that shows the trunk of the Triumph Elm up on a bit of a berm.  But...at the very bottom of the photo - in the middle - you'll see some tulip bulb tips: And, so too, have the tulips down around our parkway tree emerged.  See below for a few photos:

Snowed-In Front Boxwoods - February 2023

Image
Posting this photo in the garden diary as 'something to watch' come Spring:  the boxwoods that we have planted out front are currently weighed down by some heavy snow.  I've cleaned them off in other years and one of them suffered some die back in an early year we were living here, but this year, I'm just going to leave them be.  I'll let this snow melt off and then we'll see if there is any serious splaying that occurred and any long-term damage to the shrub.   These Boxwoods have NOT thrived, but I'm fairly confident that their lack of really taking off is related to the Norway Maple that I took down last Fall.  With less shade and the root system not having to compete with the mat of Maple roots, I'm hoping they will hit the gas pedal this season.  This area is VERY MUCH my #1 priority for the year , so the outcome of these boxwoods will factor into what I decide to plant here and/or move around.  

Totem Pole Switch Grass Winter Interest - January 2023

Image
Planted in 2021, this will be the third growing season for a singular large-scale Switch Grass that is planted in our front porch bed: the Totem Pole Switch Grass .  I've been able to 'get to know' this grass a bit over the years and have discovered that it is late starte r - well after most grasses emerge for the year.  And that every year since planting, the grass has grown taller and taller .  On a recent warm(er) afternoon this past weekend, I wandered around the front beds to have a look at some plants and came across this grass.  And was struck by the seed heads.  And how it provides a really nice look in Winter.  See below for the current state of the Switch Grass: With the removal of the declining Norway Maple and the planting of the Triumph Elm, this front yard bed is one of my main/top priorities for 2023.  Do I leave this grass here?  Add more of them?  Time to make a plan. 

Triumph Elm Tree - Fall Buds - November 2022

Image
A couple of weeks ago, we had a 3.5" caliper Triumph Elm - Ulmus Morton Glossy - to our front porch beds.  At the time the tree arrived it has *some* leaves on it with some branches already bare having dropped their leaves.  Today - just two-or-so-weeks after planting, the tree has dropped ALL of its leaves and has a set of roundish, brown buds all over the limbs.  Below, is a look at the buds that have set on our new Triumph Elm tree: Over the years, I've documented in the [garden diary] a look at some of the tree buds in our yard - including these Exclamation London Planetree that I planted during the pandemic .  I'll go out and try to capture some photos of this year's tree buds in the Fall/Winter garden in the coming weeks.  

Dead Shrub: Doublefile Viburnum Treeform - November 2022

Image
I planted a treeform Doublefile Viburnum shrub out front of our front porch in a row where I lost a Vanilla Strawberry Hydrangea earlier this year .  I also planted a few of these out back.  But, this one - was probably out of place - but in a spot that was mixed sun/shade.  And, in the shadow of the troubled Norway Maple tree in our front porch beds.  I watered it in and watered all of the other things up there the same way.  But, this treeform Viburnum went into decline pretty quickly and is now - officially - dead.  I yanked it out recently.  See below for the tree/shrub and the rootball that I removed: I've long talked about how it is SO hard to grow stuff under that Norway Maple tree.  But with it gone, now?  I'm hopeful that I can turn this area around.  Starting with amending the soil with biosolids and composted manure .  And cultivating the soil in this bed to enrich it even more this Winter (is my plan).  I'm hopeful that the stump grinding of the old tree will f

Adding Composted Manure to Stump Grindings - October 2022

Image
This is the third in a series of posts related to the removal of our large, 70-year-old (but in decline) Norway Maple tree in our front yard.  First, I shared photos of the tree being removed .  Then yesterday, I showed photos and a video of the stump being ground out .  Today, I wanted to talk a little bit about what comes next.  After doing a little bit of digging on the Web about what to do after you grind a stump, I've come to the conclusion that I needed to think about both amending the soil with organic material AND....being deliberate about adding nitrogen.   The stump grinding left behind A LOT of small pieces of wood.  A mulch of sorts.  But, about two-feet-deep. I knew that we're going to plant a new three here, so I wanted to be proactive with the soil.  I also knew that I'm dealing with a LOT of hydrophobic mulch in this area, so anything I do here will likely help.  In fact...I'm pretty sure the act of grinding the stump - AND all the soil and mulch in th

Grinding the Stump Out - Norway Maple Tree - October 2022

Image
Earlier this week, I shared photos (and a video) of the removal of our large, 70-year-old Norway Maple that was situated right in front of our wrap-around front porch.  This tree was an important landscape feature for our home - we site'd the house back purely to SAVE this tree.  But, it had to go.  That removal and subsequent processing into rounds for splitting was phase one of the project.  Phase two is to remove the stump.  A few days after they removed the tree, the team came back with a giant machine to grind the stump.  The drove the machine up front the front and started to grind the stump down.  See below for a look at the start of the stump grinding: Here, below, is a close-up look at how the machine grinds down the stump into shredded wood.  The operator ground down the stump about 24" in total depth. Stump grinder removing a Norway Maple stump The whole process didn't take long - maybe 20 minutes of grinding.  Here, below, is a video showing how far and fast t

Norway Maple Tree Removal - Illinois - October 2022

Image
The day finally arrived.  A day that I have not been looking forward to in the life of our property.  That day is the day that our large, mature Norway Maple tree that was located just outside of our front porch came down.  This tree was a lovely tree.  Lived a good life.  We moved the location of our house foundation specifically so we could try to keep this tree.  But, it still needed to come down. I foretold the removal of this magnificent tree just last month when I posted about the continued decline of the tree .  In mid/late September, we had an early evening storm and lost another large limb.  Dare I say...a 'widow maker' came down.    It wasn't as if we didn't try to save this tree.  In fact, we surely didn't want to remove it.  But, it seemed liked it was necessary as the limbs kept falling and I began to become worried that it would fall on my house.  Or, my neighbor's house. Over the years, we've worked this tree.  Gave it a growth regulator in Se