Posts

Green Velvet Boxwoods - Under Espalier Linden Trees - One Year Later - May 2024
Image
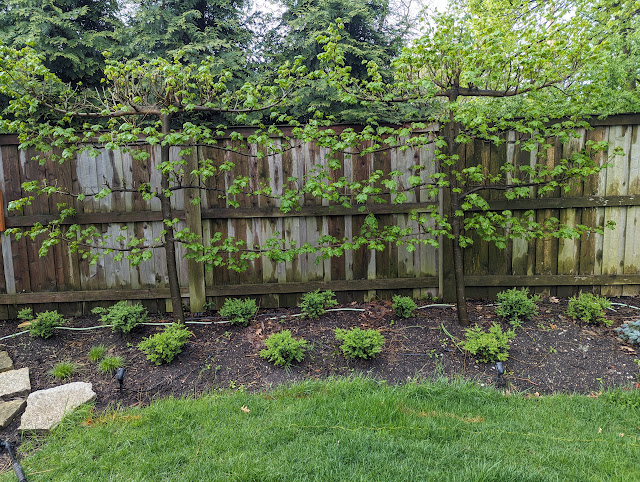
Last Summer, I added eleven Green Velvet Boxwoods (1# size) at the feet of the horizontal cordon espalier Green spire Linden trees in our backyard - up against the fence.  I bought them small, due to the cost of adding so many of them in one spot and they didn't take up much space.  You can see what they looked like last June in this post .  Spring is when my boxwoods put on growth, so I thought it was interesting to see how much they had grown in a little less than a year.  These were put in at the end of June - with a biosolids and topsoil mix - and I'm thinking put down roots all of 2023.  This Spring - 2024 - the tips of the shrubs have leapt up and out, adding light green tips to the (still) small evergreen shrubs.   Below is what they look like currently - in the middle of the Spring flush of new growth: There are seven in the back row and four in the front.  They may NOT look like much (on their own, in this photo), but here (below) is an animated gif showing the before
Nocturne Lilacs - Late Blooms - May 2024

Image
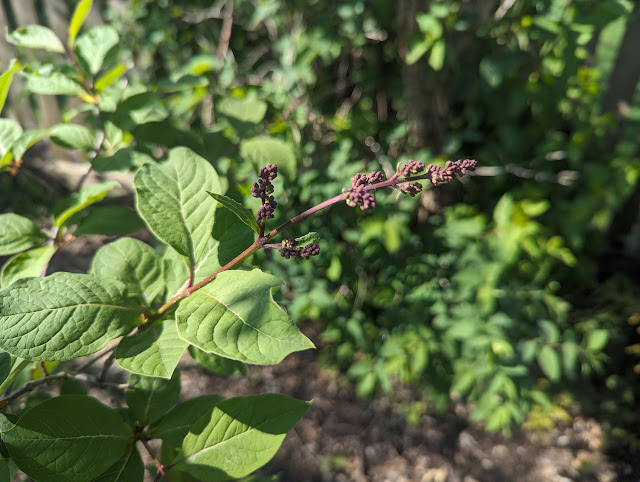
A couple weeks ago, I posted some photos of the (very few) Lilac blooms that we were seeing on our flowering shrubs this year and mentioned that while I had two varieties, one of them - the Nocturne Lilacs - had never bloomed.   Even after being transplanted to a more full-sun location.  So, imagine my delight when I was out in the garden and noticed these dark purple tightly-would flower buds on the tips of some of the Nocturne Lilac tips: These are a couple weeks behind all the other Lilacs in our neighborhood.  But...a quick poke around the Web reveals that the two-week delay is EXACTLY by design .   The late blooming lilacs bloom about two weeks later than the common lilacs and include the Preston hybrids. They are fragrant, robust plants that can be more tree like and resistant to powdery mildew. ‘Nocturne’ is a profuse bloomer with deep violet buds opening to a lilac-pink lightly scented flower. Extending the Lilac season - love that.    "Deep violet buds" reads right,

Garden Edit - Hosta Replacement Project and Stumpery Reset - May 2024

Image
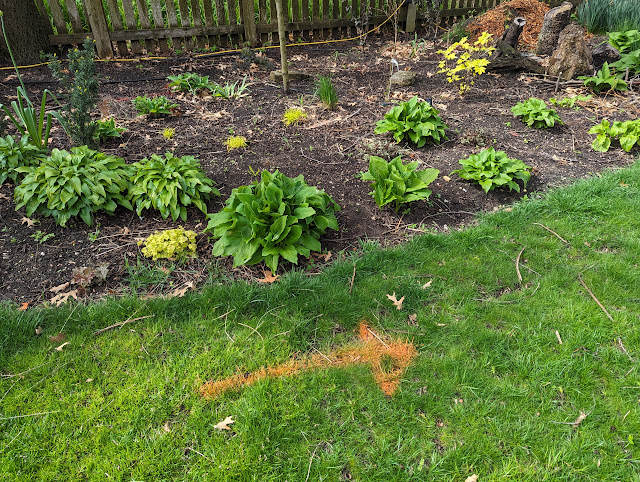
I'm racing the Cicada clock on a few projects;  the pizza oven foundation.  And...some of my proposed 2024 Garden Edits.  I wrote a post about a number of 'garden edits' that I want to make and started with the Hakonechloa Macra grasses (the green ones ) around the tree swing.  And, this past weekend, I made another large 'garden edit'.    My mantra for 2024 is 'editing' what I have - and that means a focus on planting in mass (larger quantities of the same varieties) that meet three criteria: 1. They work in our yard. Meaning...they thrive, not just survive. 2. Are appealing (to me). Foliage and Texture are key. 3. Have some four-season appeal. I don't want my garden to be 'empty' in Winter. This edit is on the southside.  And this bed - and in particular - the border/edge of the bed have been a hodge-podge.  Mostly hostas to fill-up space.  And, while I put up a few stumps in my new "stumpery" , I didn't plant anything in t

Angelina Sedum - Dividing in Spring - May 2024

Image
Last Fall, I discovered a quart-sized Ajuga - Burgundy Glow - that was planted in one of the kid's fairy garden was going REALLY well and I figured I could transplant it into the ground and extend it to being a perennial groundcover.  After all, I have had A LOT of luck with another Ajuga - Chocolate Chip.  So, I dug it out of the fairy garden and popped it into the bed right outside our screened porch door.   Fast-forward through the Winter and the Ajuga didn't make it.  But, the idea of groundcover over here makes a lot of sense.  But, I don't think Ajuga is right for this spot.  Just a little bit away is the drift of Angelina Sedum that is planted in either side of our back stoop.  I picked up my little shovel, stuck the blade in to make a little square and yanked out two of them - right in the middle of the existing colony of Angelina Sedum.  See below for the two spots I divided: The conditions of the bed outside the screened porch are identical to where the existing

Epimedium Flowers - Yellow Blooms - May 2024

Image
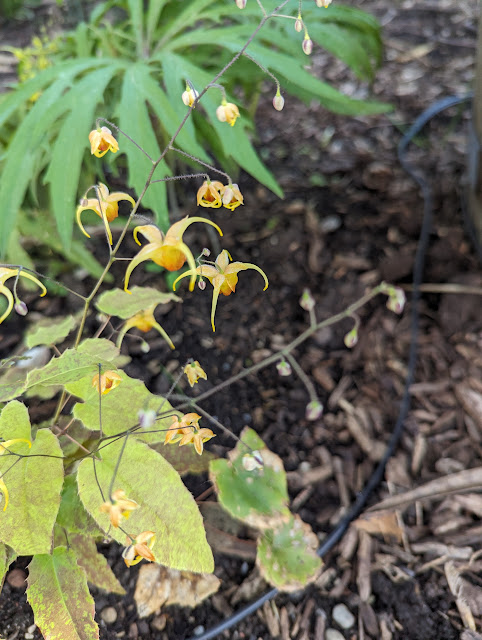
Both the Amber Queen and Spine Tingler Epimedium are in bloom this week.  Yellow, Jester-hat-shaped flowers on tall, needle-like stems, these are strongest blooms that we've had since this slow-growing cluster of groundcover went in the garden.  The Spine Tingler variety is just one-year-old (planted in 2023 ), so it is nice to see the blooms on those.  Below are both - first the Amber Queen, then below the Spine Tingler.  

Spraying Neem Oil on Roses and Magnolia Tree - May 2024

Image
Last growing season (2023), I started to use Neem Oil to treat some pests like Sawfly Larvae on my Disneyland Roses and Magnolia Scale on our Saucer Magnolia tree in the front yard.  I fell behind on the roses and saw the foliage turn into lace over the Summer.   That's when I started a dual-treatment approach with both Neem Oil sprayed on the leaves and stems and a systemic granular insect treatment.   This year, I'm going to try to stay ahead of things and despite not seeing any signs of Sawfly Larvae, I went ahead and sprayed the three original Disneyland Roses with Neem Oil.  The front yard Roses don't seem to have come back (sad), so I only sprayed the three on the side of the house.  I also sprayed the trunk and branches of the Saucer Magnolia.   Below is one of the Disneyland Roses after dousing the leaves in Neem Oil.  I have this hand-pump sprayer that I've (now) decided is my Neem Oil sprayer.  I'm going to mark it with a Sharpie, so I don't put any s

Pizza Oven Dimension Changes - Slab and Stand (Actuals) - Cinder Block Construction - May 2024

Image
This past weekend, I went out and began to assemble the frame for the concrete slab pour that will sit on top of the 4" or so layer of gravel for our backyard pizza oven.  I have posted about and pretty much considered my dimensions for this oven done.  The last time I shared the dimensions, I called them 'final, final'.  That was this post - where I included these as the final dimensions :   Slab: 78" wide, 86" deep. 6.5' wide, 7'2" deep). Stand: 72" wide, 80" deep (4.5 blocks wide, 5 blocks deep) Leaving reveal of 6" total both dimensions. 3" all ways. That's what I have now - for lumber.  78" wide slab x 86" deep slab.  But....after I assembled the forms, I decided to lay some of the concrete blocks inside the footprint to make sure I was accurate in my dimensions.  And, that's when it looked like this: I put down 4 blocks wide and 2.5 blocks (so far) deep.  Knowing that I spec'd a 3" reveal, my mind