Posts

Showing posts with the label lawn care

Synthethic Weed and Feed - Applied to Backyard - May 2021

Image
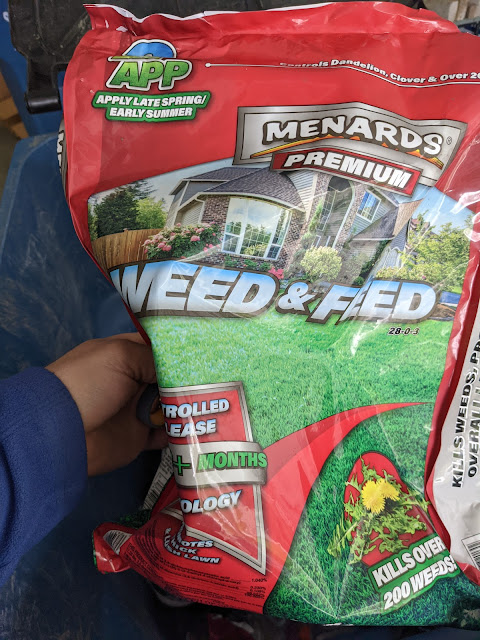
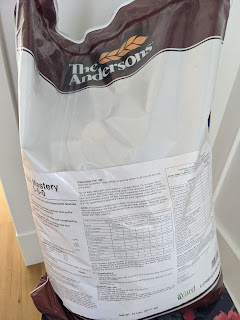
For the past few years, I've put nothing but organic/natural products down on the yard to control weeds, feed the turf and improve the soil.  But, this year, I skipped the application of a pre-emergent and I'm dealing with A LOT more weeds in the backyard than I normally have at this time of year.  I don't know if skipping the pre-emergent has to do with the weeds or if it is just a coincidence. But, I needed to take some action.  I bought a concentrate to spray the weeds and applied that a couple of weeks ago.  It worked - in spots - but wasn't enough.   So, I went with what I consider a drastic measure:  I bought a bag of Weed and Feed from Menards and threw it down in the backyard .  I looked around for a weed control ONLY granular product, but didn't see something that would work, so I decided to use this combination product.  Here's a look at the bag: Here's a closer look (below) at the makeup of the herbicide product including Dimethylamine Salt, Propi

Humic, Biochar, Sea Kelp and Lime - Lawn and Soil Treatments - April 2021

Image
Putting this in the lawn diary - I put down about 15# of The Andersons Soil Master 5-0-0 in the front yard this week.  And, I put down 3 40# bags of pelletized lawn lime in the backyard.  I bought The Anderson's Soil Mastery bag online - and it includes biochar, humic acid, iron, gypsum and sea kelp.  My plan is to spoon feed the front lawn with this - three applications...one per month - across the end or April, May, June.    Here's what it looks like in the spreader: I've applied Humic Acid in the past - early Summer 2019 - and pelletized gypsum before - but I've never applied these other things like biochar and sea kelp.  This is supposed to be an all-in-one product that I found online at Yard Mastery.  Here's their product listing : If you’ve been looking for a granular bio-stimulant for your poor soil, this is for you. It’s meant to be an add-on to your regular fertilizing regimen. It will condition your soil, add carbon and bio-stimulants, and improve the

They're Back - Wild Onion Removal - April 2021

Image
Everyone has a landscape enemy.  For some, it is Creeping Charlie or Clover.  For others, it is Garlic Mustard Weed.  For others, it is Wild Violets or Plantain Weeds.   Or Nutsedge.  Or Purslane.  I have ALL OF THOSE.  But, they're not my enemy.   I have one weed that bothers me more than any other.  Because it is both everywhere and nowhere.  And I have so much trouble removing.   It is the Wild Onion .   And I've been on a multi-year crusade to eradicate it from my yard.  Yet, I can't tell if I'm winning the battle.  Here - below - is the very latest of the scourge that I yanked out of the backyard. I have - so far - filled up a five gallon bucket of these Wild Onion bulbs and A LOT of soil that came out when I yank'ed them out.   I've been at this for (now) three seasons.  Started in 2019 when I started to pull them out .  Then, I went at it again last year with remova l. I've also tried to chemically alter the soil by applying Pelletized Lime over the

Weird Winter Pattern In Back Lawn

Image
 I was looking out our bedroom window and taking in the yard when I noticed this weird pattern of dark green spots that have emerged in our lawn this Winter.  Have a look at it below.  At first, I just assumed that it was a result of nature.  But, take a close look.  This is TOO MUCH of a pattern to be natural, right? Lizzie fertilizer?  Maybe. But, I don't think so.  We *did* get the guys at Davey to come out and feed our trees this Fall.  Could these be the sites of the fertilizer injections?  That seems like the most likely culprit, right?

Mulching Leaves Into The Lawn - Fall 2020

Image
By the time the middle of November comes around, I've been doing leaf clean-up in our yard for at least four weeks.  We get early drops (Walnut), constant drops (Catalpa, Maple, Kentucky Coffee Tree) and late drops (Oaks) and it lasts more than a month.  If I waited until they all came down, it would be a huge mess.  Not that it isn't a good idea.  It just isn't how I address the situation.  When I started this year, I spent time using the mower and bagged up all the leaves as they dropped - by mowing about once per week.  I filled our compost bins pretty quickly.   But, with our bins filled, what do I do with leaves still on the grass?  I decided to try something new this year:  I just mulched them in the lawn.   You can see it below - this is mostly a lot of oak leaves (which are hard to break down) that have been mulched up and left behind.   I don't love this look, but I wanted to try it.  Here - below - is a close-up look of the mulched in leaves.   And here's

Orbit Gear Drive h20-6 Spike Lawn Sprinkler - New Gear

Image
I've thought about an in-ground irrigation system for the past few seasons and went so far as to get a quote from the guy that Chris at Green Grass recommended ( Phil's Irrigation ).  We have been talking about a zoned system that covers our grass, our perennial beds and even some of the containers on the front porch and back patio.   But, in the mean time, I've been both hand-watering, soaker hoses and using various sprinklers to try to keep things alive.  In the front , that's been - exclusively - via an impact sprinkler on a spike.  And, it has worked pretty well.  But, we're on the third season of the impact sprinkler and between using it a lot and the wear/tear that comes with it being on the end of a retractable hose , it started to have a bunch of leaks and the pressure wasn't strong enough to have it complete a full evolution.   In the back, I've used that same impact sprinkler and a multi-pattern stationary sprinkler.  That one was, to

Early July Milorganite Spoon-Feeding - July 2020

Image
The hot, hot heat has hit the Chicago Suburbs.  We've had 90-degree temperatures for the past few weeks and it has NOT been a good environment for anything living outside - including our grass.  Lawns in our neighborhood are struggling.  Even ones with built-in irrigation.  Ours is no different.  I've been cutting it VERY LONG (setting #5 on the mower - all the way up) and watering it as frequently as I can - typically in the very early morning.  Here's how it is looking right before I feed it the usual "4th of July" application: It is green, thick and lush - which I'm happy with for the most part.  I'm almost 100% certain that the reason for the partial success this season is due to the tall cutting height.  I have other parts - like in the back where the Automower cuts - that are cut shorter that aren't as healthy and other parts where the grass appears to have gone dormant.  As for the timing of this post and the lawn schedule, I'm j

2020 - First Mow

Image
I broke out the mower and hit the (entire) front yard including the parkway and *just* the high spots (thanks, Lizzie) in the back yesterday with my first mow of the season.  I mulched it, but with all the little debris on the lawn, the next time, I might bag it to see what I can get up before the grass grows too quickly this Spring. So far, I'm seeing some good green-up and what appears to be a healthy lawn.  The biosolids on the parkway haven't worked their magic just yet, so it remains to be seen if I can replicate the success we had with the test patch .  My goal for the coming week(s) is to get the Automower boundary wire reset and get it going on the backyard with the new configuration.

Topdressing With Biosolids On Parkway - April 2020

Image
Based on the results of the test patch in our backyard where I applied 5 gallons of biosolids to our turf, I've decided to move ahead with the application in front.  I'm starting with our parkway.  #9 on my 2020 to do list was to continue to work the turf in front and, in particular, improve the condition of the parkway grass to match the main lawn.  Topdressing with these biosolids is step 1 in that process.  Prior to the application, I used my new thatch rake and removed as much thatch as I could get up.  Last Fall, I also did some limited core aeration on this section, so I'm hoping that I've set it up for success this growing season.  Down near the curb the area has been compacted a bit, so I might be looking at amending that soil a couple of times as the grass grows and can retain the organic material.  Of note, I think this time of year (early Spring) is a good time to deal with biosolids on smell alone.  There isn't a ton of time spent out in the yard

Lawn Lime - Application #1 - Spring 2020

Image
Our Home Depot is doing curbside pickup with online orders, so I put through an order for some lawn care products including pelletized lawn lime and (wait for it....) ten bags of Milorganite.  Yeah...it seems like they've figured out their supply chain issues this year?  Our local Home Depot is showing over 600 bags in inventory right now.  Based on my 2020 plan , I need 18 bags for the season, so perhaps I should buy the balance and store them (hoard them) for a few months.  Also, based on the 2020 lawn plan , I outlined a 4 bag application of lawn lime to the back in Mid-April.  You can't get any *more* Mid-April than April 15th, right?  That's a bag of the stuff from Home Depot (curbside FTW.) in the Chapin spreader that I was sent last Fall.  Mark it down.  Lawn lime applied.    #5 on the 2020 to-do list was to continue to wage battle against the Wild Onions .  This lawn lime is *supposed* to help do just that.    I'm going to go at the lawn with a small spad

Biosolids On The Lawn - Three Weeks In

Image
Well, well, well...now we're talking.  Have a look at that test plot above where you can see the impact of the biosolids that I topdressed in this section of our backyard lawn.  A week ago, I shared a photo that was two weeks in and the turf had already started to react positively .  Today, you can see the dark, thick grass in the rectangle that had the biosolids applied. Here's the timeline: Application of 5 gallons of biosolids . Two weeks in . Three weeks in.  (this photo/post). I don't know how I could classify this experiment as anything other than a spectacular success. I can see a process of top-dressing larger sections of our yard, but that's not a small project if I get it delivered - as it requires three yards minimum.  I could, however, see taking a series of five gallon buckets over to fill up and use on the parkway to try to thicken that area.

Biosolids Turf Test - Two Weeks In

Image
A couple of weeks ago, I spread 5 gallons of biosolids on a rectangle of turf in our backyard.  Here's that post .  Today if you look out there, the grass is, ummm, different.  It is different than any of the reset of the grass in our yard.  It is deeper green and has taller growth than any other section of grass in our entire backyard.  If you look at the photo at the top, you can see the arker area that runs from top to bottom, right?  A couple of weeks in and you can still see the material that is in large chunks, but some of it has made its way into the thatch.  I was out there on a day that it had rained and it seemed that the original smell from the biosolids was invigorated a bit. That's a downside of topdressing with biosolids.  But, the upside?  It is visible in this photo - clear as day.  With that smell and our kids being heavy users of our yard during the Spring and Summer, I'm wondering if Fall is the best time to consider topdressing with biosolids.  It

Today Is The Day: Pre-Emergent Application (Thanks GDDTracker)

Image
In March, I shared the bag of Halts (no lawn food) that I had secured before Amazon started to slow down their shipping during the pandemic and referenced the Michigan State University Growing Degree Days tracker .  Welp...today is the day:  we're right in the middle of the "Optimum" range so it is time to put down that pre-emergent.  You can see where April 2nd lines up in the screenshot above. My bag of grassy weed pre-emergent that I have from Scott's covers just 5k square feet.  I have about 15K square feet of turf, so this covers just part of my lawn - and I've been focused on the very far back 5k square feet.  That's where I applied this year's batch .  I'm trying to set a reminder for myself that I should throw down another round of this stuff in the Fall to take on the Poa that I think is taking over parts of my lawn.  I went back to my ratty Scott's Edgeguard spreader for this job of what reminds me of cracked corn: I'll be

A Biosolids Test - Backyard Turf Site - March 2020

Image
That right there is a five gallon bucket of biosolids.  Yeah...biosolids.  Courtesy of the Downers Grove Sanitary District.  They have what they call a " Biosolids Distribution Program " that residents have a few ways of engaging with in terms of receiving the, ummm, biosolids. First...you might be wondering:  what the heck are biosolids?  According to the DGSD : Biosolids, a byproduct of the process of wastewater purification at the Wastewater Treatment Center, is highly recommended for use in flower beds, lawns, shrubs, hedges, and other landscaping. The biosolids are stockpiled for one to two years and then pulverized to provide a product that is easily incorporated into the soil.  The high organic content of biosolids enhances soil work-ability and water retention capacity. The substantial nutrient content will help supply plant needs for nitrogen, phosphorus and potassium. The lawn fertilizer that I've been using called Milorganite is a biosolid.  But....if

My Lawn Enemy Is Back: Wild Onions 2020

Image
I was out in the far back of our yard yesterday and I saw some brand new, bright green growth.  I knew immediately what I was looking at:  the first instance of Wild Onions for the year.  I know it won't be the last.  If you've followed along, you know that Wild Onions in my yard are public enemy #1.  They've achieved that status due to their prolific nature (they are EVERYWHERE), the fact that I can combat them in early Spring when there isn't much else going on in the yard and they are a DIY project that doesn't involve herbicides (you have to dig them out). I've chronicled my Wild Onion journey here on the blog starting with last Spring when I started to dig the clumps of Wild Onion bulbs out of the turf everywhere I could .  Once their season passed, I tried my best to make the soil less hospitable for them by applying Lime a few times.  I posted about them earlier this year when I saw this story about a potential spray (Bonide Burnout) that might wo

Using Crabgrass Preventer - Without Food (Year 2)

Image
Nat added this bag that you see at the top of this post to one of her recent orders from Amazon.  It is a bag of Scott's Crabgrass and Grassy Weed Preventer under the "Halts" product name.  It does NOT have lawn food in it - which is fairly uncommon in most crabgrass preventers. You can find this stuff here at Amazon (this is NOT an affiliate link.  I don't do that...) for $16.99. I used this same product last year - and sought it out because of the fact that it doesn't have lawn food in the mix.  Last year, I held off on feeding my lawn until Memorial Day and I'm thinking that I'm going to do the same. I laid out my full 2020 lawn care plan here in this post from February .  In that post , you'll note that I'm calling for an application of this pre-emergent in "April" versus "mid-April".  And that's because that I'm going to turn to - once again - Michigan State University and their "Growing Degree Days&q

Winter Lawn Domination Line And Potential Bed Extension - February 2020

Image
I posted (in jest) last September a look at what Allyn Hane calls the 'domination line' in our front yard showing the fruit of the efforts of tending to the turf look like after most of a season.  Back in September, you can tell that the grass that I had fed over the season appeared darker.  Today, I'm posting a photo that I took recently to add to the [ garden diary ] of what our front yard grass/turf looks like after a rough Winter.  I'm including the 'domination line' as a way to see the difference in my grass over time.  The photo above is shot from the sidewalk toward the house with my yard on the right side.  The brown-est part in the middle of the photo (closer to the bed) is also the 'highest spot' in that area.  So, I'm not certain that it has to do simply with feeding or if the contours or grade of the yard is involved, too.  I have a gutter that comes out in the area of the bed near the house that runs each time it rains and the I

Lawn Care 2020 Calendar + 2019 Lookback

Image
The post I created about Wild Onion removal a few days ago made me realize that I have to get my thoughts together on a 2020 lawn care plan.  In order to do that, I thought it would be valuable (for me) to collect what I did last year so I can determine what I want to do this year. For reference, I have a cool season lawn made up of Kentucky Bluegrass.  I cut the front long  all season and the back is done shorter with my Husqvarna Automower . If last year was my *first* year of digging in and working the turf on my own, this year, I'm going to try to learn from my mistakes ( burning with fertilizer ) and successes (not pushing the lawn too much with food) and continue on my path towards 100% non-synthetic applications.  Because of the Creeping Charlie, I'm not certain that I'm going to get there this year, but we'll see. 2019 Lawn applications/treatments by Season Spring: April:  Bought as much Milorganite as I could find:  8 bags .  32# bags. April:  Bega

Preparing For My Spring Battle: Wild Onions

Image
Is it too early to be thinking about Spring lawn care and turf treatments?  I don't think so.  I need to put together my full annual timetable for the lawn.  But, before I do that, I wanted to post that establishes my main Spring lawn enemy. Mid-April is one of the first milestones - at least based on last year's temperature:  that's when I put down pre-emergent on the lawn - mostly focused on crabgrass and other broadleaf/grass leaf weeds .  Last year, that was followed by a large-scale attack on something that we have present ALL OVER our backyard:  wild onions .  In late April, I documented how I was going around and attempting to dig out the full clumps of bulbs .  My turf was pockmarked with holes from the extraction all Summer.  Come September, I used the soil temperatures to my favor and threw down some seed and soil in these holes and it germinated pretty fast .  I seem to have managed the crabgrass piece of turf care and I'll likely follow the same setup

Lawn Equipment: Groundskeeper II Thatch Rake

Image
Over the years, I've done a few [Christmas Haul] posts that show off some of the things that people have gifted me for the yard and garage and shop.  This year, my first "haul" post (despite not being labeled that in the title) was this heated bird bath post from my mother-in-law.  Today, is another gift, but from my Sister-in-Law:  this rake called " The Groundskeeper II ". I came across it on someone in the lawn care community YouTube channel (wish I could remember who it was?  But, just search [Groundskeeper II rake] on YT and you'll find plenty of review posts). What is it? It is a rake.  Yep.  A rake.  But, it is a thatch rake.  And it is unique in design.  Here (below) is the rake laying in the ground in our yard.  You can see that I pulled up a little dead grass in the photo, too.   The Groundskeeper II has a couple of stickers on the handle that talk up the value prop of the tool: 1.  Easy on your back.  2.  Self-cleaning