Posts

Brick Exterior Exploration - Pizza Oven Build - June 2024

Image
My brain is already moving ahead to the exterior of the pizza oven.  I don't know if I'll get to cladding the outside of the oven, but I'd like to try this year.  You can go a lot of directions, but the one that I've focused on/been drawn-to is brick.  I've talked about brick and used a TikTok as potential inspiration for a brick pattern . That means that I've been poking around Facebook marketplace and Craigslist to figure out what kind of brick is available.  Every listing quotes the number of bricks available, but I had no idea how many bricks I actually need to clad the full oven.   In terms of oven facade inspiration, I'm very much looking to this oven build on YouTube as inspiration .  That oven is from the YouTube channel named:  The log cabin life style by Jerry Tyson .  This screenshot below is from his oven-build video ( source ) and I'm eye-balling the height of his corners to be five-feet-tall.   I know my stand is 70 inches deep by 62.5 in

Sedum kamtschaticum 'Variegatum' - Yellow Blooms - June 2024

Image
Last Fall, I planted a pair of variegated sedums -  Sedum kamtschaticum 'Variegatum' down by the sidewalk as a drought-tolerant groundcover .  They managed the conditions of the Winter and emerged this Spring.  I posted about them in March when very little else was growing in our garden .  They had been eaten a bit by the (dang!) rabbits, but otherwise were in good shape.  Today - in early June - they're putting on some yellow blooms.  One of them (the one on the right) is a bigger clump, but they're BOTH beginning to flower.  See below for a few photos.  Just above them are the recently-planted Dusty Miller annuals (that are being invaded by some turfgrass that didn't get properly smothered.   It looks like I didn't post about those (yet), so I need to get them into the [garden diary]. They're likely candidates to divide in a few years - once they've spread out a bit.  

Getting to Know Acer pseudosieboldianum 'Northern Glow' - Korean Maple - June 2024

Image
Over the years, I've come across Korean Maples that are hybrids with Japanese Maples.  Famously, the folks at Iseli Nursery have introduced a collection of "Jack Frost Maples" that are hybrids of Acer palmatums and Acer pseudosieboldaianum - Japanese and Korean Maples - that have been 'evaluated and selected to tolerate the dramatic weather shifts of the upper Midwest of North America.' The upper midwest?  That's us.   So, when I was at The Growing Place and came across an affordable ($174.00) Northern Glow Korean Maple, I figured it was time to come home and go into our garden.  Below is the sign from TGP that calls it a cold-hardy tree that mostly resembles the Japanese Maple parent. And, here below, is a look at the tree that is currently stashed in the island bed by our driveway.   What do people say about the Northern Glow Maple?  iTrees has this listing : Northern Glow® Maple combines the character of a Japanese Maple and the cold hardiness of a Korean

Drystacking Pizza Oven Stand And Filling Cores - June 2024

Image
Last week, my pizza oven build update included how I had purchased a 10" wetsaw and mortared in the first course of the cinder block stand .  On top of that first course of block sits the rest of the stand, but I opted to simply dry-stack them in place.  The height of the oven floor is one of the biggest build considerations and I'm aiming for between 44 and 46 inches in height.  Based on some tests, that's where I'm comfortable and want to aim to hit when I build the stand, add the insulation and place the floor.   The floor is made of medium-duty firebricks that are 2.5" thick.  Set on a thin base of high heat mortar and/or sand.  Call it 1/4".  4" of insulation below that puts me at 6.75" of height.  The hearth has a little bit of flexibility in it - thickness-wise.  But, call it about 4 to 5 inches thick.  That means, I needed to do a little math to figure out how many courses I needed to build.   46 inches minus 6.75 inches = 39.25".  Sub

Feeding Disneyland Roses + First Flush of Blooms - May 2024

Image
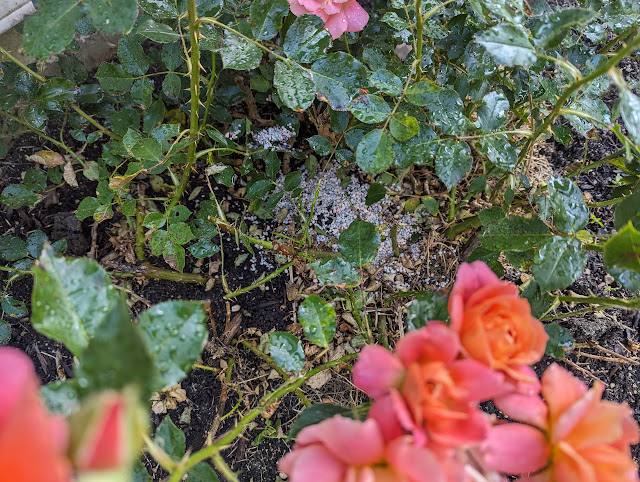
This is the second granular feeding of the season for our Disneyland Roses that I've been trying to put down right around the first of the month - so this one is a day early.  See below for a few photos - showing the fertilizer application as well as the state of the three remaining rose bushes with blooms.  The one closest to the fence is having some trouble, so I've been spraying them every week with a Neem Oil brew to help kill whatever pests and/or fungus that is taking over. 

DIY Pizza Oven Build - 10" Wet Saw - Tools Needed - May 2024

Image
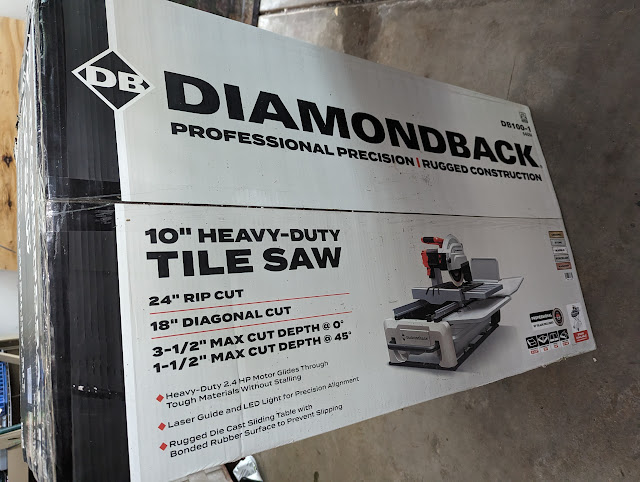
So far in my diy backyard wood-fired pizza oven build, all that I've talked about/posted about is what I'll call infrastructure.  That's the foundation slab (reinforced), the block stand (cores filled) and the suspended hearth (reinforced).  But, once all that is out of the way, it quickly becomes a brick-cutting exercise.  Medium-duty firebricks are 2.5" thick, 4.5" wide and 9" long.  They're beefy.   Each of those bricks require 4 (or so) cuts to make them useable in the dome.  In order to cut those big firebricks, one needs a saw that is both ready to cut brick (wet saw) and has a big throat (cut depth), so you don't have to cut one-side, then flip, and cut the other. After bouncing around Facebook Marketplace and Craigslist for months, I decided to take the plunge with a new saw from Harbor Freight.  Between their Memorial Day sale, another discount (membership) and a gift card that I was given for my birthday earlier this year, the new 10" D

Couple of Wood-Fired Pizza Oven Hearth Construction Tips Via YouTube - May 2024

Image
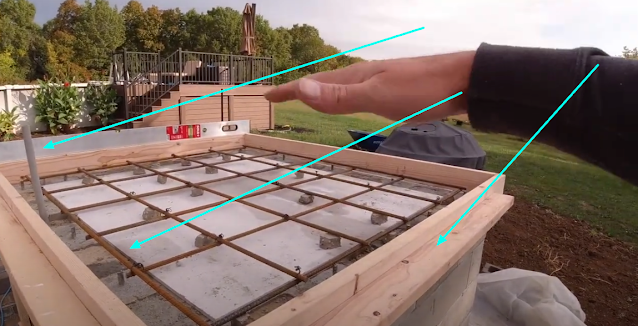
Last week, I posted my latest update on our backyard pizza oven build where I mortared in the first course of the cinderblock stand .  I'm on my way this week to swap out some of the blocks and to pick up the rest of the angle iron so I can drystack the rest of the stand.  At risk of getting things out of order, I'm going to talk a little bit about the suspended hearth.  That hearth sits ON TOP of the stand.  It is reinforced concrete that is framed up with a 2x6.  That means - at the VERY MOST, the hearth is 5.5" thick.  But, because you overlap the forms with the block stand, you lose about an inch - so it becomes something like 4.5" thick.   I'm thinking about the hearth and the materials required as I run to the hardware store and I found a bunch tips that I'm going to use in my hearth build via the  Blood Sweat and Beers YouTube channel  -  this video where he walks through his reinforced hearth forms and setup .   I thought it was worth documenting here