Drystacking Pizza Oven Stand And Filling Cores - June 2024
Last week, my pizza oven build update included how I had purchased a 10" wetsaw and mortared in the first course of the cinder block stand. On top of that first course of block sits the rest of the stand, but I opted to simply dry-stack them in place. The height of the oven floor is one of the biggest build considerations and I'm aiming for between 44 and 46 inches in height. Based on some tests, that's where I'm comfortable and want to aim to hit when I build the stand, add the insulation and place the floor.
The floor is made of medium-duty firebricks that are 2.5" thick. Set on a thin base of high heat mortar and/or sand. Call it 1/4". 4" of insulation below that puts me at 6.75" of height. The hearth has a little bit of flexibility in it - thickness-wise. But, call it about 4 to 5 inches thick. That means, I needed to do a little math to figure out how many courses I needed to build.
46 inches minus 6.75 inches = 39.25". Subtract the 4-5-inches and we get a target stand height of: 34.25 to 35.25 inches tall.
Cinder blocks are billed as being 8x8x16, but like dimensional lumber, they're a bit smaller than that. The actual dimensions of 8x8x16 concrete blocks are 7 5/8ths x 7 5/8ths x 15 5/18ths. Seven-and-five-eights x 4 courses = 30.5 inches. Because I mortared in the first course, I picked up a little bit of height there - right around 3/8ths of an inch - so I'm NOT 4" short, I'm something like 3 and 5/8ths below my target height.
If full 8x8x16 cinder blocks are 7 and 5/8ths, I figured that half-height blocks were what I needed.
They're special order at Menards, so I placed an order for 15 of them and they arrived a week later. The half-height blocks are billed at 8 inches deep, 4 inches tall and 16 inches long. But, like full blocks, the actual dimensions are a bit smaller. The height is actually 3 and 5/8ths. 3.625" tall.
Add that 3.625" to the four-courses of 30.5" and we get: 34 and 7/8ths inches. Almost 35 inches tall. Right in the middle of my 34.25" and 35.25" target stand height.
I laid out the blocks that I had on hand and that's when I realized that a pallet of cinder blocks comes with two different kind of blocks: stretcher blocks and pillar blocks. Stretcher blocks are NOT square on the ends, rather they have those little 'nubs' on both ends. And Pillar blocks that ARE square on all four-sides.
When I had my ordered delivered, there was no way to specify how may of *each* that I needed. They just gave me a mixed pallet. I wanted to have ONLY pillar blocks exposed to the edges, so I needed to return a couple of stretcher blocks and replace them with pillar blocks - when I was working with the 8x8x16 ones. The special order half-height blocks? I had to deal with what I was given. Turns out, I was a few pillar blocks short.
I also planned to use bond beam blocks for the top row to help strengthen the top layer.
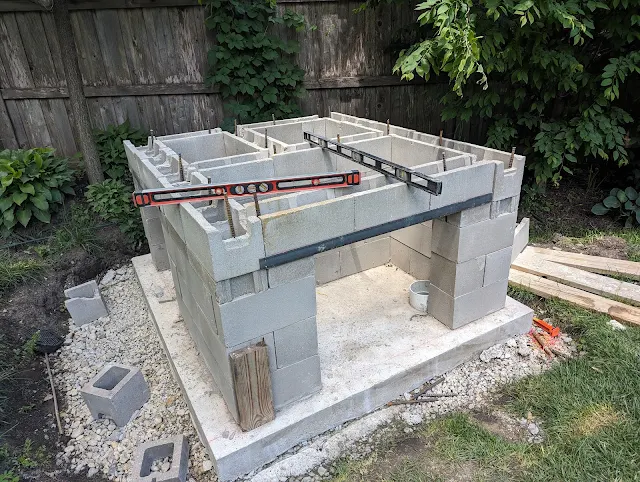
Below are some photos showing the process of drystacking the blocks and then filling some of the cores with concrete and rebar.
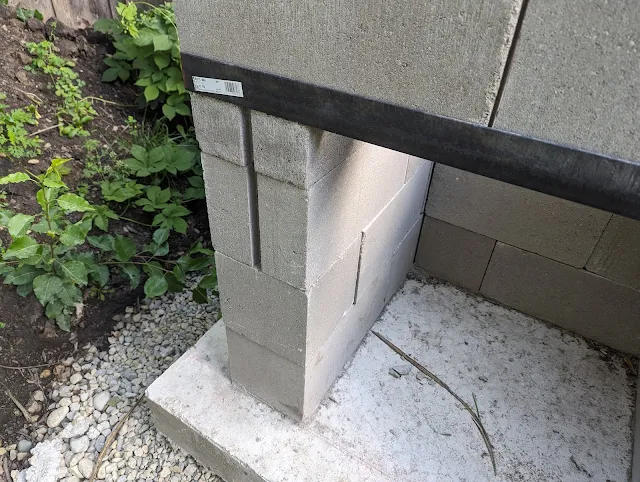
First shows the drystacking up three full-block courses and adding the half-height blocks. I needed a couple of half-width, half-height blocks, so I took out my angle grinder and cut some in half.
I then cut up some 1/2" rebar and stuck it in the cores that I planned on filling. The instructions suggest every-other one, but because of how the wall was stacked, I doubled-up in a few spots like the front-two cores and where the middle-wall intersects in the back. I cut the rebar to be about 3" or so taller than the height of the top of the blocks.
Keeping the stand level and square is important - but I'm finding out - NOT critical. Yes...I want the stand level and plumb. But, I can pick up the level in the slab. Similarly...I can pick up a little bit of level with the insulation layer. And, so on. Still....I worked had to make this thing level and square.
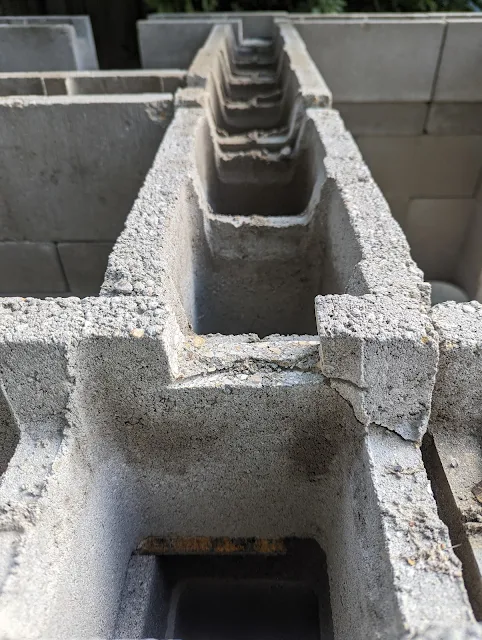
Due to the orientation of the walls - including that interior "T-shaped wall", I had to use my angle grinder to cut out some additional cavities to allow for the 'flow-through' of rebar across the entire rim. Below is a look at some of the cuts that I made with the blocks.
Once I was satisfied with the layout, I began to fill the cores. Using fast-setting post concrete (that doesn't need to be mixed before pouring), I began to fill cores and center the rebar. I ended up filling 16 cores with concrete and stuffed the bags down the non-filled ones to take up some space. My plan is to fill the remaining cores with sand. My math says that I need about eleven 40# bags of sand to fill the empty cores (one bag per core).
What comes next? Bending, cutting and fitting rebar into the bond-beam blocks. Then, cutting some board to sit on top of the openings (that I'll leave in place) along with supports for below that board and openings. My plan is to cut those supports a bit short and shim them into place so I can knock them out when the hearth is cured. On top of those boards will go 1/2" rebar set at 11" or so square - in both directions.


Comments
Post a Comment
Be nice to each other here.