Installing the Gartenkraft 100 Foot Retractable Garden Hose Reel
Inside of our garage, we had a hose bib installed during construction that I intended to use to water inside the garage, on the driveway and out front of the house. But, when we actually started to use the hose in this area, it quickly became apparent that we had to be thoughtful in terms of where/how we stored the hose. At first, I considered something like the (highly regarded) Eley hose reel with a traditional hose. I came across it from Laura on Garden Answer in this video. But, in thinking about how much the kids are involved in the hose (watering the flowers, playing with the water, etc), it seemed like if I wanted the hose to end up wound up each and everytime, I was going to have to find a self-retracting hose reel. GeekbeatTV ran a review of a retractable hose reel from Flowmaster that seemed right for us. Our Home Depot sells the same Flowmaster reel but under the Gartenkraft name.
And after it came home with us, it sat in the garage for a month. Then I figured it was time to install it. The mounting bracket required four lag bolts driven directly into the wall. For some, completely terrible reason, the four holes are spaced like 4" apart side-to-side. That means that if you're trying to put this thing into a stud, you can only get two screws in with the other two hanging out there.
This whole thing pivots off of that mounting bracket and can swivel so it is flush against the wall. And, with 100' of hose being literally yanked from the reel every time we use this thing, it means that getting this thing to bear properly on the wall is critical.
Having two lag bolts in a stud and two in drywall wasn't going to work (at least, I didn't think) so, I had to come with another way.
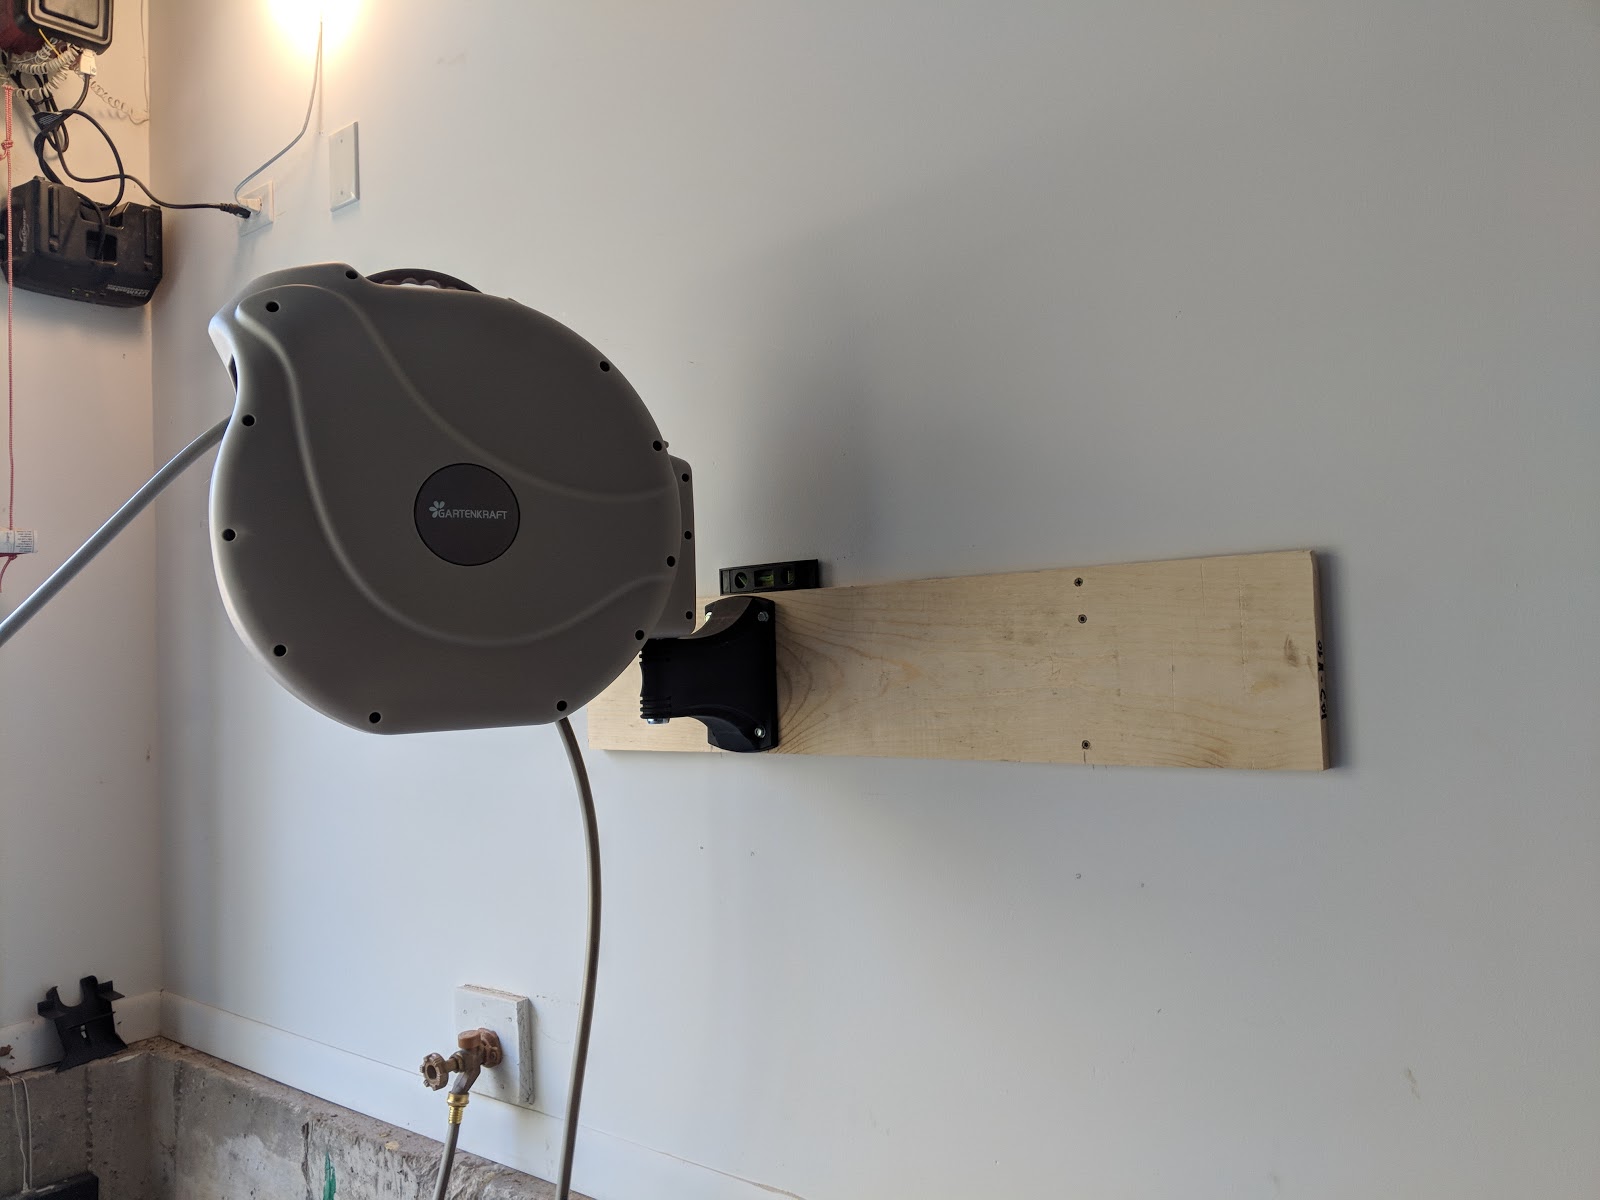
You can see from the photo above, my solution was to involve a piece of wood (1x6) mounted to the wall as a sort of 'ledger board'. I found a couple of stud locations and marked them. Then, I figured where I was going to mount the actual bracket. Marked that location on the wall along with the four lag bolt holes. I pre-drilled the two going into the stud with a tiny drill bit (forget the size) and then with a larger bit, bore two more holes in the drywall that would accept some heavy-duty wall anchors.
Then, I took to 3.5" deck screws and sunk them so they were just sticking out the back of the ledge board in the two holes that were going to go into the wall anchors. Using that to 'set' the ledger, along with a level laying on top of the board (You can see the little level in the photo above), I placed the ledger along a line. Those two deck screws sticking out made sure that I *knew* where the wall anchors were. I sunk a series of 3.5" deck screws into the studs - which were 16" on center in multiple places. This secured the ledger to wall with 2.25" of decking screws into the studs. (.5" of ledger, .75" of sheetrock)
Now that the ledger was secured to the wall, I upgraded the lag bolts to accommodate the .5" of ledger board and sunk the two lags into the stud and the other two into the wall anchors. The ledger gave me .5" of bearing and then the anchors give me another 2.25" of bearing inside the anchor, which I know - by itself - wouldn't have been enough. With the .5" of ledger, I figure most of the initial pressure will be bore at that point before having to rely on the anchor.
It has been a few weeks with the reel up and so far, it seems like things are rock solid. But it also appears to me that we might need to install a splitter on this faucet and install a second reel so we can be doing different/other things. In particular, this GartenKraft reel features a 1/2" hose, so the capacity through the end isn't enough to power a sprinkler head to cover our entire yard side-to-side, which based on using the 5/8" typical hose, we get full coverage. Maybe I'll end up with the Eley hose reel after all?!?!


Comments
Post a Comment
Be nice to each other here.